2.0.3 | 10/1/2023
Step 1 - Add Component | Step 2 - Add Merge Button
Let’s Get Ready To Mambo!
You’ve installed the app and are ready to take the next steps to generate professional digital documents right out of Salesforce. Let us show you the way.
Step 1 - Adding A Component ↵
In order to get access to configure Mambo Merge we simply need to add a component to a lightning page. This can be achieved by heading over to an object page and editing its page layout.
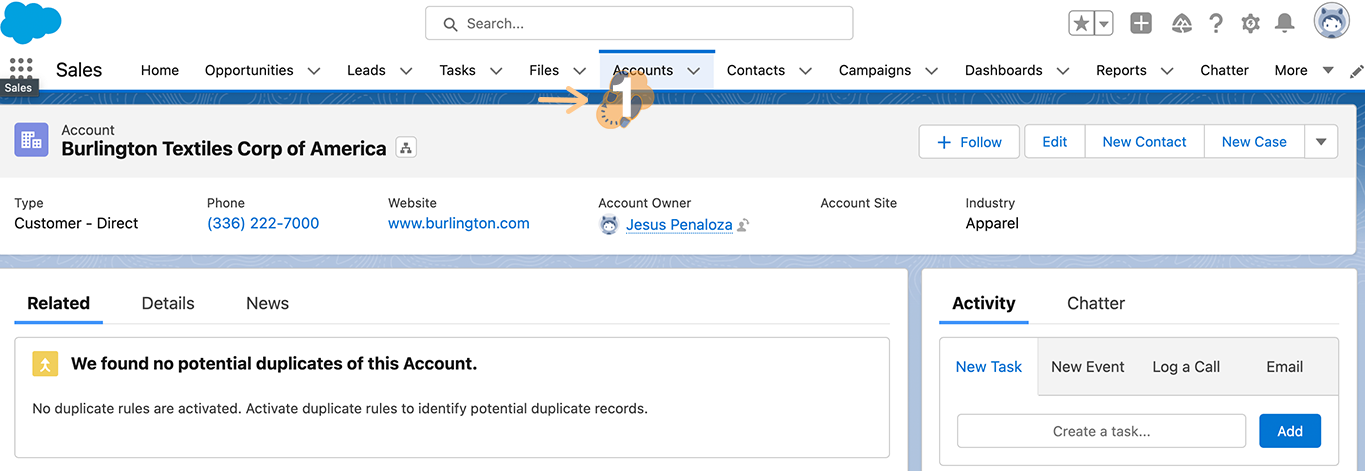
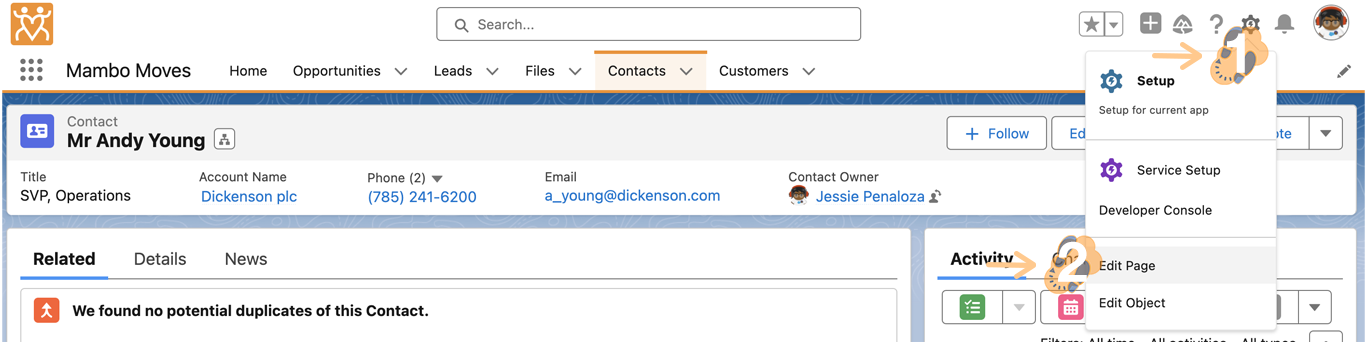
1.1 - Start by navigating to an object record page where you plan to use Mambo Merge.
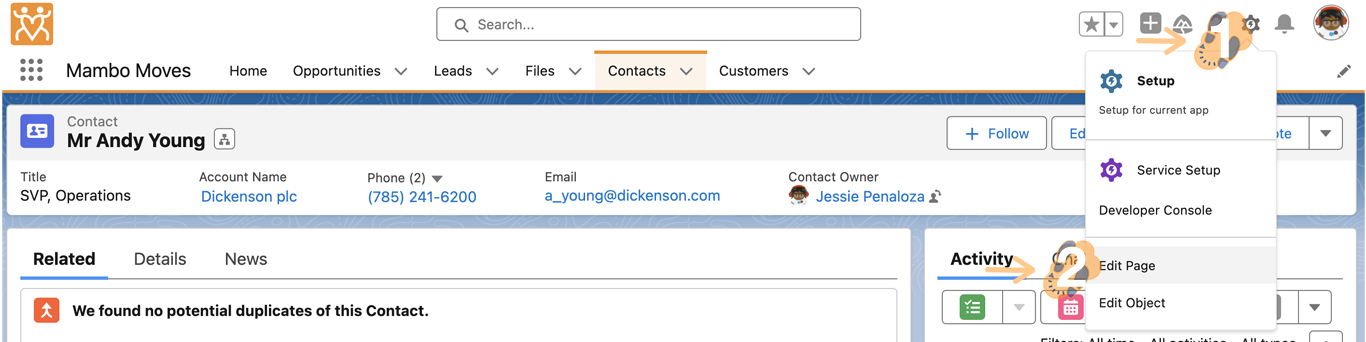
1.2 Click on the “Gear” icon located in the top right-hand corner and select “Edit Page”.
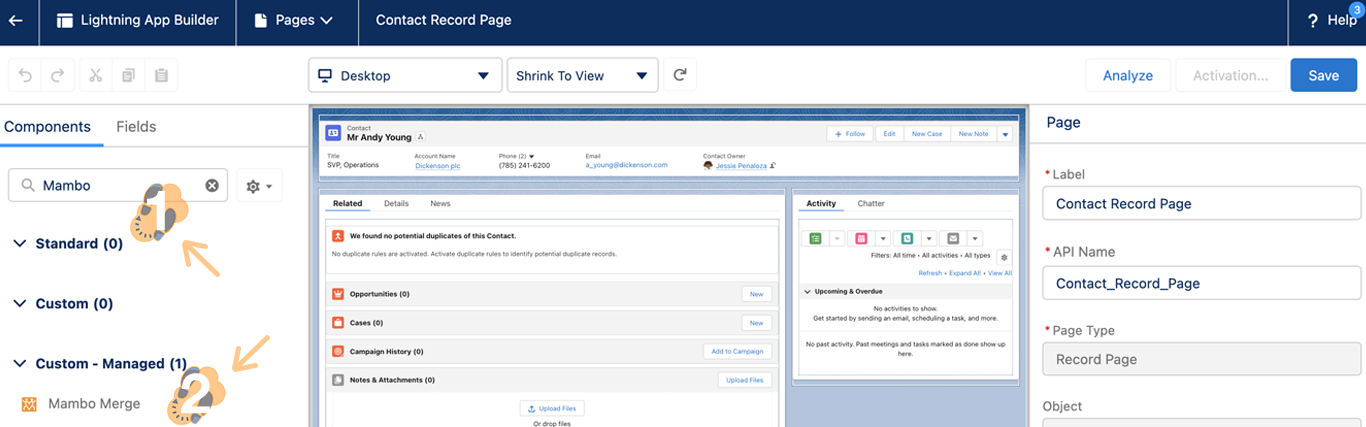
1.3 This will launch the “Lightning App Builder” where you can go ahead and search for the Mambo Merge component which can be found under “Custom - Managed”.
1.4 “Drag and place” an instance of the component anywhere where the green area highlights as you hover the component around the page layout.
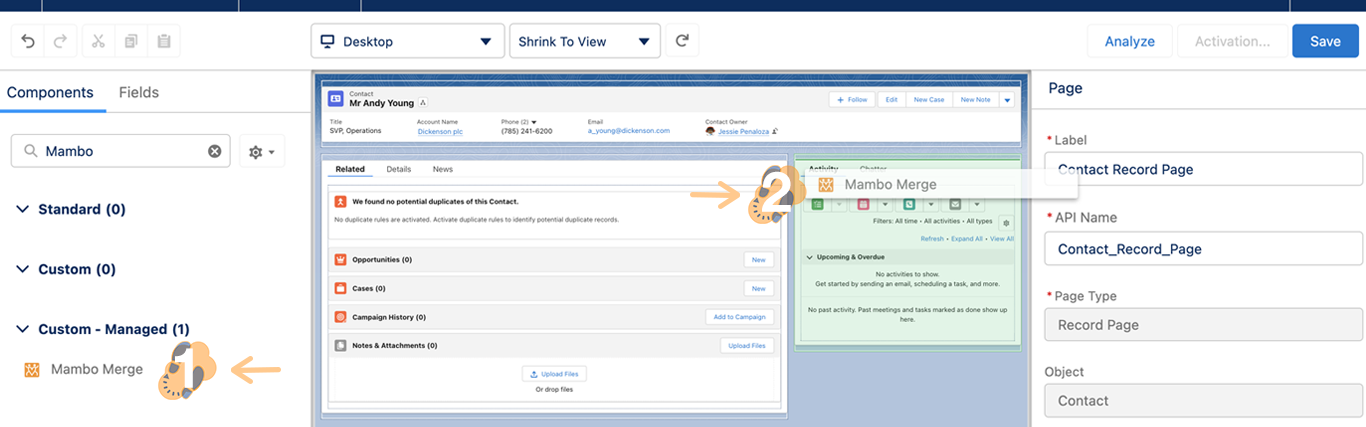
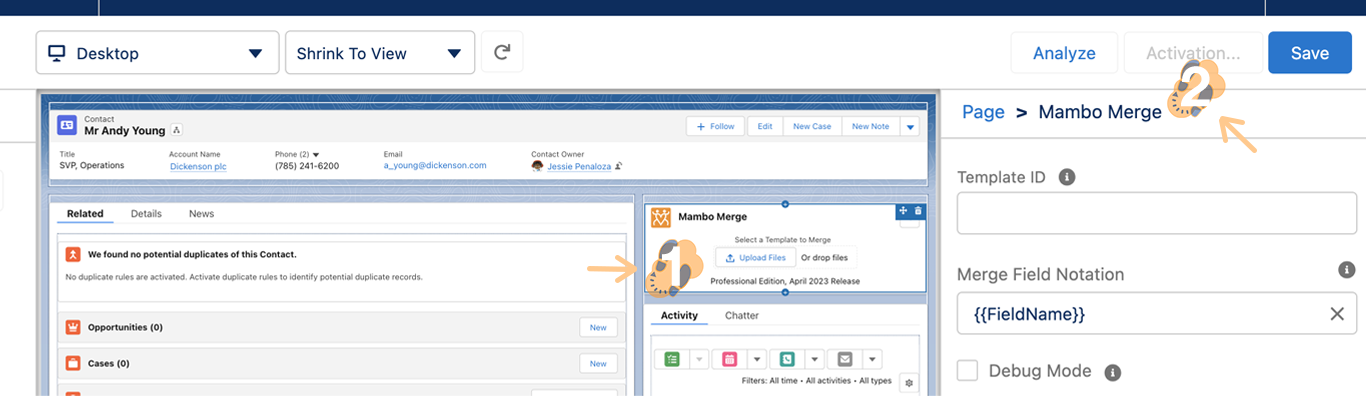
Once placed, you can see the component within the lightning page, and if you click the component you can configure its settings.
1.5 Before we exit the page layout will need to activate this page in order to save the component, do this by clicking the “Activation” button.
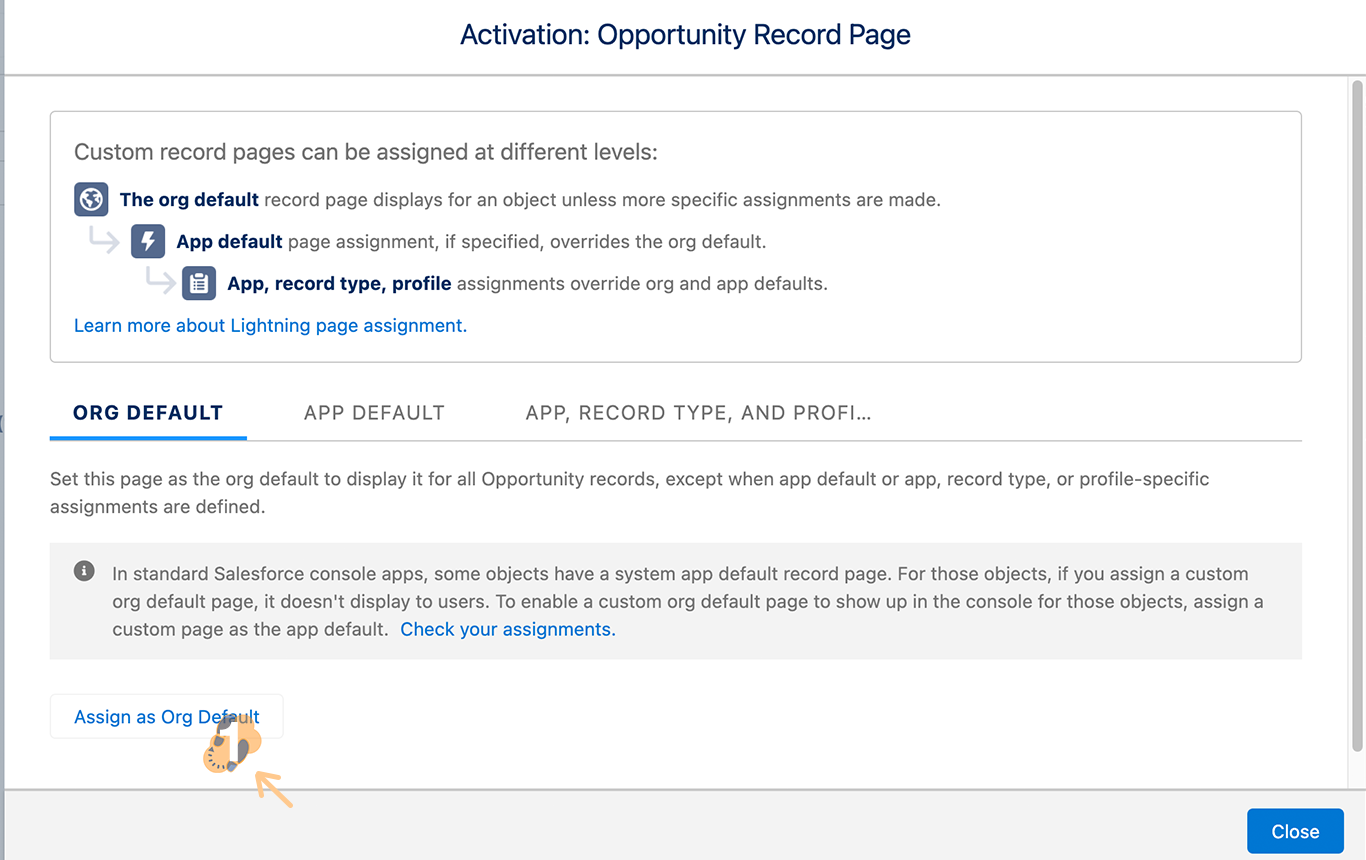
1.6 This will launch the activation window, go ahead and click on “Assign as Org Default”.
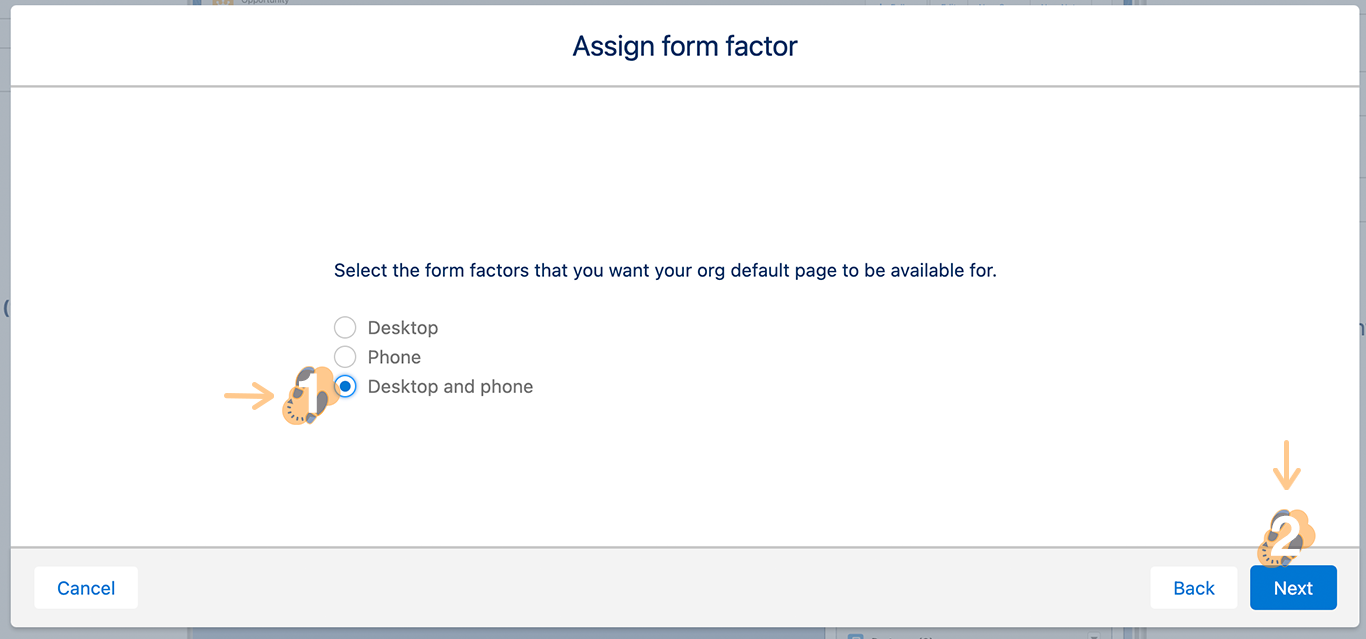
1.7 This will launch another window that will let you provide access to this component on either a desktop, mobile, or both. We recommend that you provide access to both. Proceed by selecting “Desktop and phone” and clicking “Next”.
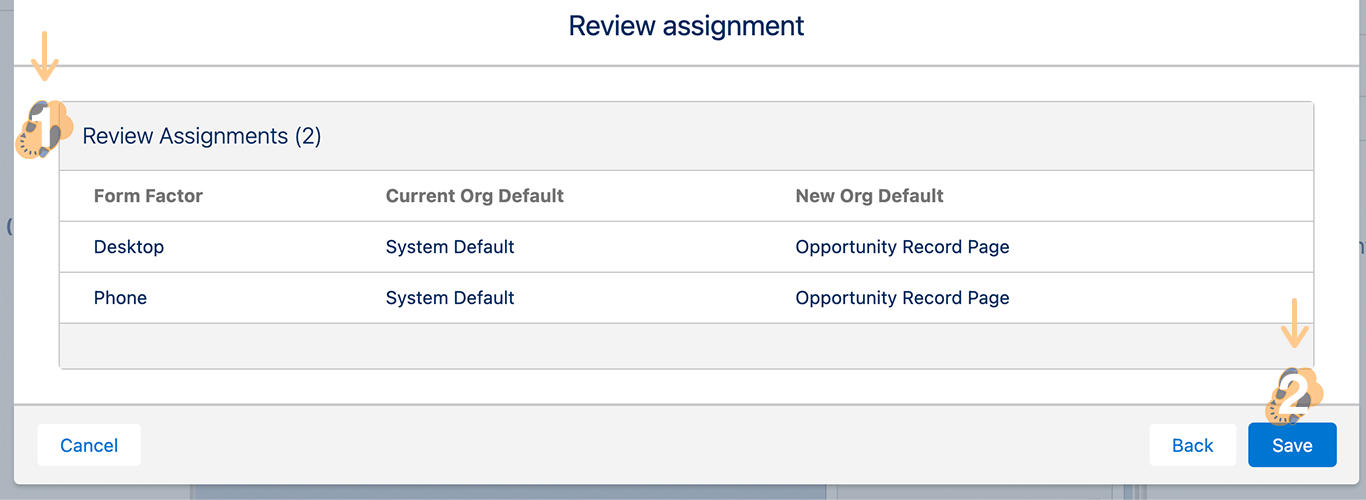
1.8 The last window reviews your changes before you “Save” them.
1.9 This will take you back to the lightning app builder where you can now press the “Save” button and “Back Arrow”. Saving your settings and taking you back to the record page where you first started.

Note: The Save button can be found in the top right-hand corner while the Back Arrow will be located in the top left-hand corner of the lightning page.
1.10 Now your component is ready to use within your object page.

To create a merge button you’ll need to obtain the 15-18 alphanumeric File ID sequence from the document you plan to use as a template.
Step 2: Creating A Merge Button Set ↵
Note: If you need assistance creating your first template go ahead and read our How To Create A Template for the steps necessary to build your first template.
2.1 Once you have the alphanumeric sequence simply head back to the object that has the component installed and edit its page layout like before. Will do this by clicking on the “Gear” icon and selecting “Edit Page” from the dropdown menu.
2.2 This will launch the “Lightning App Builder” where you can go ahead and click on the component to display its settings and add the “File ID” within the “Template ID” text box.
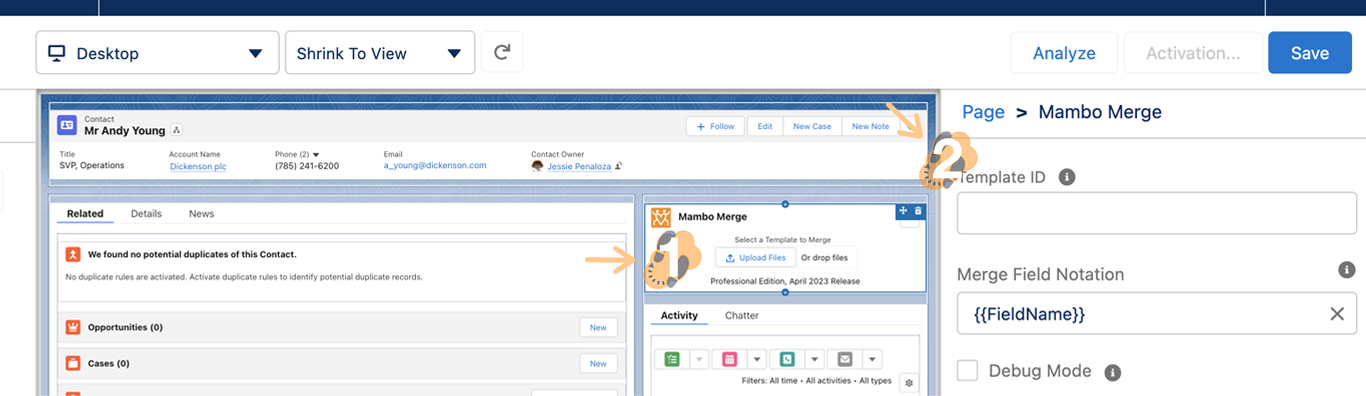
Note: If you need assistance locating the File ID reference our Uploading Documents To The FILES Tab article. Make sure to remove any extra spaces and copy exactly as is. Should be a 15-18 alphanumeric sequence.
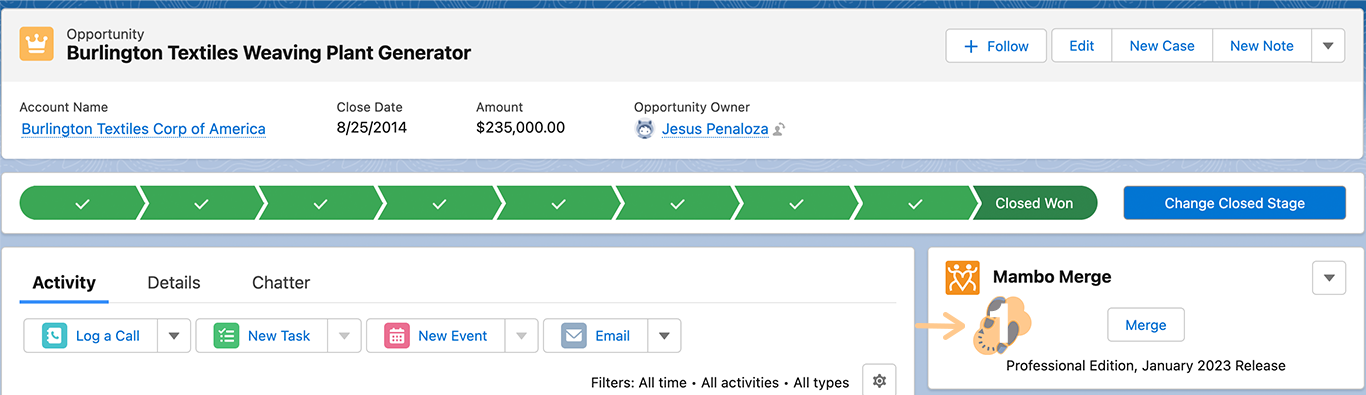
2.3 Click on “Save” and go back to the record page. Your component will now link the template provided with the “File ID” to the component and create a Merge button.

2.4 Each time this button is pressed the data will merge with the template to output a new document.
You are now ready to test your merge button and build out more as needed using our Freestyle edition.
Congratulations!
Our Paid editions will allow you to add and label multiple buttons within a single component. This process helps create a single merge button by linking one template directly to it.