2.2.2 | 1/4/2024
Step 1: Prerequisites | Step 2: Define Your Use Case and Conditions | Step 3: Build A Routine | Step 4: Test Routine
Consolidate Data By Using A Bulk Merge
The “Bulk” merge, allows you to consolidate multiple merged documents simultaneously with just a single click. Create documents for each record that meet specific conditions and combine them into one master document to consolidate necessary data from each record for review and analysis. In this guide, we’ll walk you through a typical use case using the Leads Object, showcasing how this method can greatly enhance your DocOps needs. Let’s dive in!
Step 1: Prerequisites ↵
Before diving in make sure to complete the following checklist.
1.1 Install a “Mambo Component” within the Object page you plan to merge documents.
1.2 Know how to use “Template Builder” to create a template.
1.3 Know how to build a “Routine” and “Merge Button.”
1.4 Have our “Full Speed” edition installed.
Note: We recommend to complete the list above before you proceed.
Step 2: Define Your Use Case and Conditions ↵
You need to identify what use case you are trying to generate documents for and what conditions must be met within each record to merge data and consolidate it into one larger file.
2.1 Our use case will include the “Leads” Object and create an “Open Leads Master Doc” to consolidate data from all the records that are under the lead status “Open - Not Contacted” and are located in California “CA.”
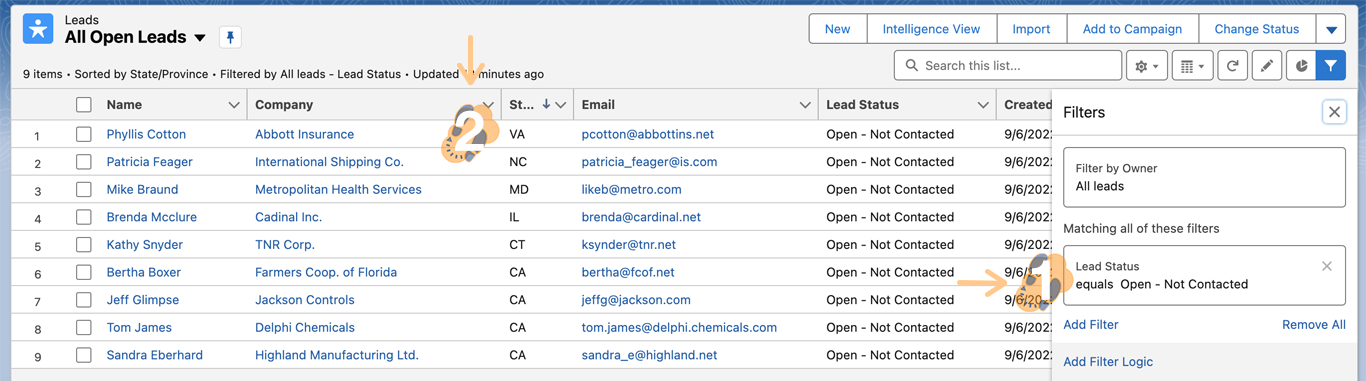
We will generate a listview to sort all the records that Mambo Merge will consolidate data from into one master document.
Note: Records that do not meet these conditions will not be included within the master doc.
Step 3: Build A Routine ↵
With our use case and conditions defined, we can begin to build out the routine that will traverse all the records within the Leads Object to merge and consolidate the record’s data if all conditions are met within each record.
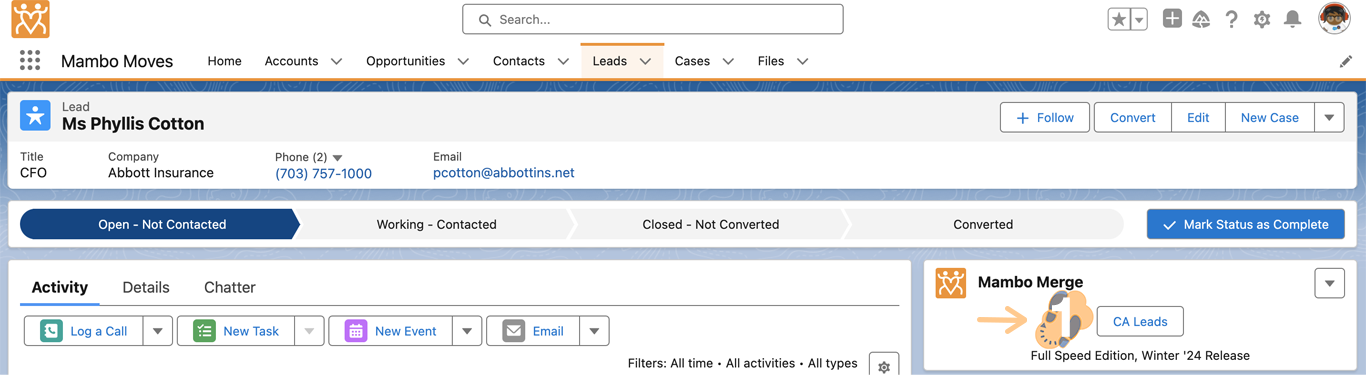
3.1 Head over to a “Lead” record and locate the “Mambo Component” installed.

3.2 Click on the “Down Arrow” and select “Studio” from the drop-down.
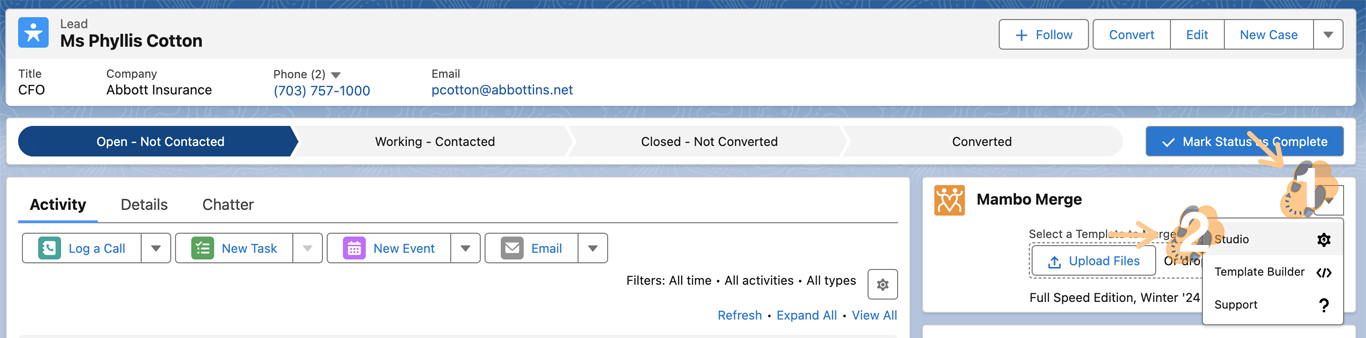
3.3 Within the Studio click on “New Routine” to launch the wizard.

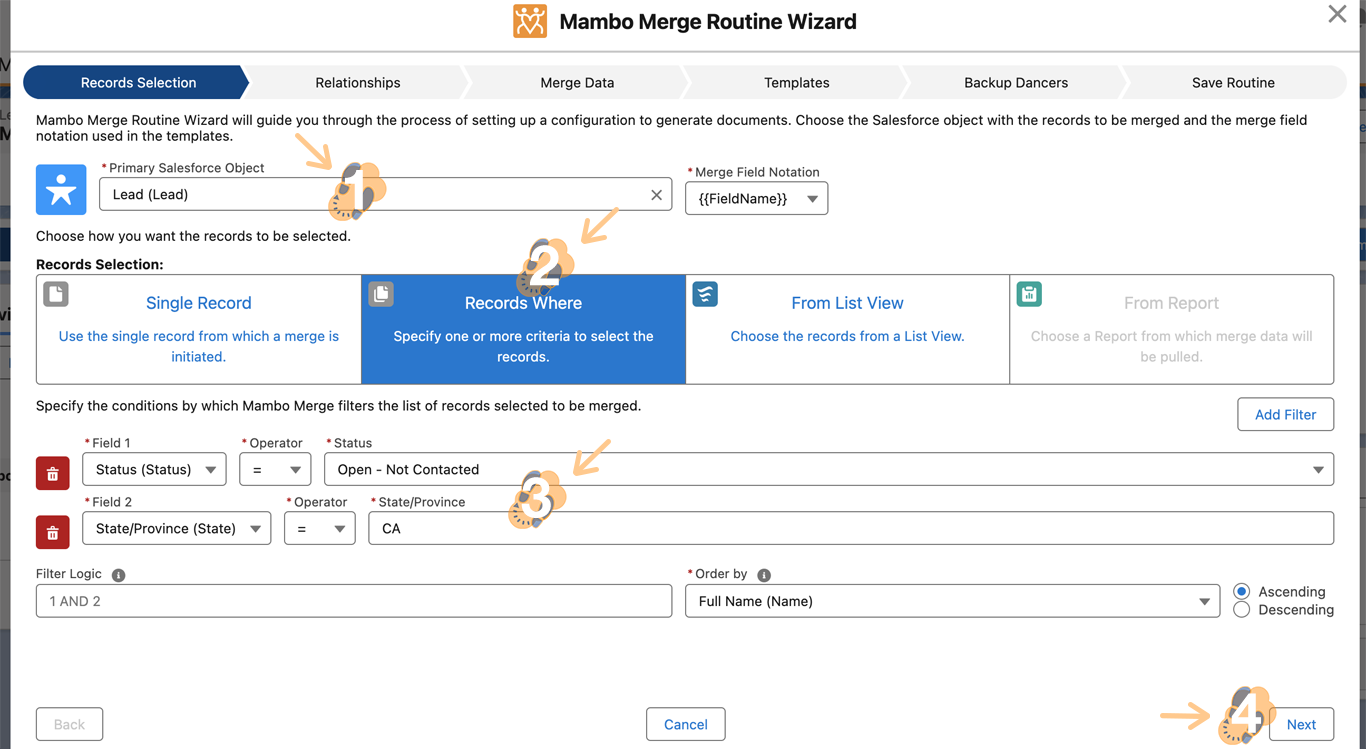
3.4 The “Records Selection” screen will be configured by using the following settings. Remember, depending on your use case the “Primary Salesforce Object” and “Filter” options will need to be changed.
Primary Salesforce Object: Lead
Records Selection: Records Where
Filter 1 (Field | Operator | Value): Status | = | Open - Not Contacted
Filter 2 (Field | Operator | Value): State | = | CA
Filter Logic: 1 AND 2
Order by: Full Name | Ascending
Once all settings are confirmed, press “Next” to proceed.
3.5 Because we do not need to define any Relationships we can skip this section by clicking “Next.”

3.6 Since we already have a template ready to use we won’t need the “Merge Data” screen, however, if we need to adjust our Template we can always use this screen to ensure the correct merge fields are defined in our template. Will skip this screen by pressing “Next” to proceed.

For this use case, we are using a simple Template to consolidate key information from each Lead record that matches the conditions set.
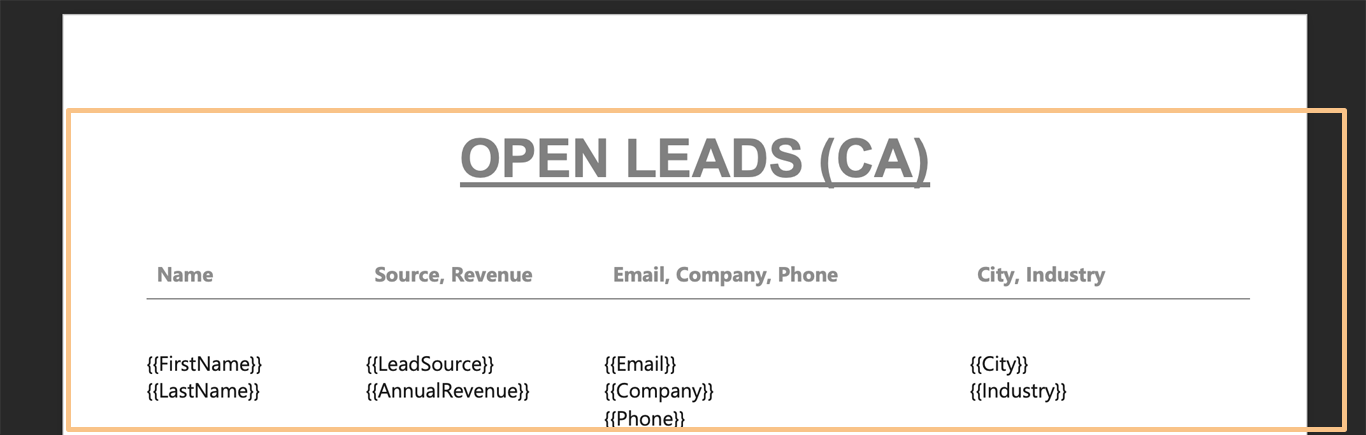
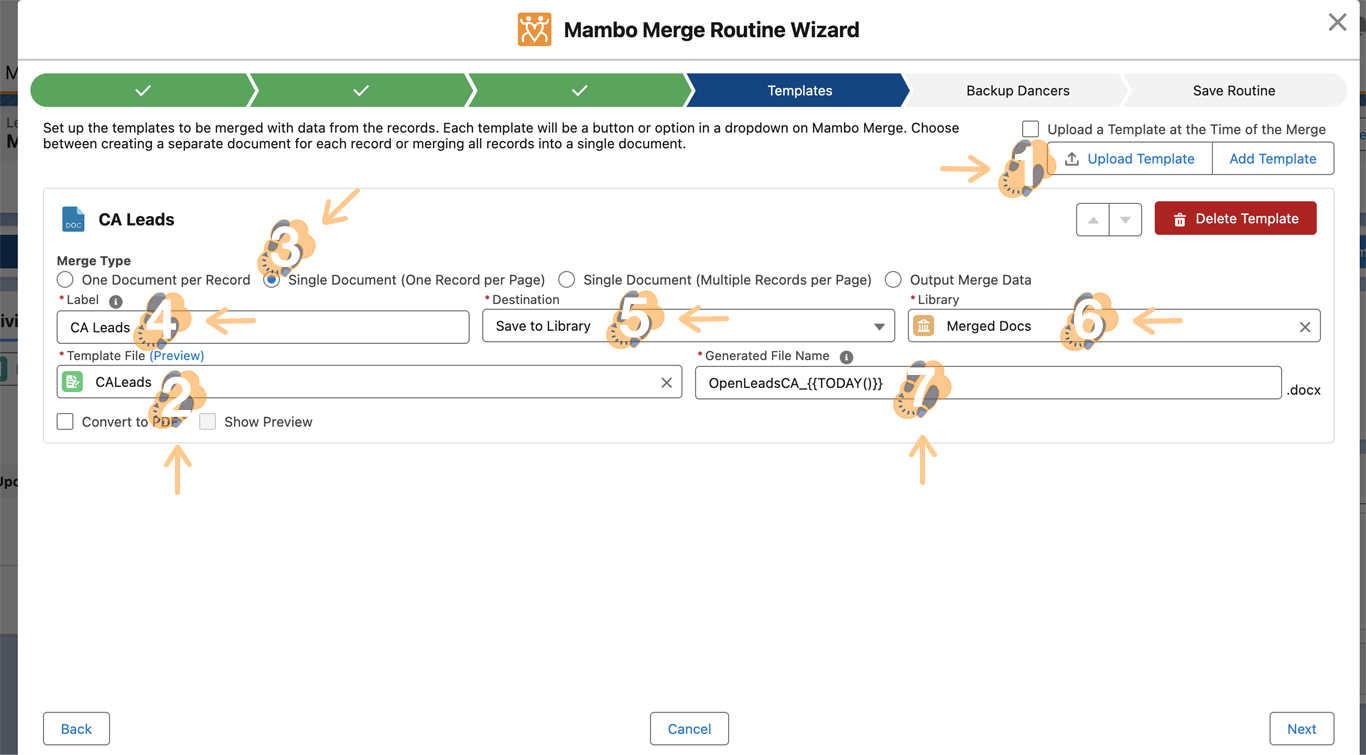
3.7 Now we can configure our Template with the following settings. Once again, based on your use case these settings will change.
-Template: (Upload or Add A Template)
-Template File: (Displays The File Name Uploaded or Added)
-Merge Type: Single Document (One Record per Page)
-Label: CA Leads
-Destination: Save To Library
-Library: (The Library You Choose To Save This Master File)
-Generated File Name: OpenLeadsCA_{{TODAY()}}
Once you have configured your Template, click “Next” to proceed.
3.8 Because we do not plan to use “Backup Dancers” we can skip this screen and click “Next.”

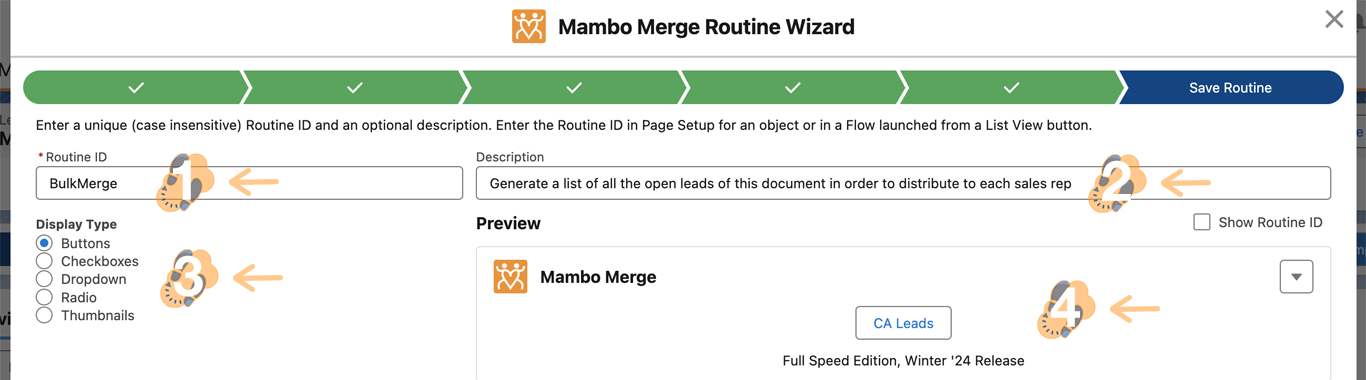
3.9 On this last screen, we can finalize the Routine by defining the following settings. These settings will also change based on your use case.
Routine ID: BulkMerge
Description: (Provide A Short Description)
Display Type: Buttons
Preview: (Quick Preview of Component)
Once you are ready click “Save” to complete the Routine and exit the Studio.
Step 4: Test Routine ↵
Now that we have the Routine built, we can assign it to the component and test it out to make sure all records that meet the conditions have their documents generated and consolidated accordingly.
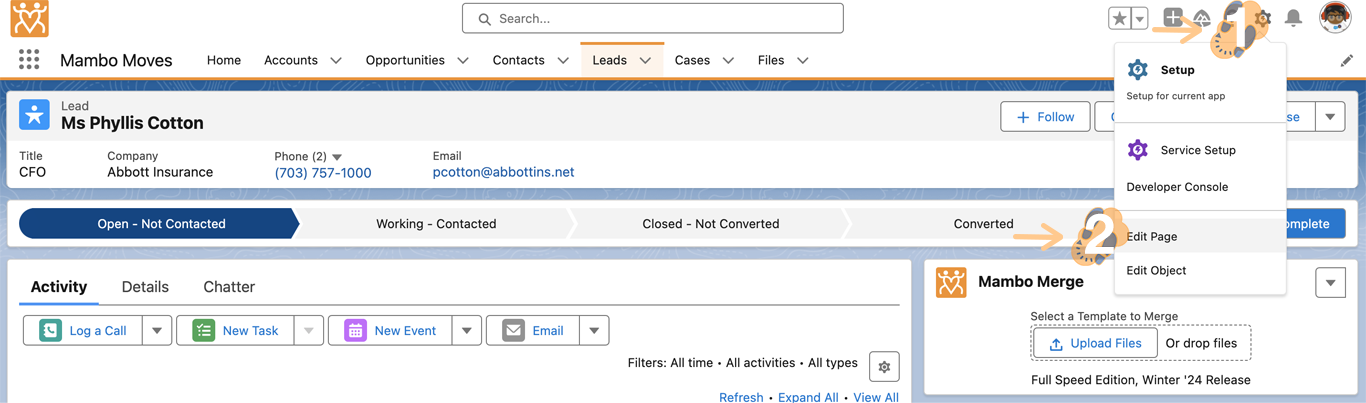
4.1 Head back to your Leads record, where you first started, and click on the “Gear Icon” to select “Edit Page” from the drop-down.
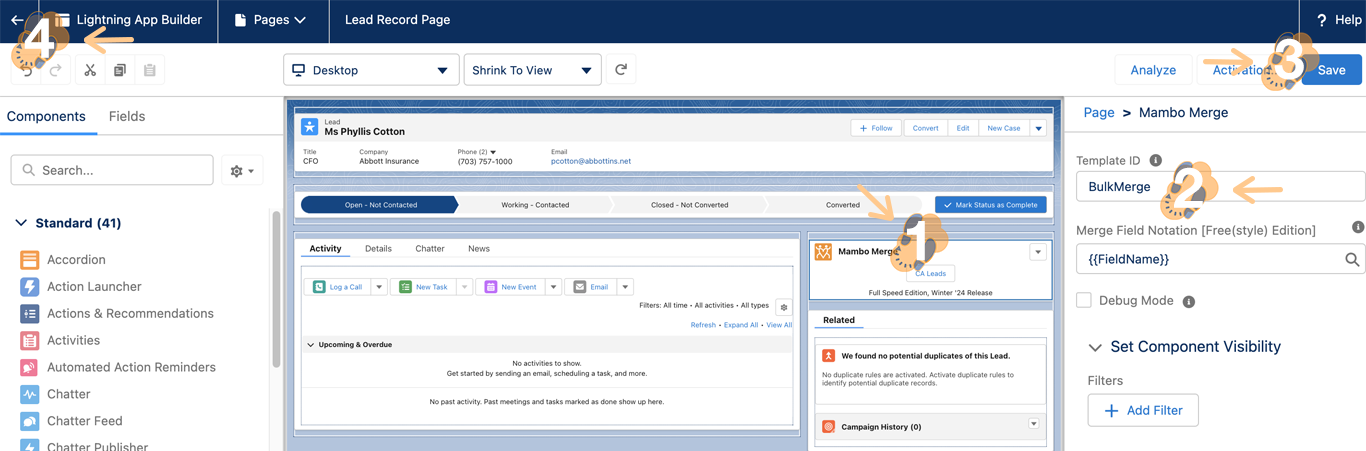
4.2 Within the Lightning App Builder head over to the “Mambo Component” and click on it to open its component settings. From there type in or paste the “Routine ID” (From the previous step) within the “Template ID” field and press the “Tab” key to have Mambo Merge assign the Routine to the component. Click on “Save” and then the “Back Arrow” to exit the builder and apply these settings.
4.3 Once we return to the record page you will notice the component now has the action button “CA Leads” which it did not before. Proceed to press the button to initiate the component.
4.4 Once the Mambo component compiles all the merged documents into a master file, a prompt will appear on the top portion of the screen.
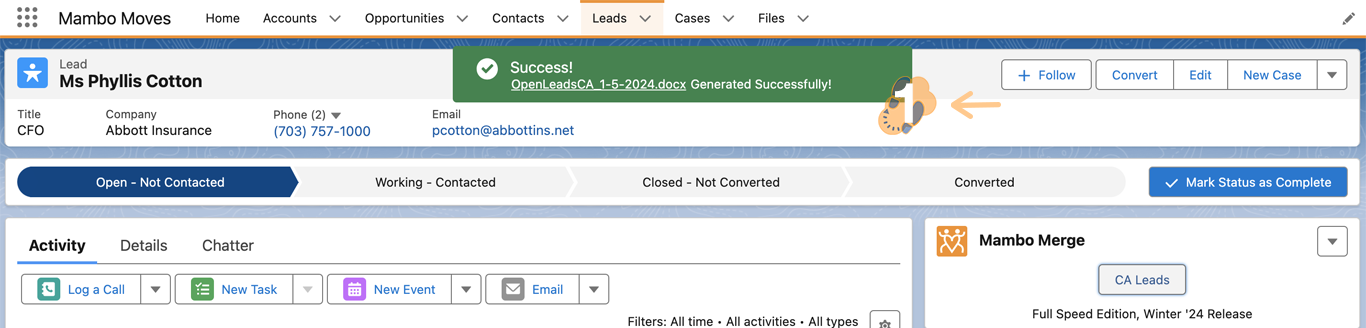
4.5 Heading over to the “FILES” Libraries tab you will notice that a new file has been saved within your org. This file will contain the merged data from all the records that met the conditions of lead status “Open - Not Contacted” and are located in California “CA.”

Clicking into the file will show us what record data got consolidated.
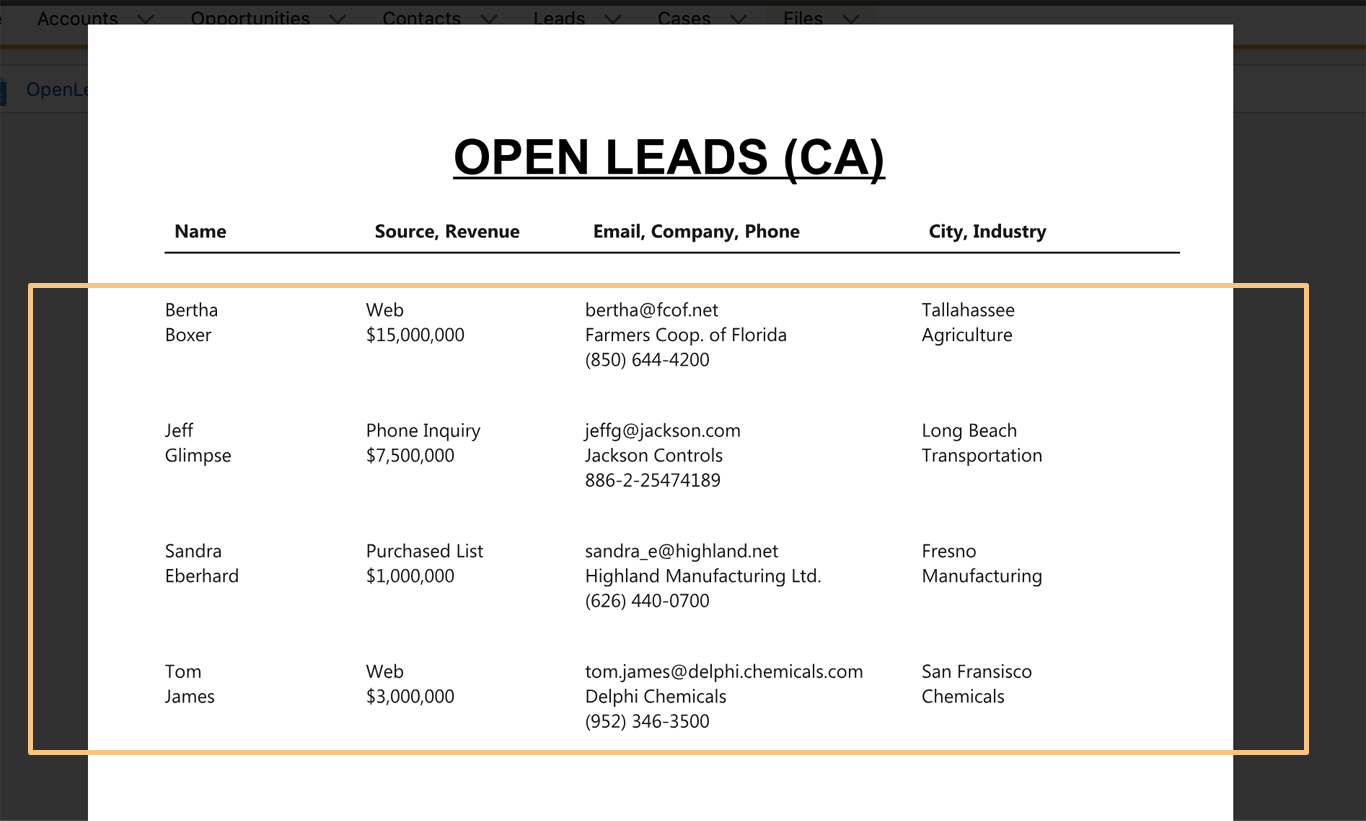
4.6 Heading back to our Leads List View and cross-referencing it with the master doc merged we can see which leads did not make the cut and which did.
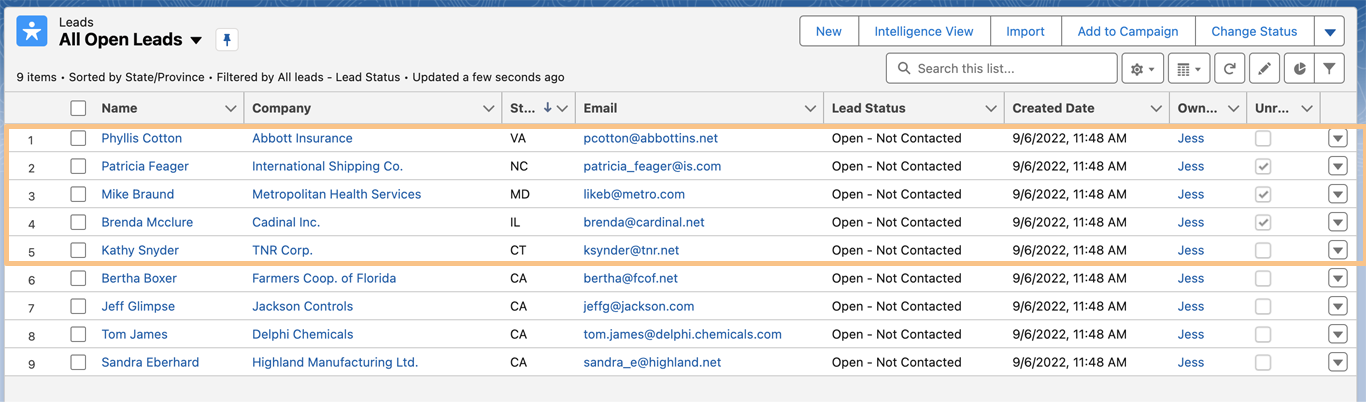
Note: Every time the CA Leads button is pressed within the component a new version of the master document will be created while preserving the original one.
What’s Your Use Case For Bulk Merges?
Share with us your use cases to help identify what is the best way Mambo Merge can help generate your documents.