2.0.3 | 9/15/2023
Step 1: Locate The Component | Step 2: Build A Routine | Step 3: Relationships | Step 4: Merge Data | Step 5: Upload Template | Step 6: Configure Template | Step 7: Backup Dancers | Step 8: Configure Component | Step 9: Activate Routine | Step 10: Test Button
Who benefits? What Issues Does it Address?
Being able to identify an object, person, or thing in a way others can comprehend is overlooked by many and appreciated by others in their own way. Within Salesforce records contain data that distinguishes them and makes each unique. Extracting specific elements from each record aids in categorizing data to create labels. Mambo Merge is able to combine data to generate all sorts of labels for event registration cards, shipping boxes, envelopes, barcodes, product labels, and more to categorize information in ways easily understood by everyone. If you are looking for ways to organize and categorize data within your org follow these steps below to get you started.
Step 1: Locate The Component ↵
Our example will be filtering a list of contacts to send a recognition letter and printing out labels to add their contact information. However, will segment contacts based on whether or not their birthday falls before or in our merged date, let us begin.
1.1 You’ll need to traverse to the “Contacts” object page and select a record to access the Mambo component within a record page.
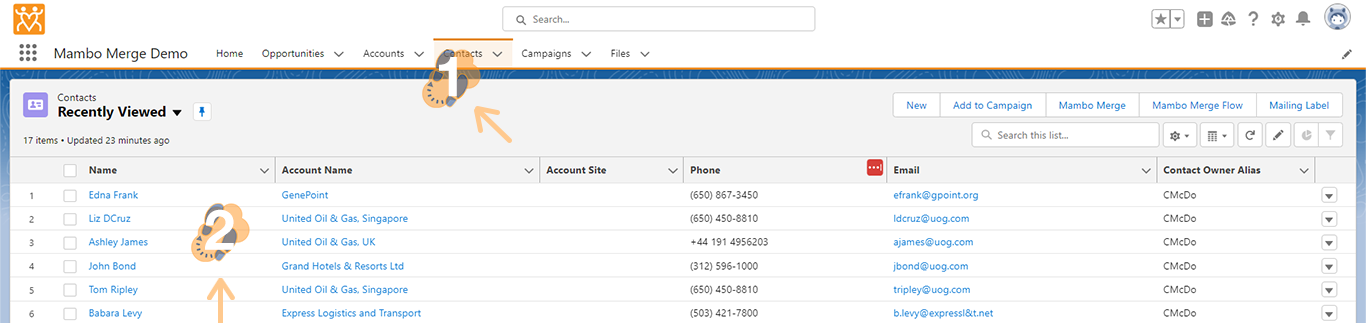
1.2 Within the selected record page you will be able to see the Mambo component. Go ahead and click on the “drop-down arrow” to select “Studio” and launch the routines menu.
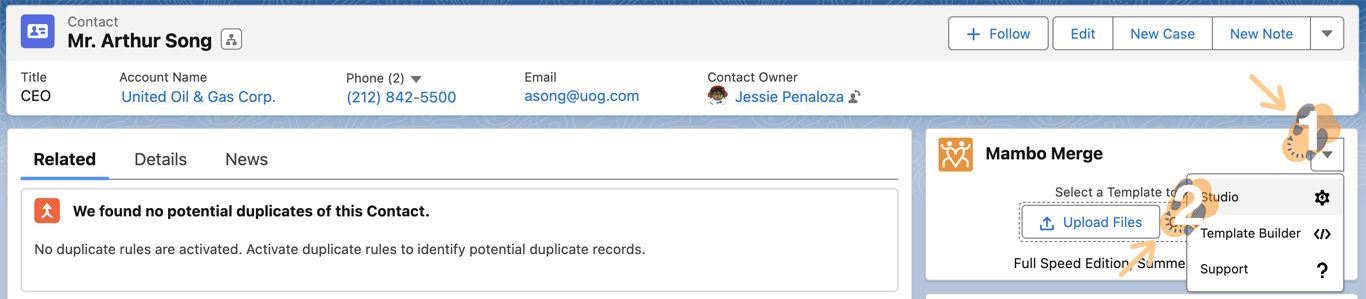
Note: You can launch our Studio from any Mambo component. We recommend heading over to the object you plan to build a routine around to view all fields and data available for merging
Step 2: Build A Routine ↵
Here you are able to create, edit, or delete routines. You can even import or export them for backup purposes or transfer them between orgs.
2.1 Let’s go ahead and build a routine by clicking on the “New Routine” button on the top-right side of the window.

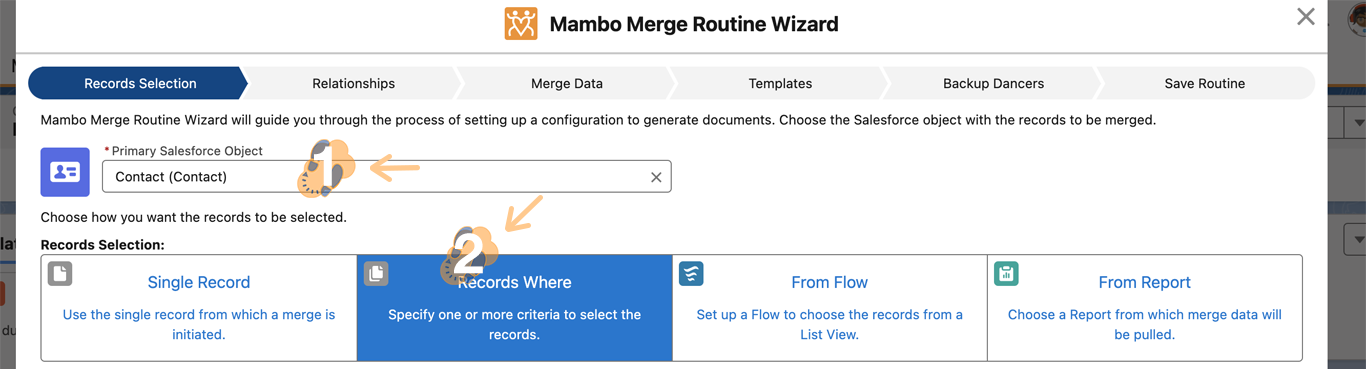
2.2 Whenever you start a new routine you’ll need to select the “Primary Salesforce Object” you intend to build the routine around. Because we are using the “Contacts” object we will be selecting it as our PSO. Once the object has been selected, you’ll need to identify the type of routine you want to build around. We have various selections but will be setting up a “Records Where” routine for this label-maker feature.
2.3 A set of conditions will now appear and consists of a “Field”, “Operator”, and “Data Type” that will narrow down the records to use for the merge. You’ll also have the ability to sort the records by using the “Order by” drop-down and selecting the field to use for sorting in “ascending” or “descending order”. (Keep in mind that this sorting method will determine what records get added first, second, third, etc within your template)
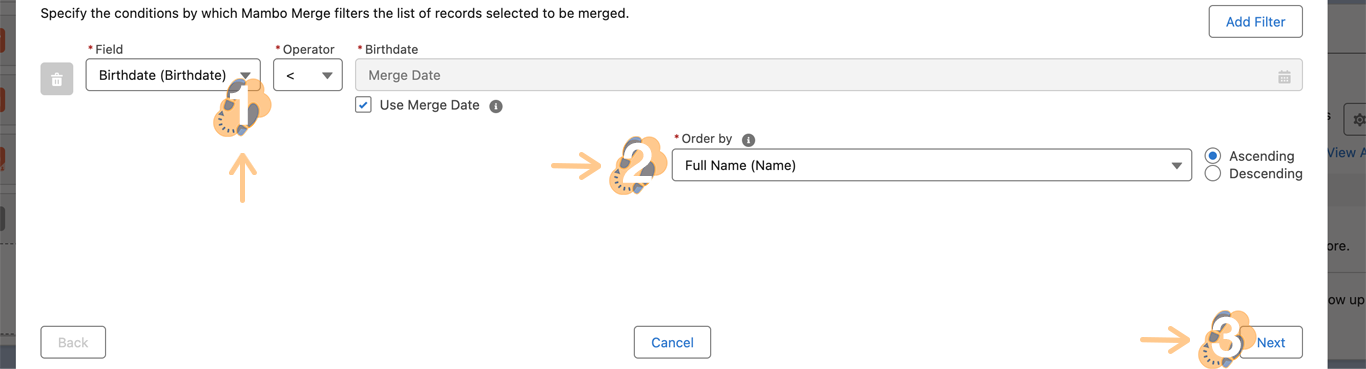
Select the “Birthday” field within the “Contacts” object with a “Lesser than” or “Equal to” operator and a data type of “date” (which is by default on date fields). Lastly, we will sort our records by “Full Name” in ascending order. Once all this information is correct click on “Next”.
Note: Each routine type contains additional fields that help define the conditions to meet and apply.
Step 3: Relationships (Skip) ↵
Next up is the Relationships tab, which can be used for accessing data from related objects through lookup fields or related lists.
3.1 For this use case, we don’t need Relationships and can skip this section by clicking “Next” to proceed.
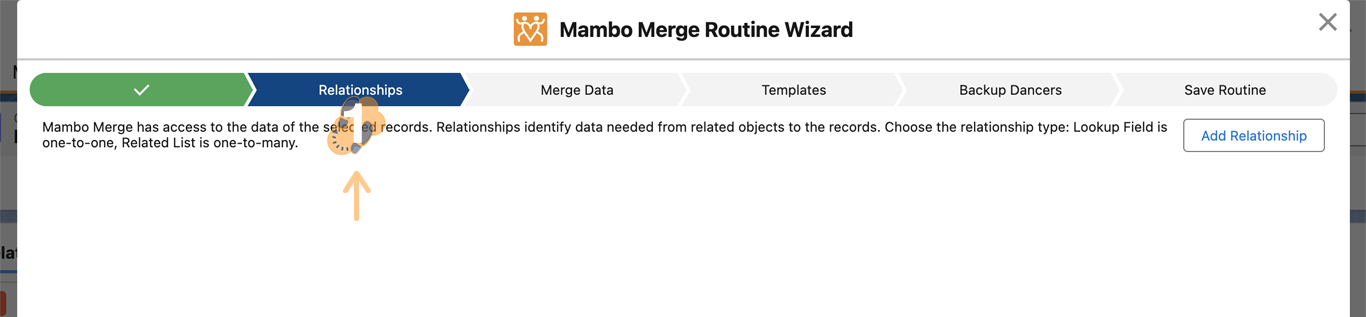
Note: Depending on where your merge data needs to be retrieved, Relationships can help tell Mambo what related objects to navigate.
Step 4: Merge Data ↵
The next tab (also known as “Merge Data”) becomes quite helpful when troubleshooting issues because it’s able to provide all the records that match the conditions set previously. Here, you’ll be able to traverse each record to match its field name with its field value.
4.1 Simply use the drop-down arrow to traverse each record and populate the corresponding data associated with that record. It also helps identify the merge field you will need to use within your template to ensure the data you need is properly added to the template.
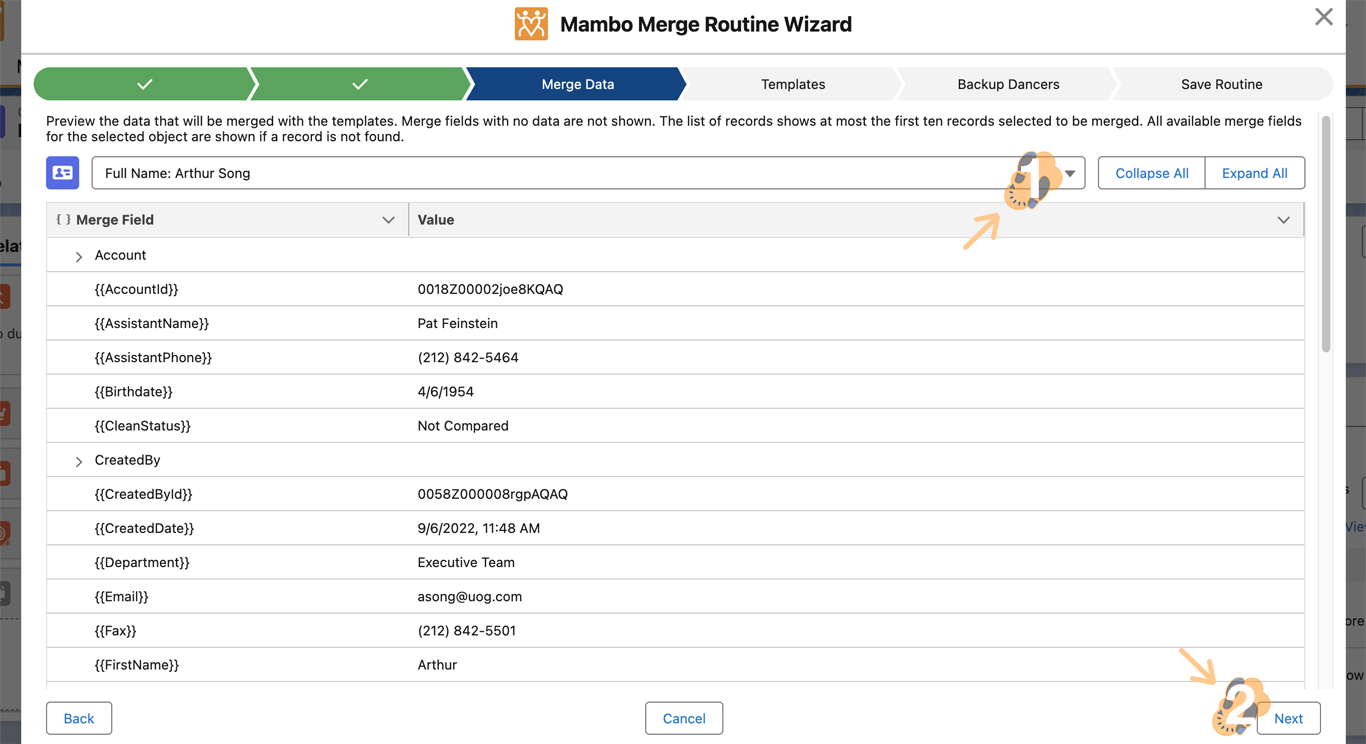
Note: Merge Data can also be accessed through the Template Builder.
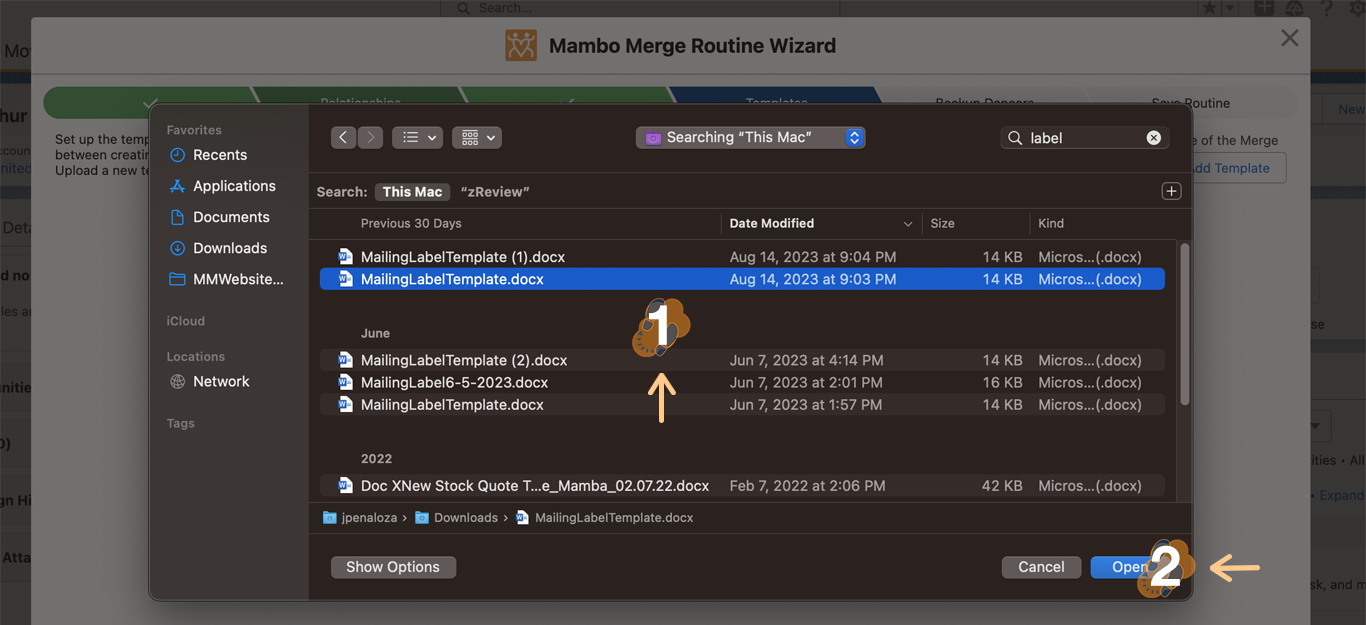
Step 5: Upload Template ↵
Now that you have the merge fields you need to extract values you are ready to build out your template. As this is a label-maker routine there are various use cases that can be applied across various objects. In our example will be creating labels to issue for various ship-to addresses which we can then print through Avery labels to properly place in our letters and send to our customers.
5.1 Simply click on the “Upload a Template” button and choose this template to properly merge the customer’s first name, last name, and full ship-to address.
5.2 For our example, we have “first name”, “last name” on the first line, followed by the “ship-to address” on additional lines. This layout resembles a 2”x 4” Avery 5163 10 shipping labels per sheet template.
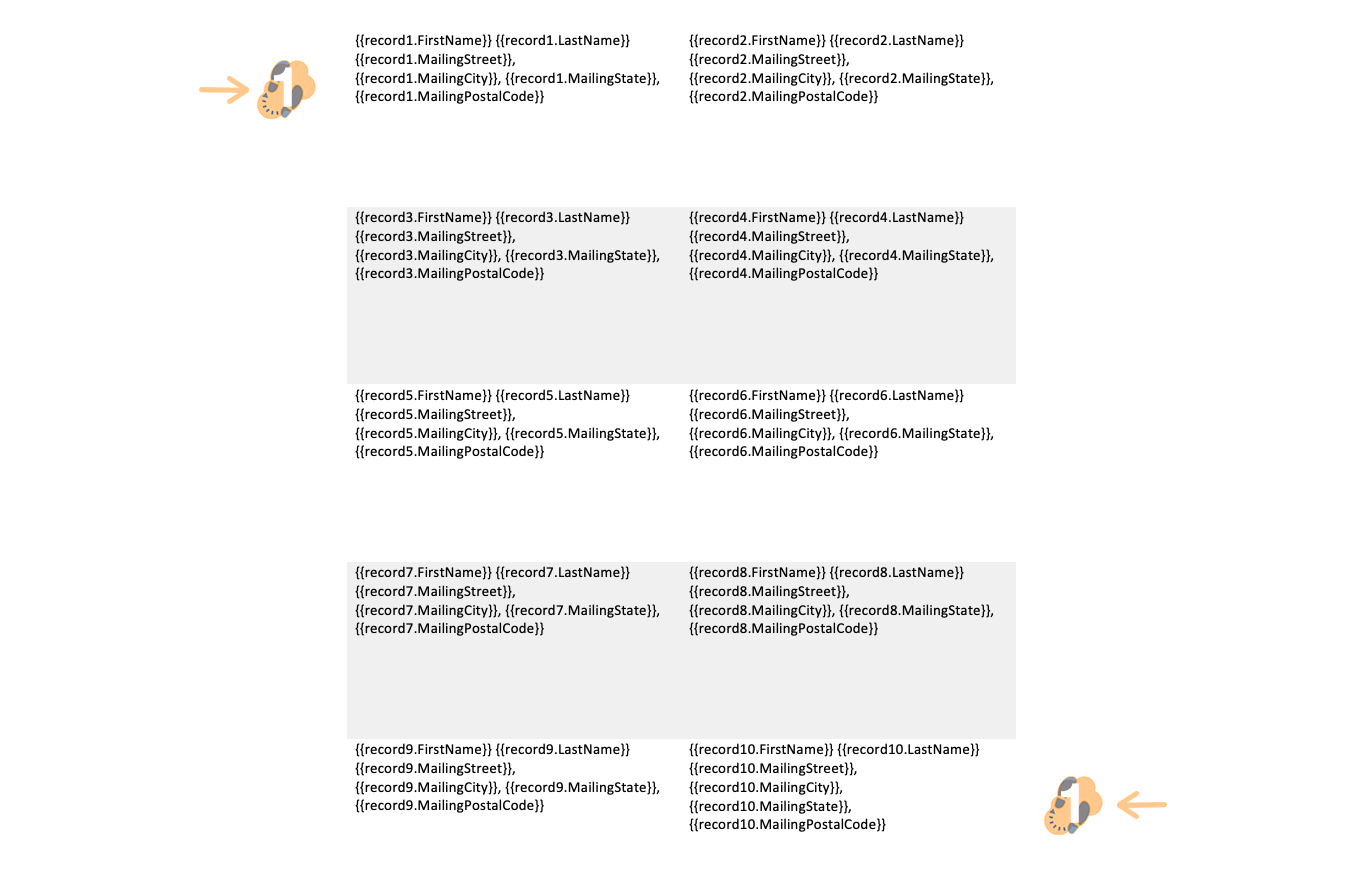
Note: You’ll only need to map out the merge fields for one sheet as Mambo Merge dynamically knows to generate additional sheets if more records need to be merged.
Step 6: Configure Template ↵
Once the template has been uploaded you will need to define some settings in order for the routine to know how to use the template to create the merged document.
6.1 First up is the “Merge Type”, because we are planning to create one merged document that will include all the merge data records matching the conditions set and will be using a “Single Document (Multiple Records per Page)” option. Next is the “Label”, which is the name assigned to the button, drop-down, or bullet point within your component – For this example will use Label Merge. The “Destination” follows which tells Mambo Merge where to store the merged document once it’s complete, for this example will use Download Immediately (However you can always store this file in a library to keep all your documents properly organized).
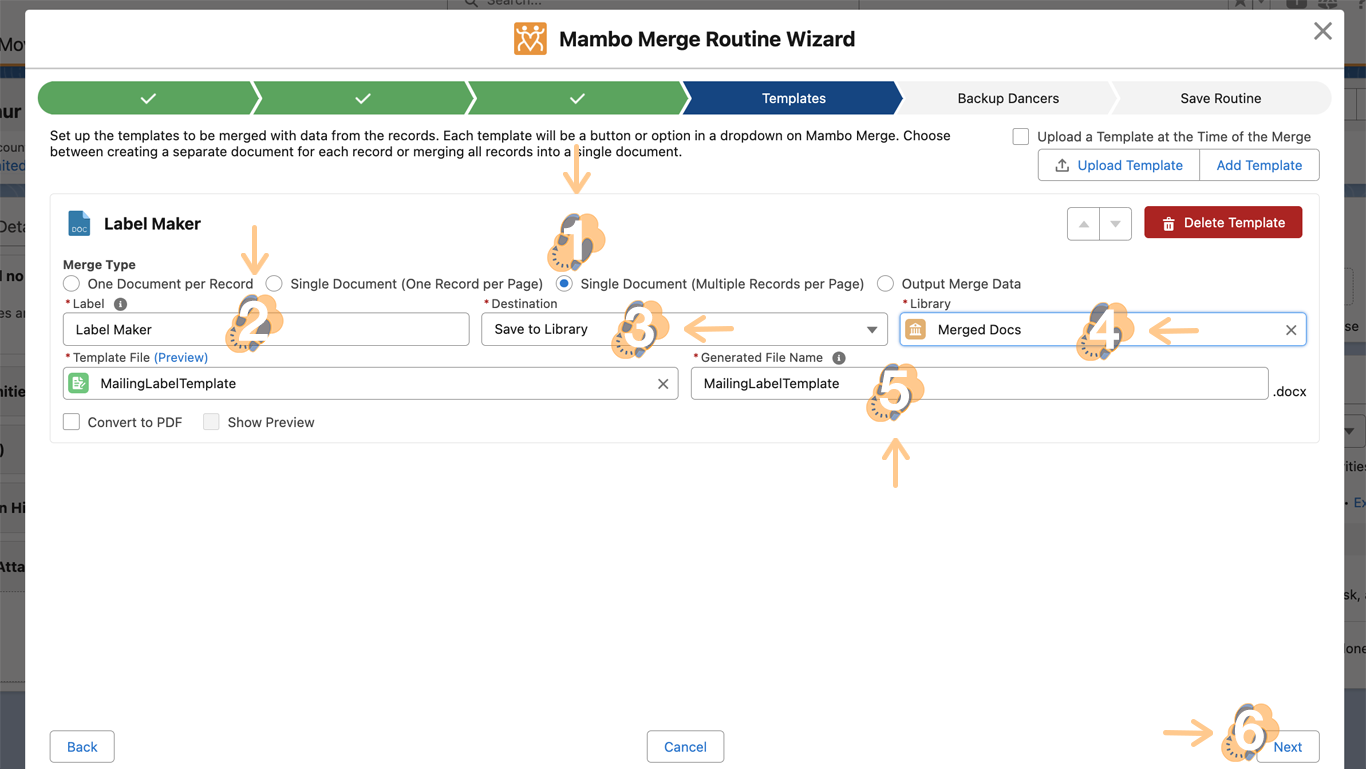
“Template File” is the name of the template that will be used for this routine and which we uploaded previously. (You can always go back and switch the template that will be used, as needed). Lastly is the “Generate File Name”, which will be the name given to the file upon merging. In our example, we will be using MailingLabel{{today()}} which includes a merge field function that will extract today’s date. That way each and every time the document is generated it will contain the date it was created. Once all this is complete click on “Next” to proceed.
Note: Each template will be linked to either a button, dropdown, radio, or checkbox within your routine.
Step 7: Backup Dancers (Skip) ↵
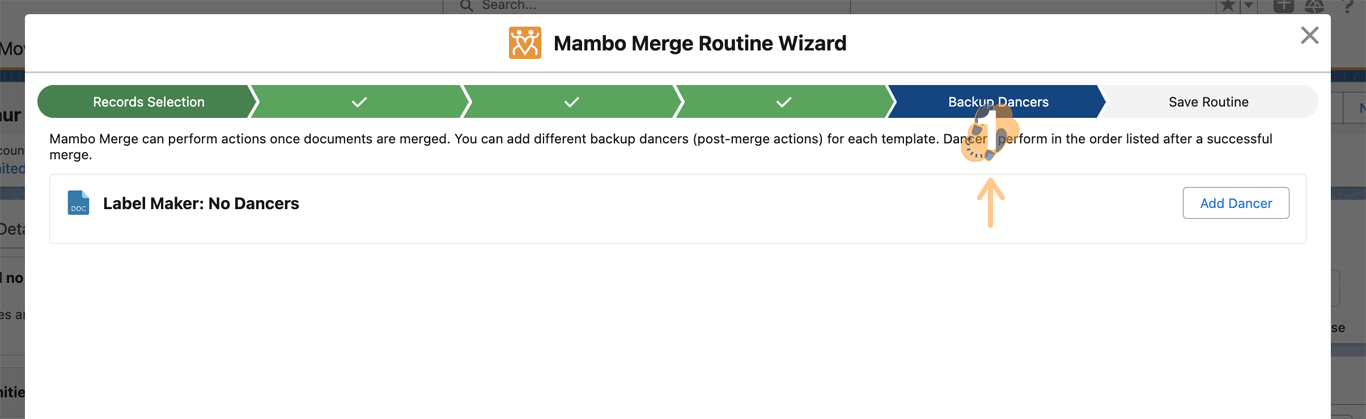
Whenever you need to apply additional actions to a merge, Backup Dancers are your way to go. These types of actions help delegate tasks to team members after a document has been merged.
7.1 For our example, we will not use any and can proceed by clicking “Next”.
Note: We continue to add more Backup Dancers with each new release we deploy to the AppExchange.
Step 8: Configure Component ↵
Here we can add the final touches to our routine and component appearance so its ready to use.
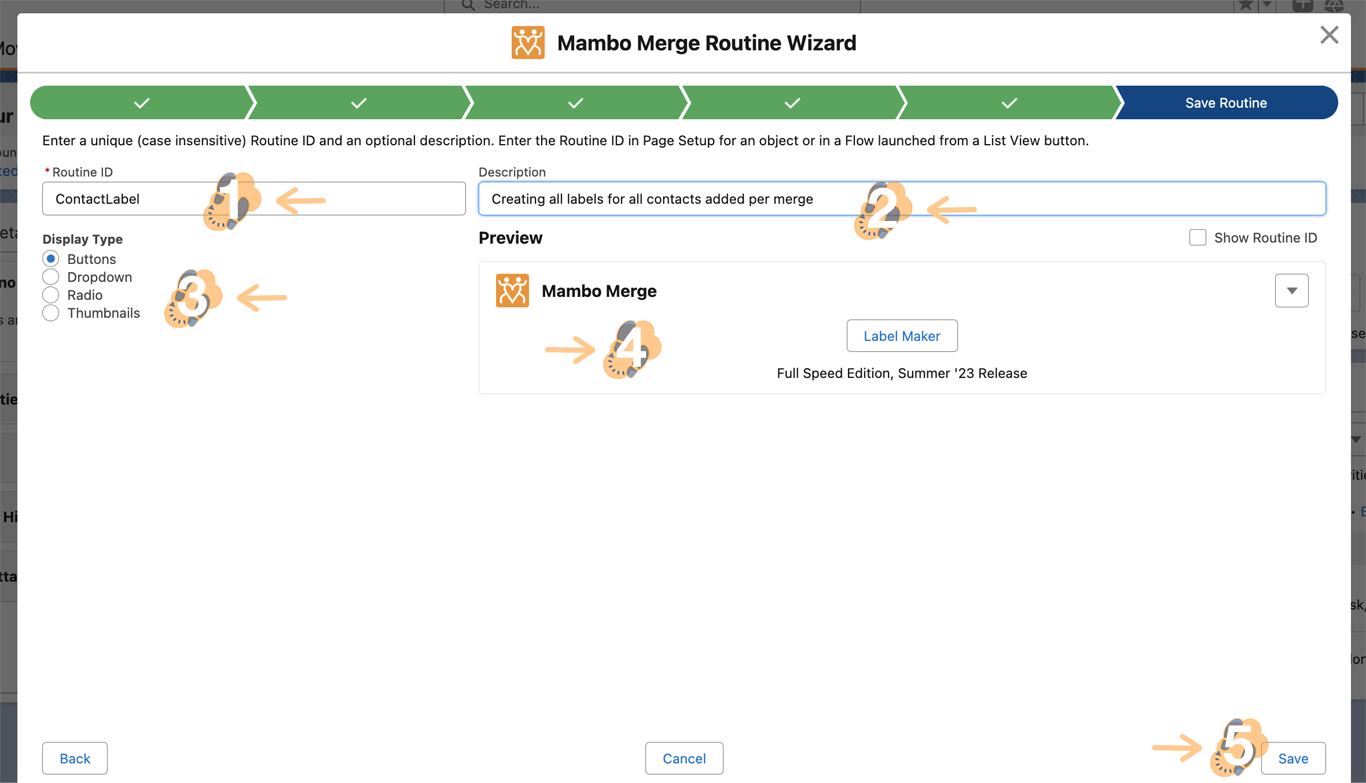
8.1 Each routine needs a “Routine ID” which is a unique identifier and will be used later to activate a component with that specific routine. Will be using “ContactLabel” for our routine ID. You can also include a “short description” within the Description box to help you remember down the road. The “Display Type” toggles between the appearance of the action button that will appear within the component. You can choose from a Button, Dropdown, Radio, or Thumbnail – will be using the default, Buttons. To the right, you’ll be able to see a preview of the component with the options selected. Proceed and complete the routine by clicking on “Save”.
Note: You can always change the look and feel of your routing by coming back to this step.
Step 9: Activate Routine ↵
Now that the routine is built you’ll need to activate it by adding it to a Mambo component.
9.1 Let’s head back to the “Object page” and select the “Setup” gear followed by “Edit Page”.
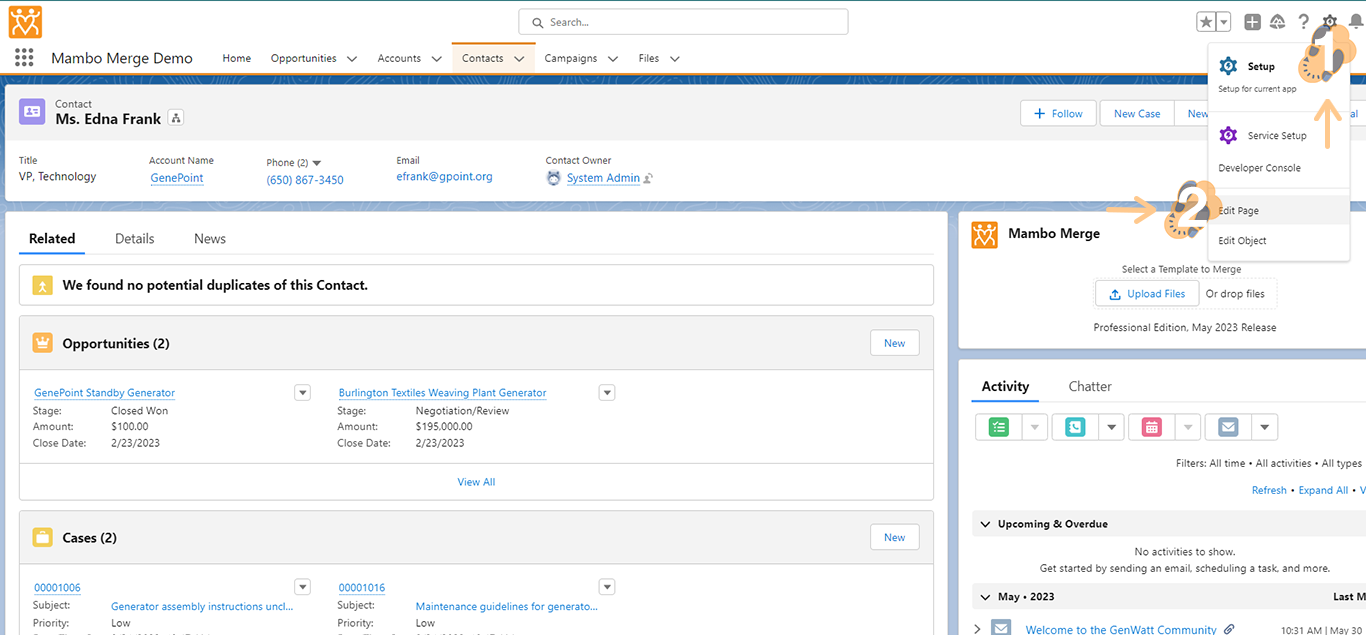
Note: In our example will be heading back to Contacts where the component will be using this routine.
9.2 Within the Lightning Page Builder head over to the “Mambo component” and click on it to launch its “settings panel” to the right. On “Template ID” go ahead and paste the routine ID – we used “ContactLabel”. (You will notice the Mambo component will now have the button Label Merge as how our routine builder previewed before)Click on “Save” and then the “back arrow” to head back to exit the Lightning App Builder.
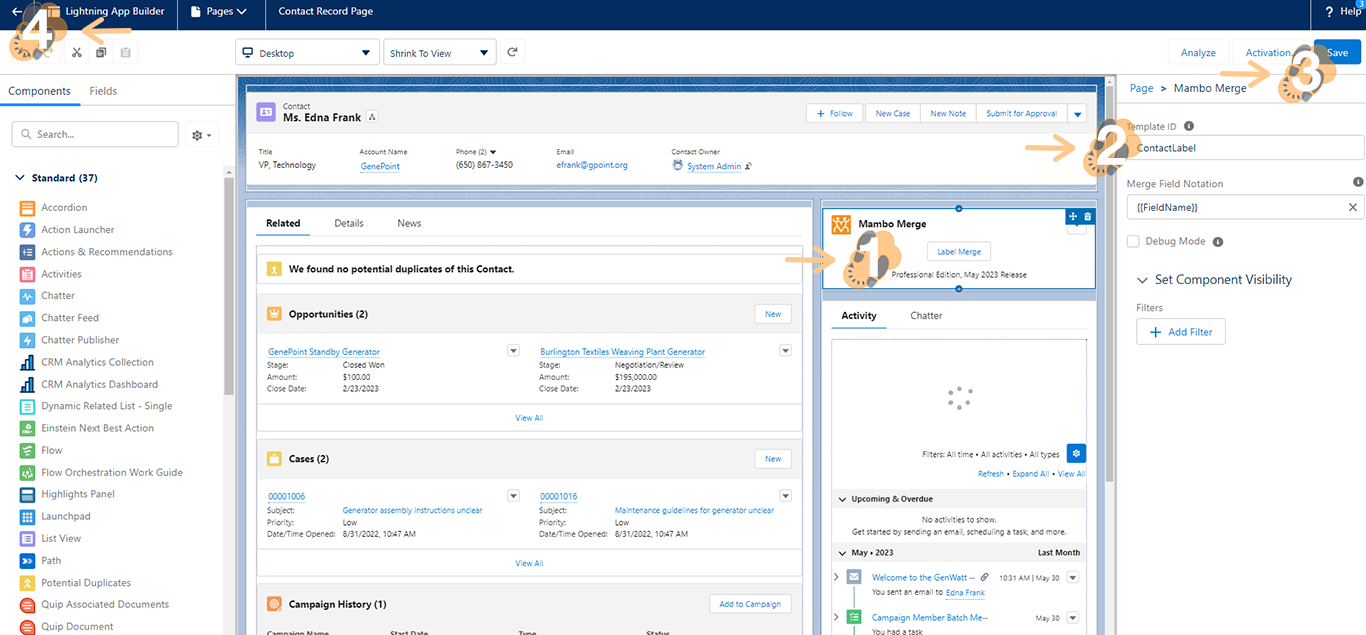
Note: You must activate a routine before you can actually use it within a Mambo component.
Step 10: Test Button ↵
Now that our component is activated and ready to use, we can proceed by testing it and making sure the right output is generated correctly.
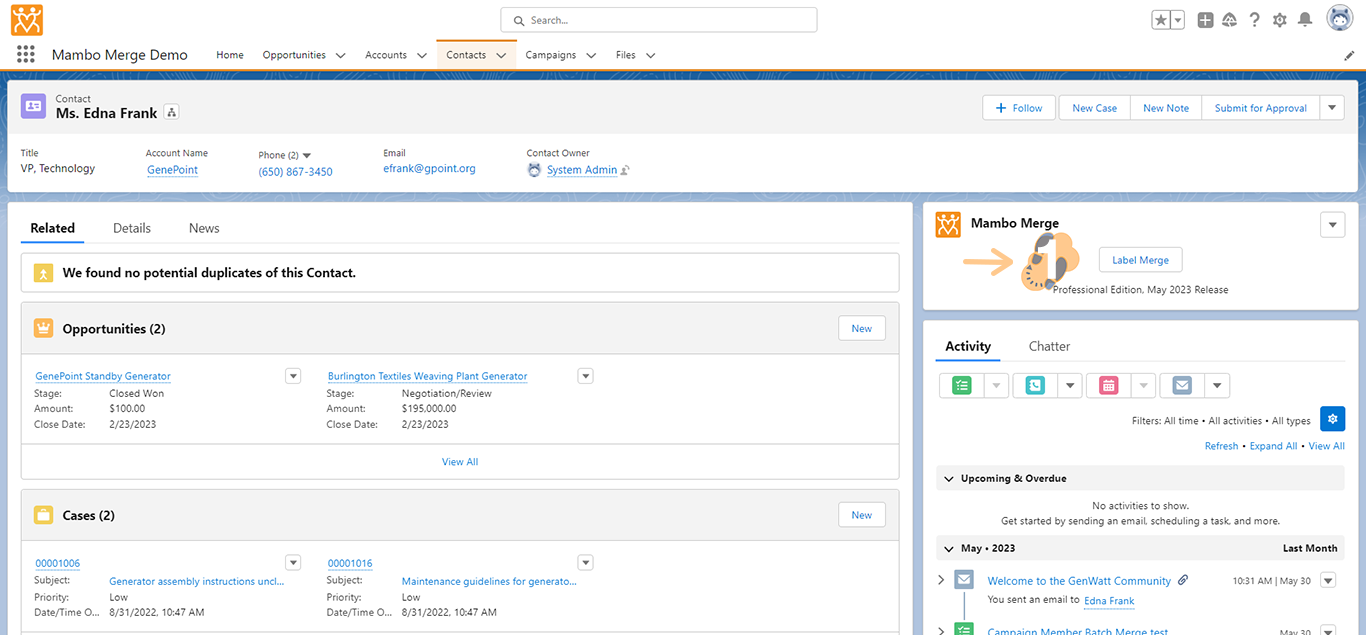
10.1 Head back to the component and press the “Label Merge” button.
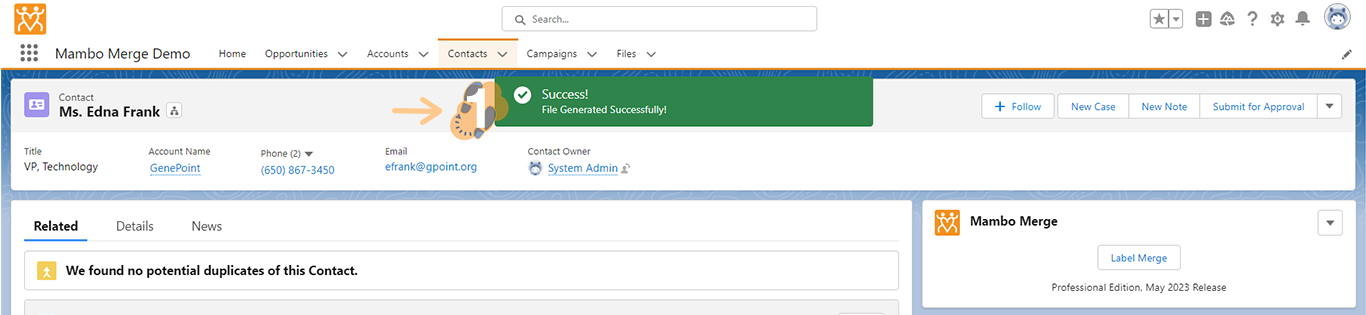
10.2 Upon successfully merging the document the following “prompt” will appear and the MailingLabel6-1-2023.docx will be automatically downloaded to your computer. The “date used” within the file name will reflect based on when the button was pressed.
10.3 The output consists of each record that met the conditions set when first building out the routine with the merge fields added within our template. The output is a simple yet powerful organized list of contacts for mailing purposes.
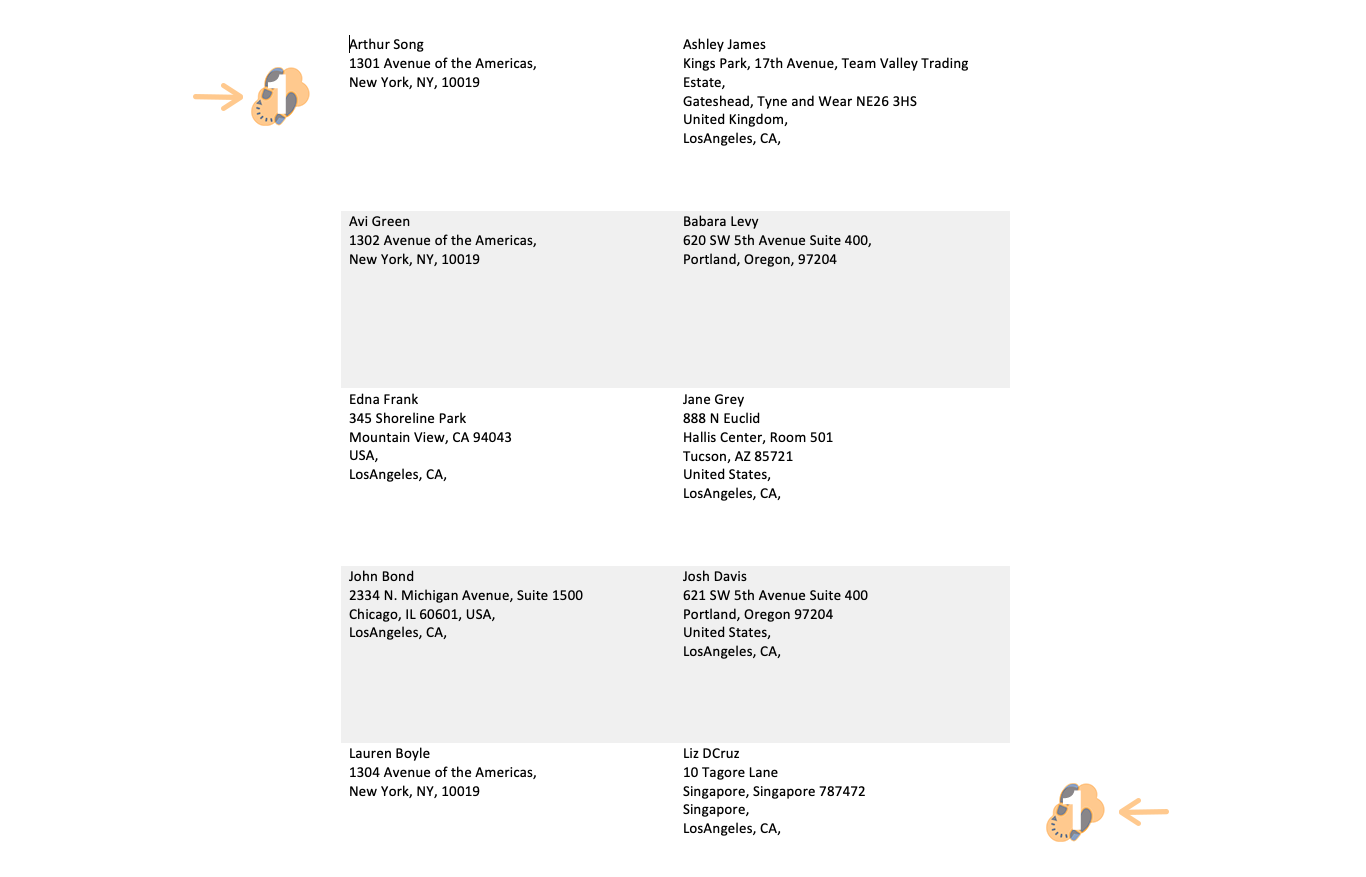
Note: If your output is not correct, check your template to make sure you have the correct merge fields added. Also, make sure you have the field-level security settings to access the data within those fields.
Helping organize and categorize objects, names, and things
There are various use cases for just about any type of label. Let your imagination go wild to see what you can come up with and share with us and the rest of our fellow Mambo users. If you need assistance or would like to automatically add the routine to your Mambo component, feel free to import it directly by downloading it here.
This routine is pre-built to the Contacts object and will include the settings mentioned in this article. If you plan to import it directly just make sure to upload the template provided as that does not get included when the routine is imported.