2.0.3 | 10/1/2023
Step 1: Resource Error | Step 2: Permission Set | Step 3: Define Permissions | Step 4: Manage Assignments | Step 5: Login As Users
Routines Modify Record Data within Your Org
Our Studio makes it simple and easy to configure a set of instructions that allow you to tell Mambo Merge what to do before and after a document is merged. This includes but is not limited to comparing field data between records, making changes to a specific set of records, sending emails to hundreds of clients and even setting up tasks to follow-up with related colleagues. Security could easily be jeopardized and bypassed if Mambo Merge disregarded account profiles and permissions sets before authorizing such actions. That is why specific permissions must be granted in order for any user to create, edit, and delete routines.
Templates can still be updated and managed without the need to change routines by uploading a new version of that document.
Administrator Notice
Exercise caution and ensure that proper due diligence is performed before authorizing permissions to users in Salesforce, as granting inappropriate access can compromise data security and integrity.
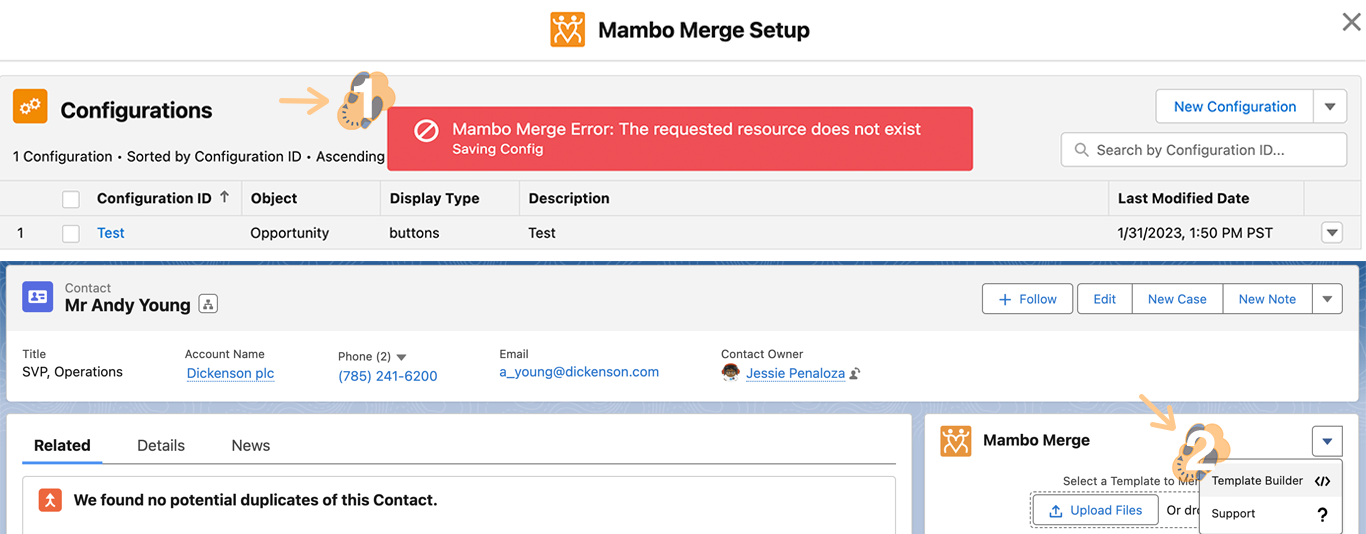
Step 1: Manage Routines – Resource Errors ↵
If you have encountered errors or issues making changes to Mambo Merge routines, follow these simple steps and have your friendly Admin grant the appropriate permissions once they have verified your credentials.
1.1 Errors consist of “warning notifications” as well as not being able to access our “Studio” within a Mambo component.
We adhere to Salesforce security protocols and recommend using permissions sets to assign users to manage routines instead of user profiles that automatically grant access to anyone who falls within that profile.
Step 2: Create A New Permission Set ↵
Let us begin by creating a new permission set, here are the steps to get you started.
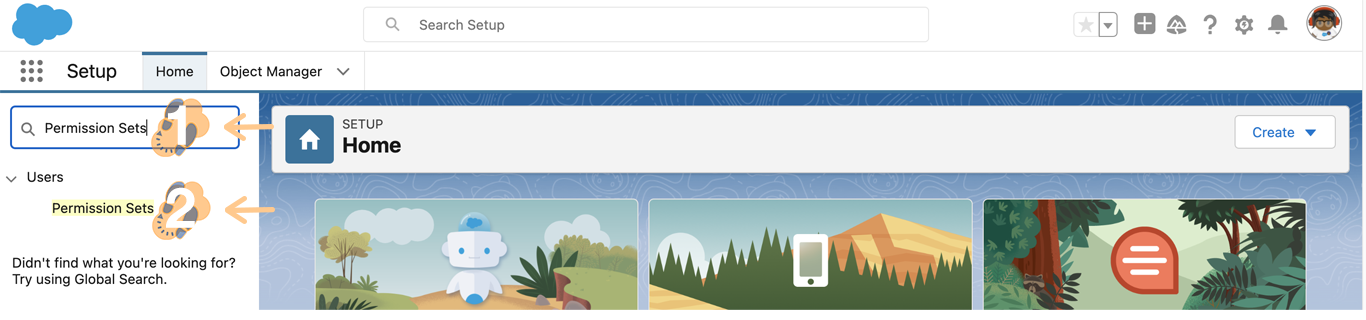
2.1 Head over to your org’s setup “Gear” icon and select “Setup”.

2.2 Within the “Home” tab search “Permissions Sets” and click on its search result.
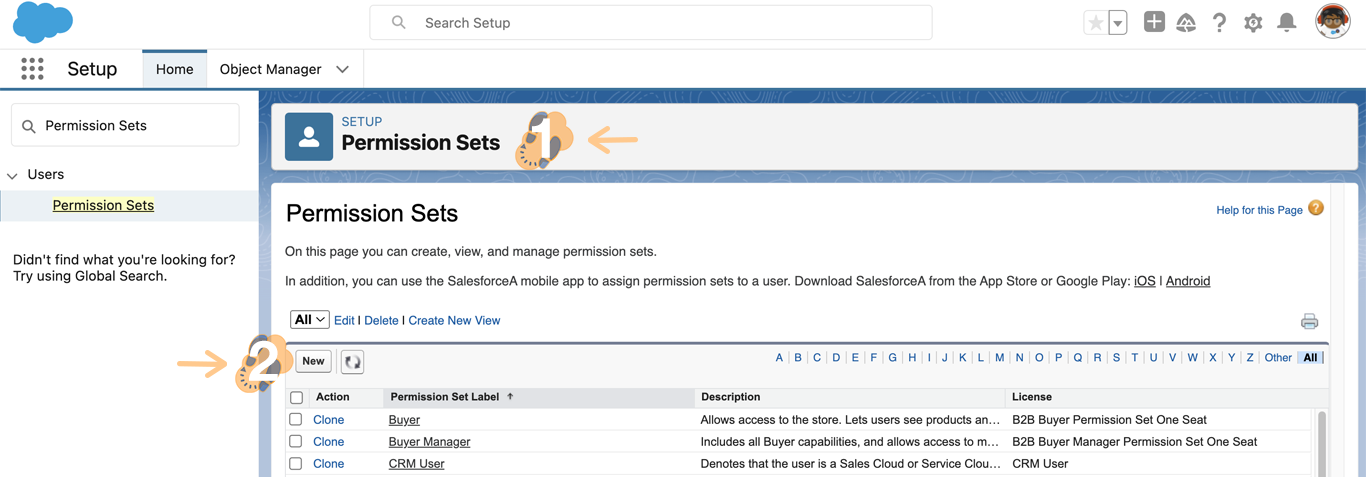
2.3 Create a new Permission set by clicking on the “New” button.
2.4 Create a “Label” for the Permission Set and provide a “description” to include more details. Once ready click on “Save”.
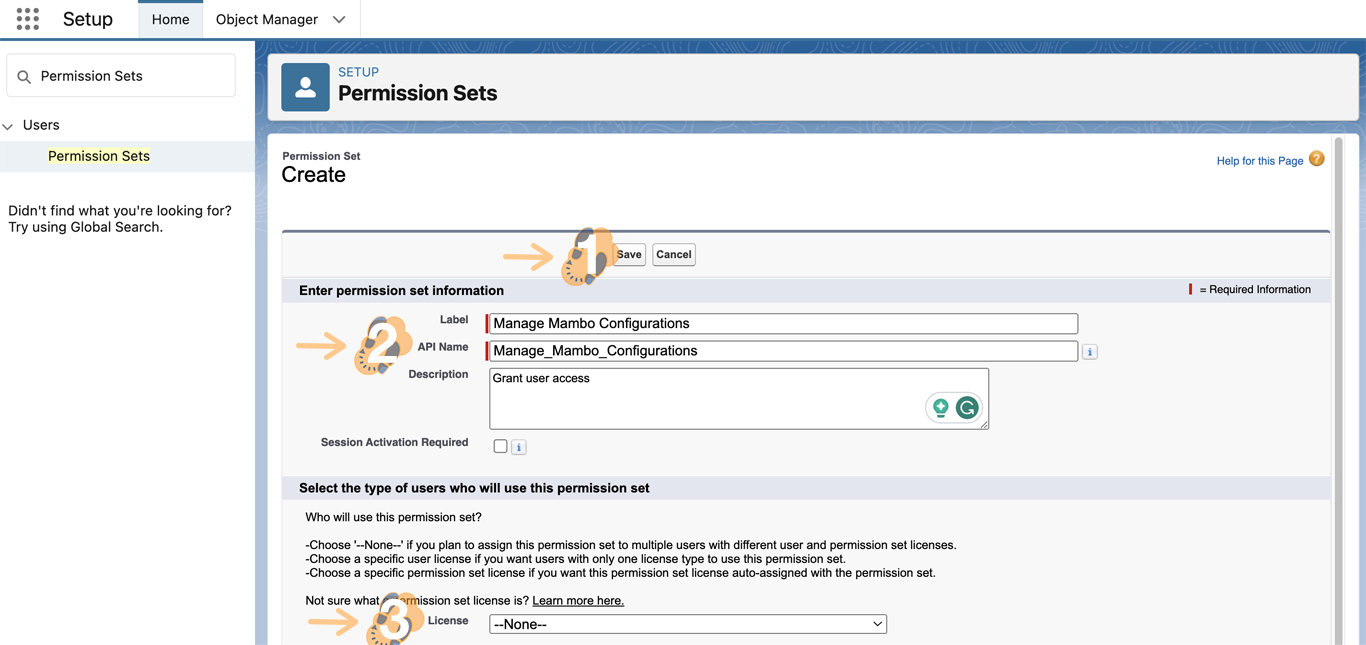
Note: You have the option to define the License type and users who will use this permission set by default or assign them individually. We decided to keep them as None and assign them manually.
Step 3: Define Permissions ↵
Define this permission to allow Mambo users to manage routines within your org. Only assign these permissions to those who need it most.
3.1 Once the permission is created scroll down the page to identify what specific permission you want to include. Click on “System Permissions”.
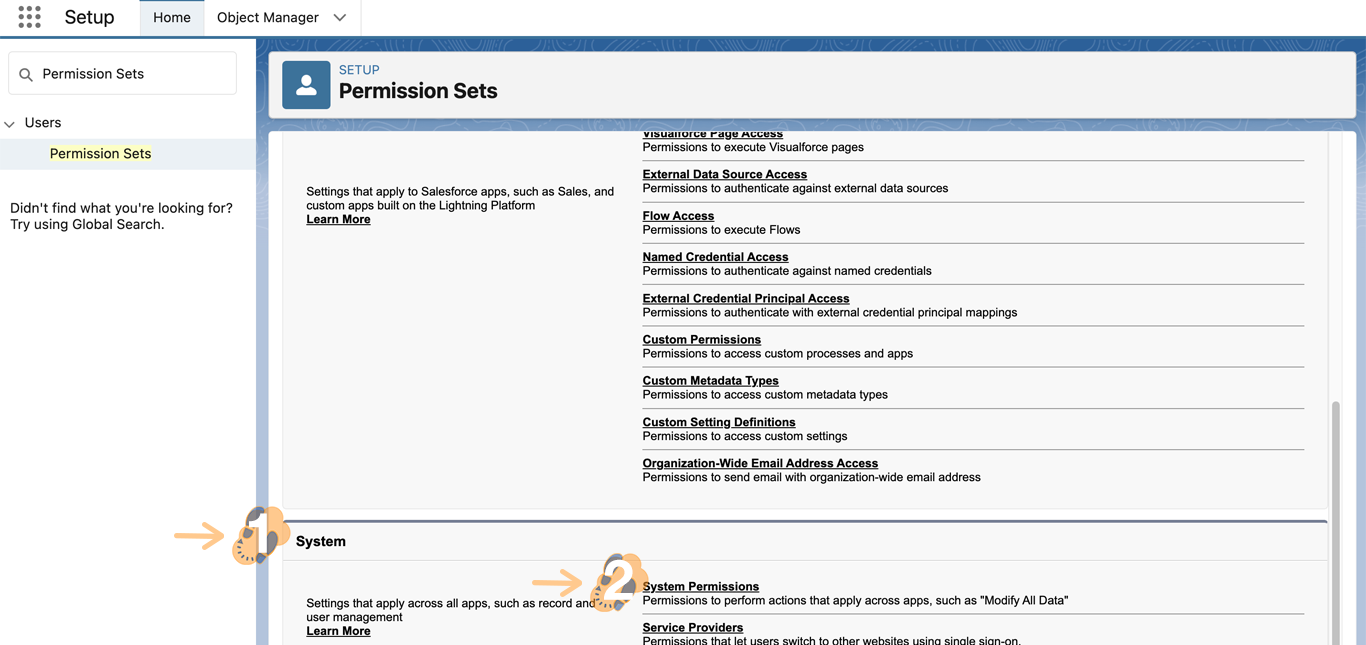
3.2 On the next screen click on “Edit” to begin defining what permissions will be included within this Permission Set.
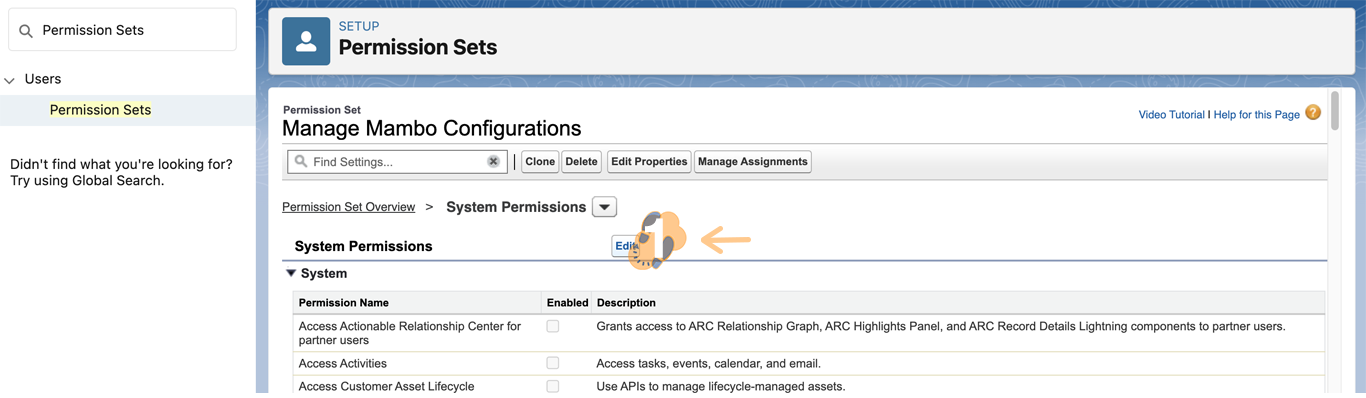
3.3 Start by checking off “API Enabled” and “Author Apex”.
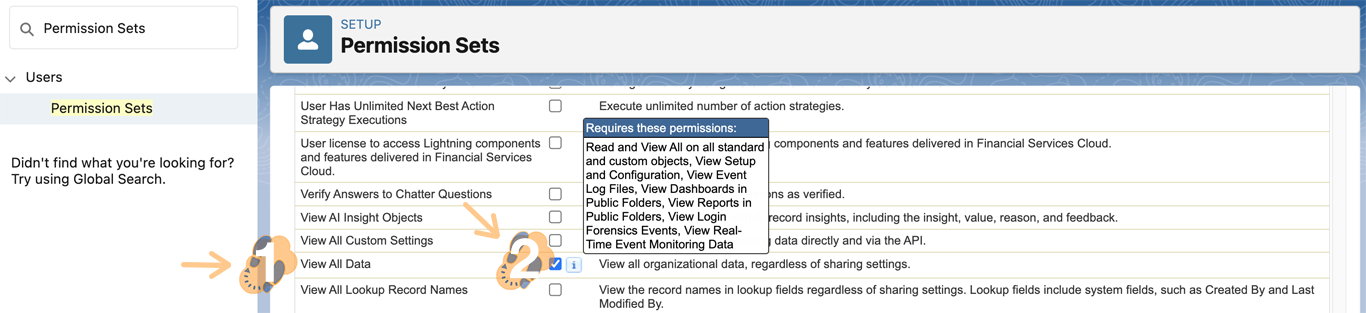
Note: Hover over the info icon to identify what additional permissions will automatically be enabled when checking off certain permissions.
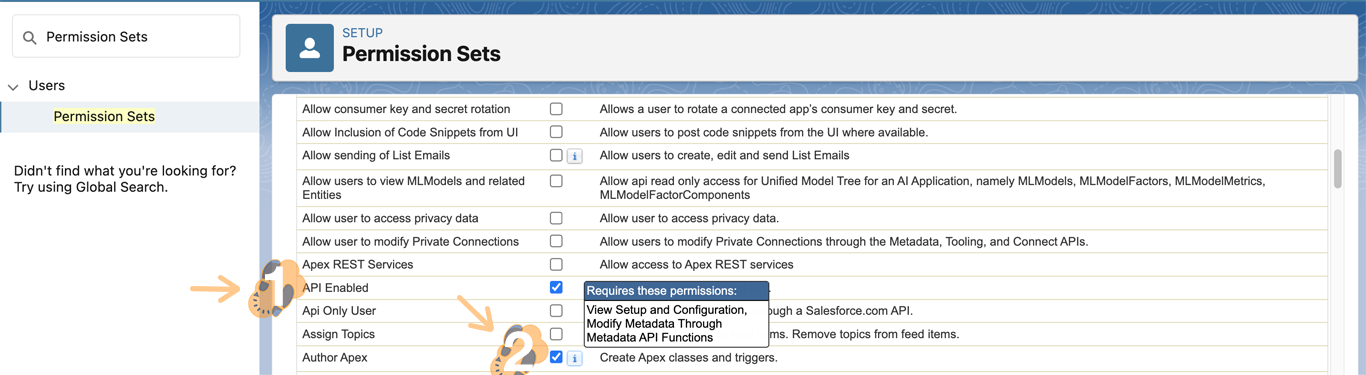
3.4 Select “Customize Application”. Once again, additional permissions will be automatically selected.
3.5 Towards the bottom of the page select “View All Data”.
3.6 Confirm the changes and press the “Save” button.
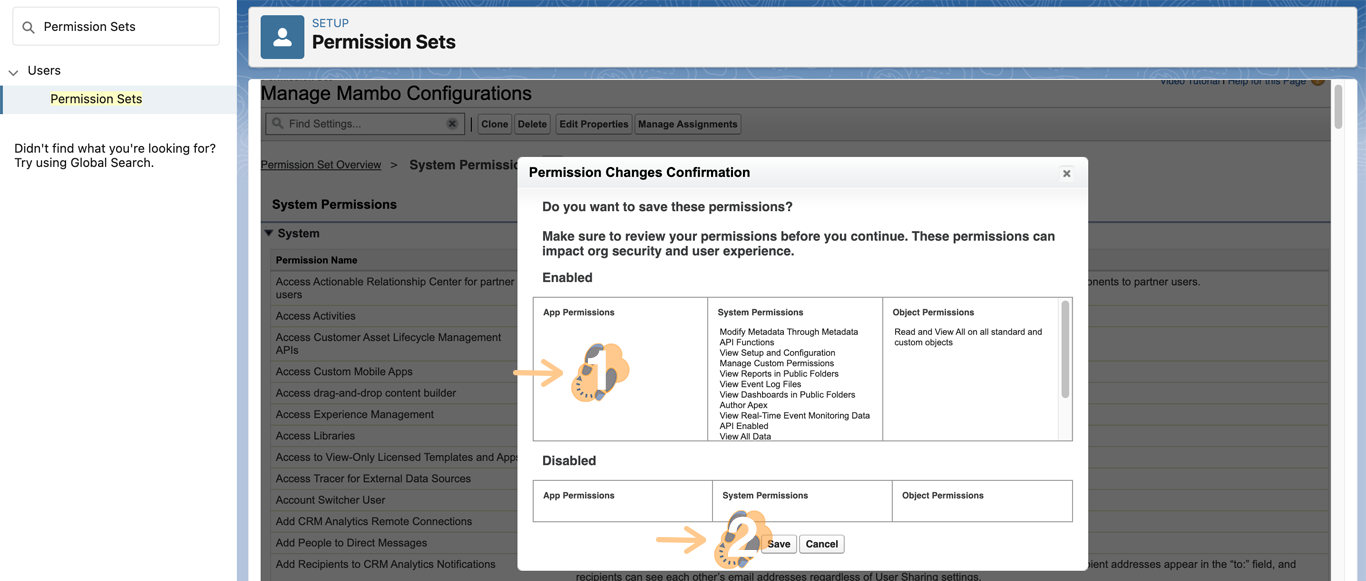
Note: The pop-up may or may not appear. Make sure to head back to the Permission Sets screen to make sure the changes were successfully saved.
Step 4: Manage Assignments ↵
Now that the permissions have been defined we can begin assigning them to those users.
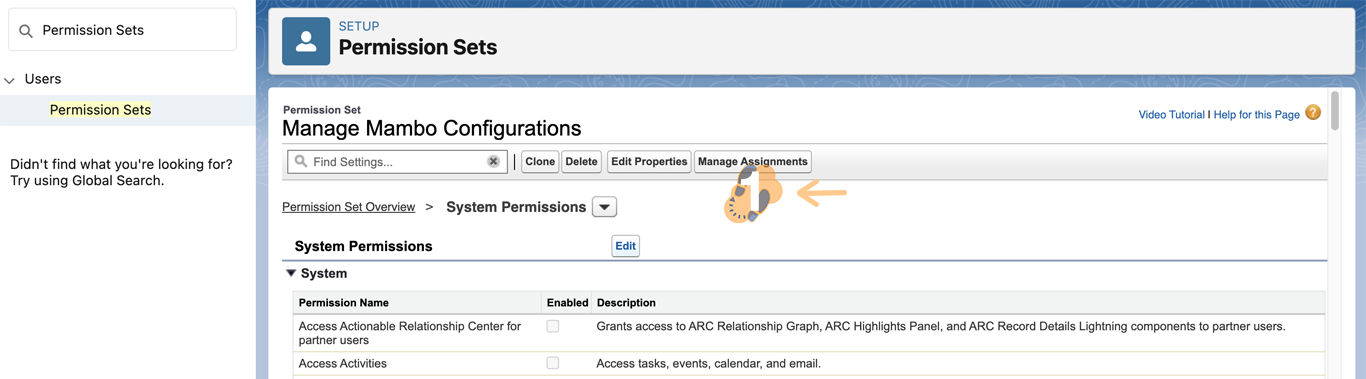
4.1 Head back to the saved Permission Set and click on “Manage Assignments”.
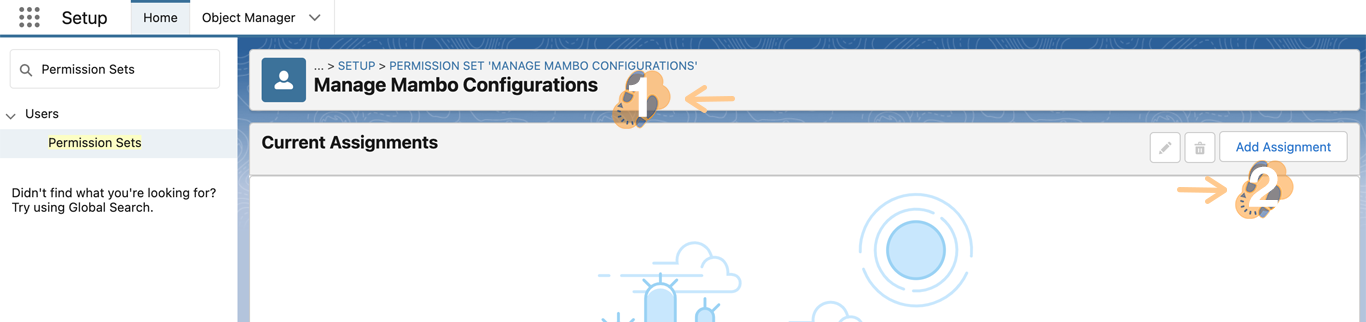
4.2 On this next screen click on “Add Assignment” to define what users will be assigned to this Permission Set.
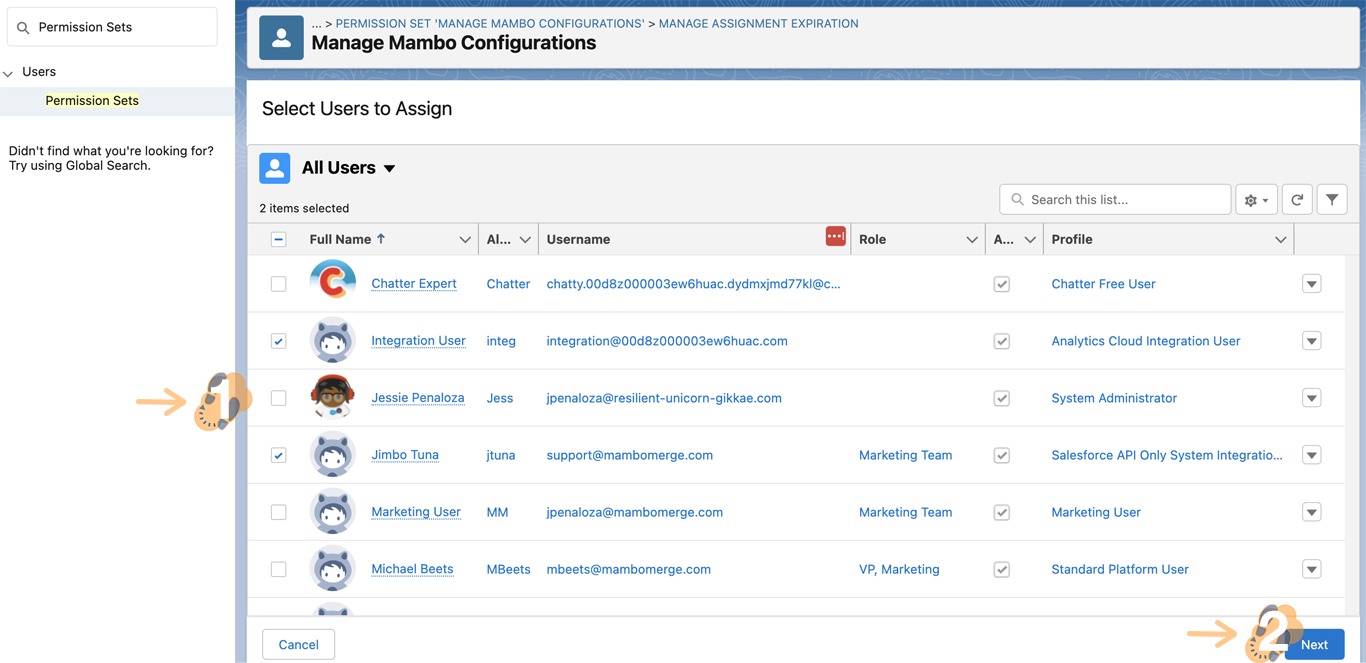
4.3 Select the user(s) to assign this Permission Set and click “Next”.
4.4 On this last screen, you have the option to “set an expiration date” for this permission set. By default, there is none assigned. Once ready, click on “Assign” to save.
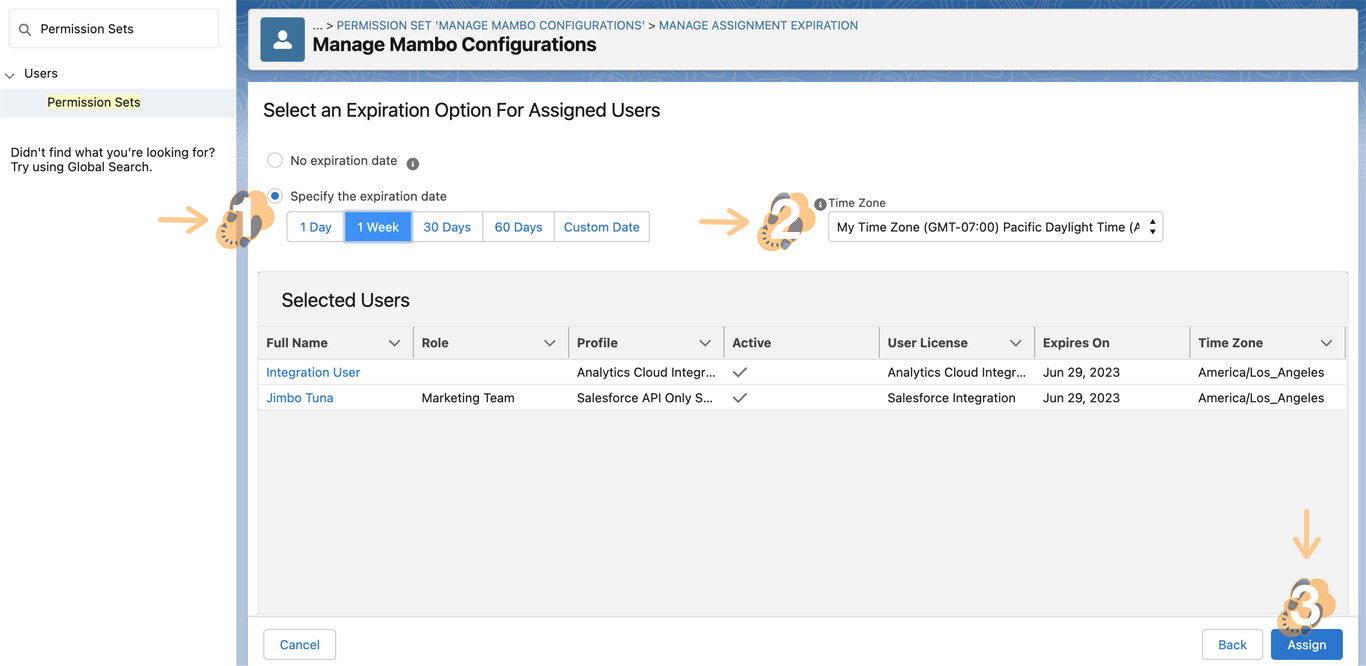
Note: You can always adjust the expiration date by editing the assignment.
4.5 At times you may see “errors” populate after trying to assign a user with this Permission Set. Make sure field-level security or license types aren’t preventing you from assigning to select users.
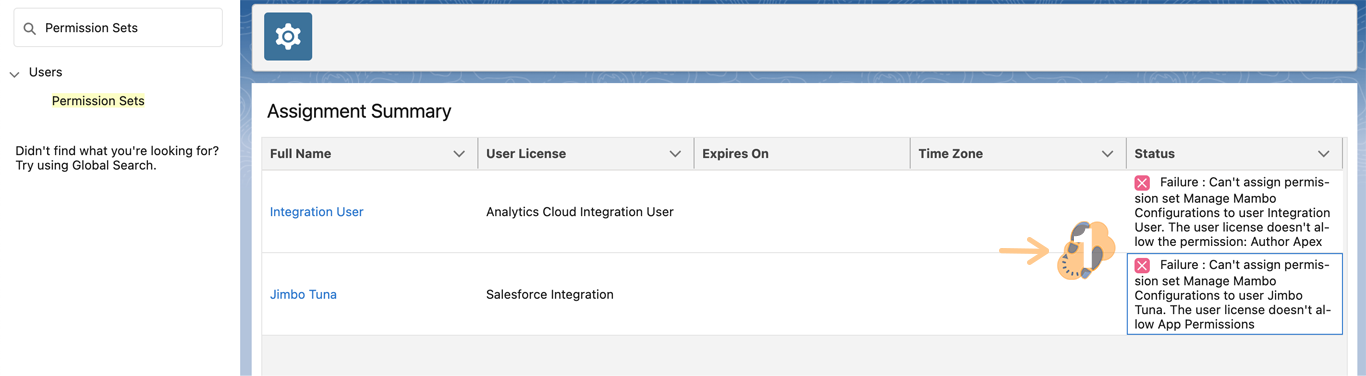
Note: Salesforce authorizes user access based on field-level security or license types to ensure user access does not violate security protocols.
4.6 When successful, the “Current Assignments” window will now list all the users that have been assigned to this permission set.

Note: You can always repeat this step to add new users or make changes to the assignment.
Step 5: Login As User ↵
The last step is to test all the users that have been assigned to the Permission Set. Follow these steps to test each one.
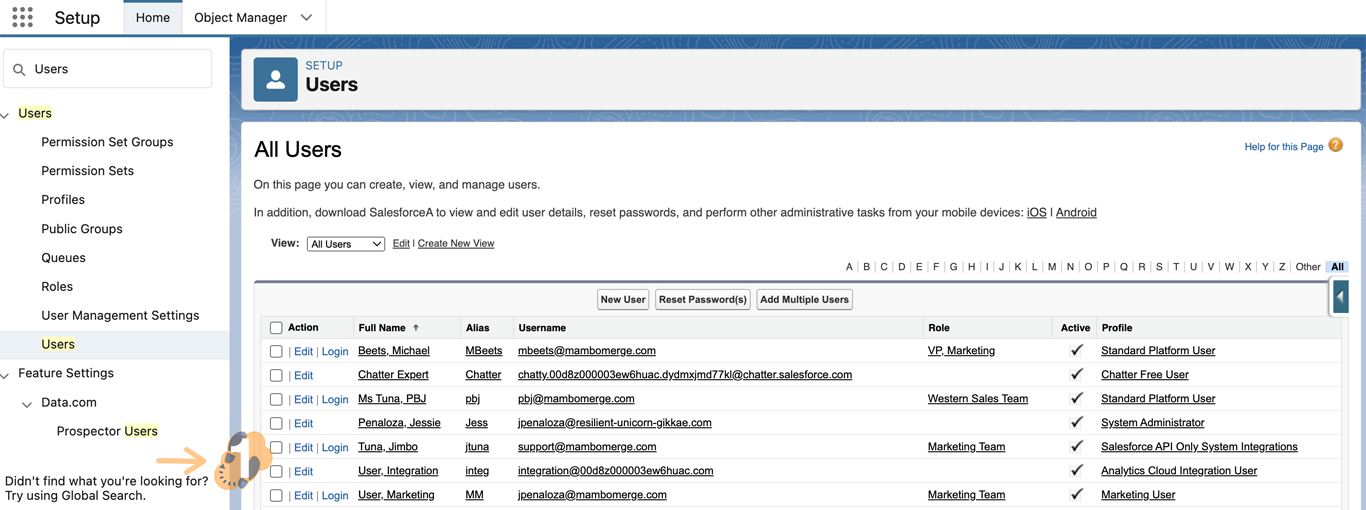
5.1 Start by heading back to the “Home” tab, search “Users”, and click on its search result. Next, click on the “Login” link of an assigned user.
5.2 This will launch a new window with a banner on top letting you know that you are logged in as a selected user.

5.3 Now head over to a “record page” where the user would need to manage routines within a Mambo Merge component.

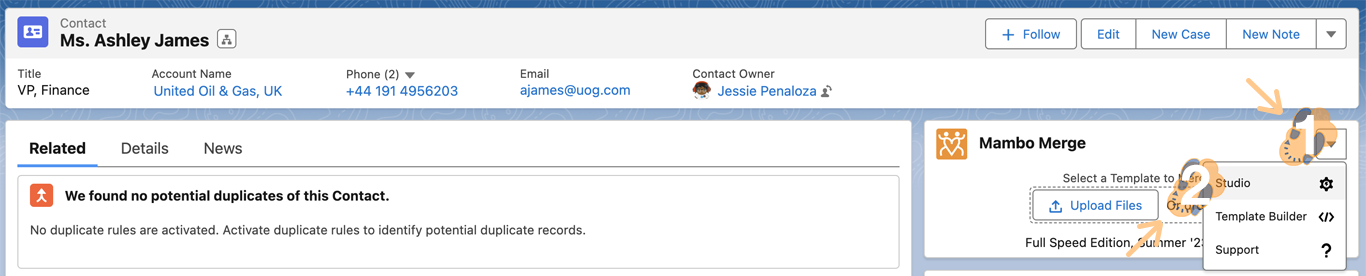
5.4 Click on the arrow and select “Studio” from the dropdown menu.
5.5 Within the Setup menu assigned users should now be able to “create, edit, and delete” routines without any resource errors or restrictions. If you encounter errors refer back to Steps 3 and 4 to ensure all permissions are defined and granted.

Note: Repeat this step for each user who needs to verify their assigned Permission Set.
Assign users the necessary permissions to manage Mambo routines
To comply with Salesforce security protocols, Mambo Merge requires users to have specific permissions to manage their routines.