2.0.3 | 10/1/2023
Step 1: Use Template Builder | Step 2: Use Merge Data | Step 3: Build A Template | Step 4: Test Your Template
Keep The Look and Feel That Suits Your Needs
Creating new templates to merge is fun and simple by adding the necessary fields to retrieve the information that keeps your business moving in the right direction.
Step 1: Use Template Builder To Gather Your Merge Fields ↵
Begin turning documents into templates by using our simple and easy-to-use Template Builder, let’s get started.
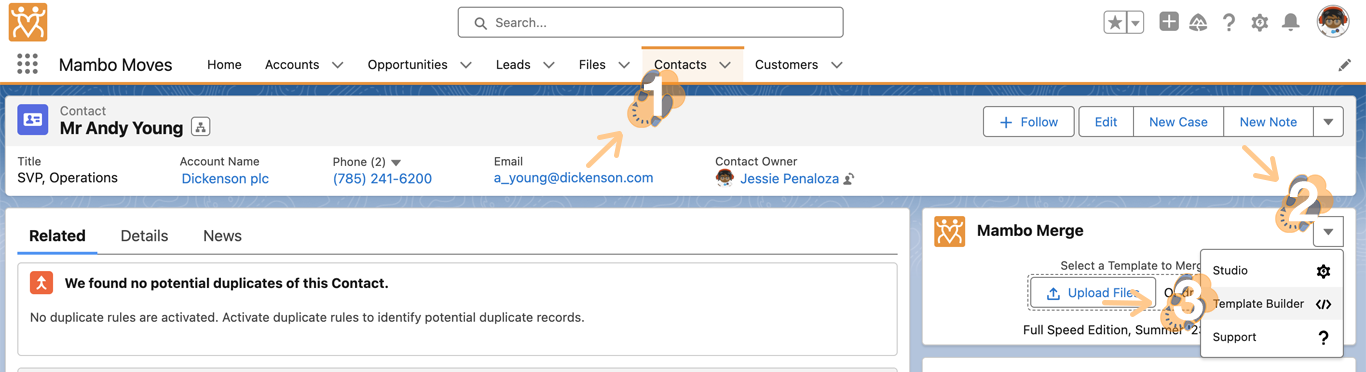
1.1 You’ll need to head over to the component you wish to generate a template from, click on its “Down Arrow”, and select “Template Builder”.
1.2 From here the “Merge Data” screen, similar to our Studio, will allow you to identify each “Merge Field” syntax along with its actual “Value”. Identify available fields and values that this component can access. Select the necessary merge fields and add them to your template to retrieve the values you seek within your merged document.
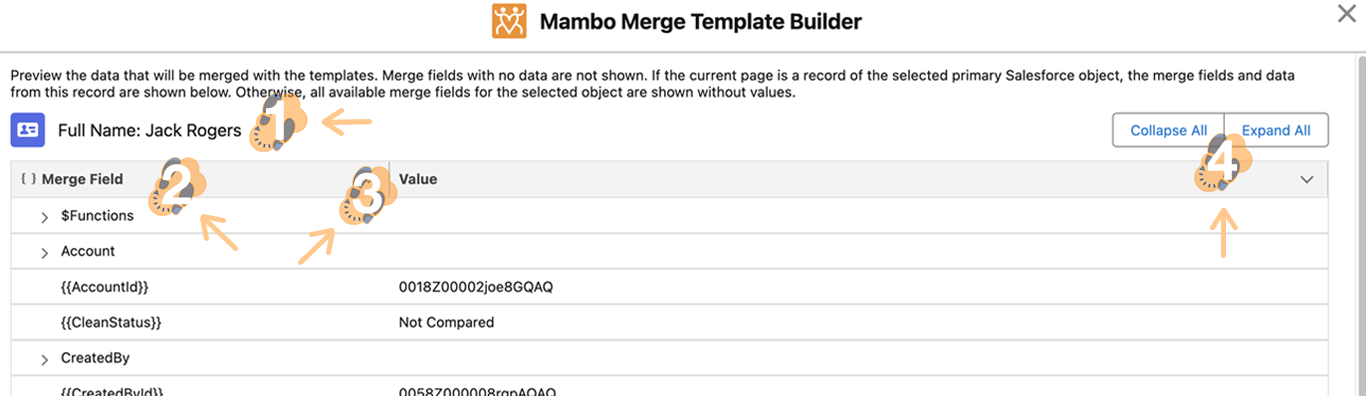
Once you have identified the merge field syntax you’ll need within your document you can begin creating your template.
Step 2: Use Merge Data Within our Studio ↵
The other way of gathering merge fields is by using the Merge Data screen within our Studio.
2.1 Start by going to the component’s object record page you wish to generate documents from to build a routine.
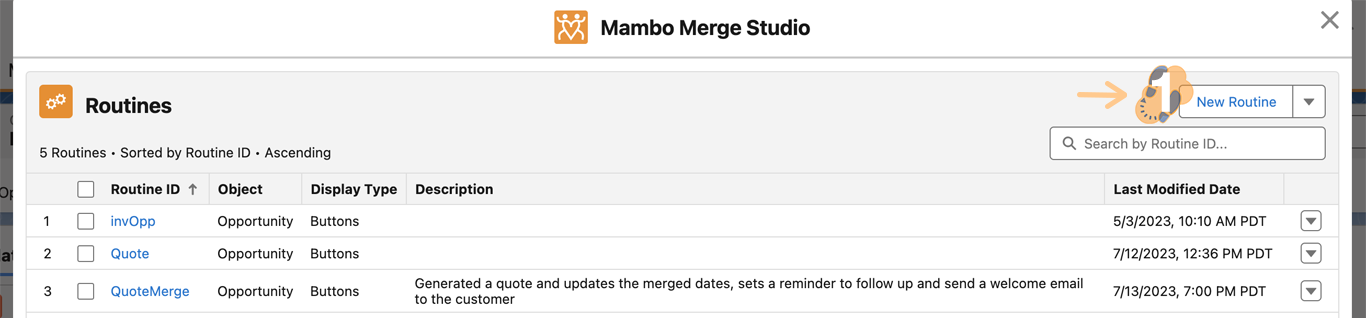
2.2 Within the component go ahead and click on the “Down Arrow” and select “Studio”.

2.3 Click on “New Routine” to launch the wizard.
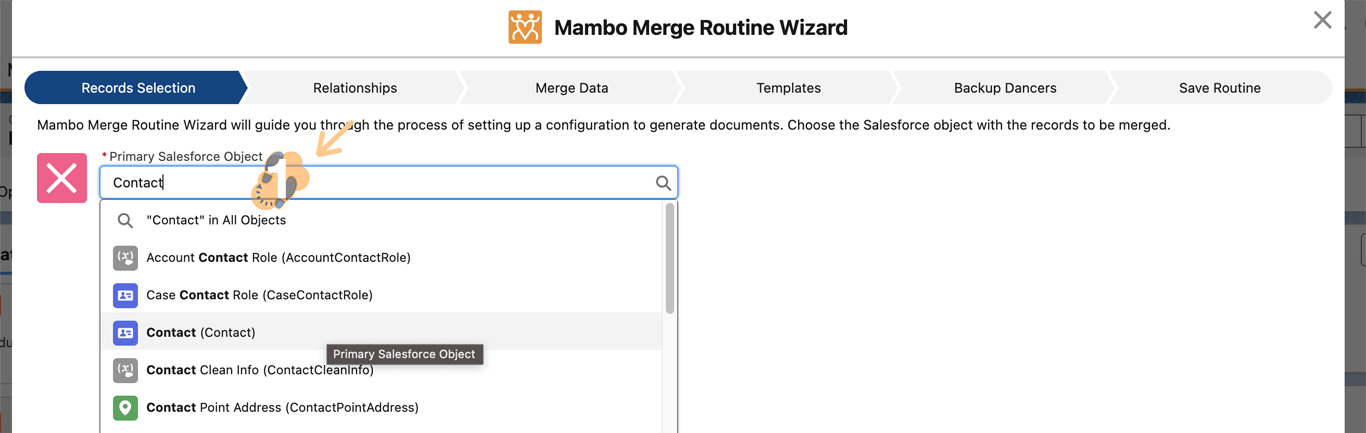
2.4 Select the “Primary Salesforce Object” you want to build the template around.
2.5 Select “Single Record” (under record selection), and click “Next”.
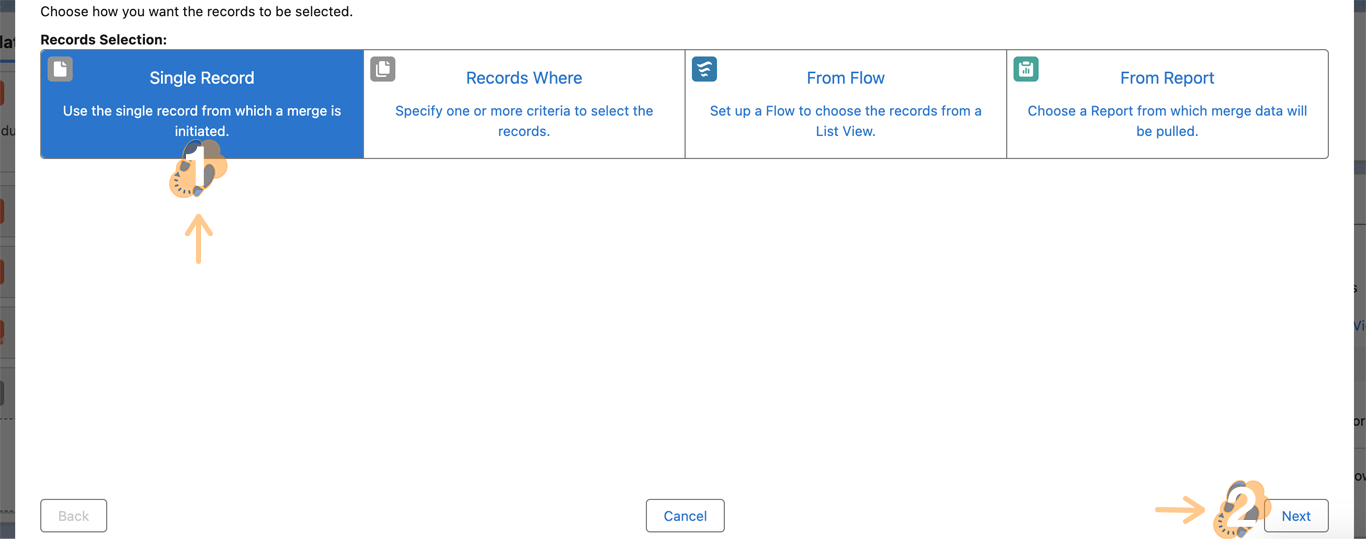
2.6 Skip the “Relationships” section by clicking on “Next”.

2.7 The “Merge Data” screen is where we can begin gathering merge field syntax you’ll need to build a template.
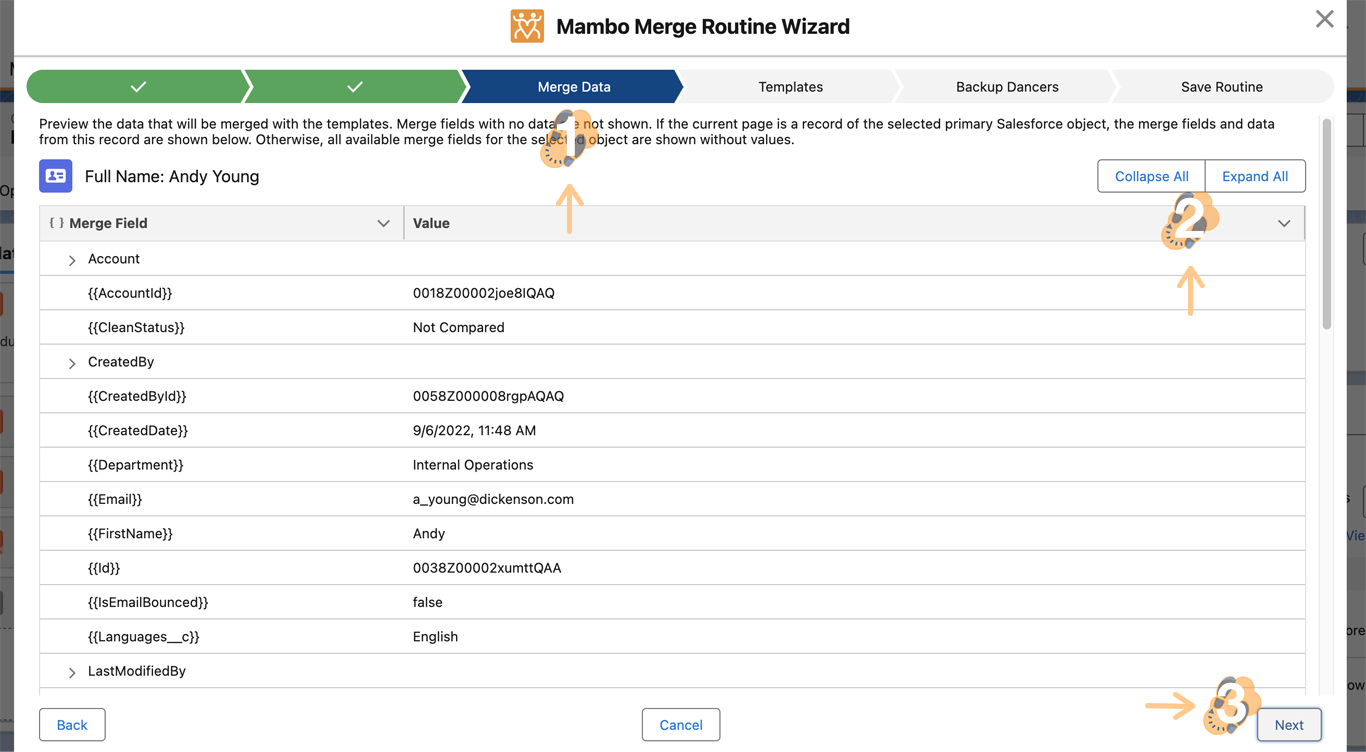
Note: Use the Collapse All and Expand All buttons to traverse available fields and verify merge syntax used will return the data or values you need.
Step 3: Build Your Template ↵
Now that you have identified the merge fields you will need to insert them into your document so you can begin to build out your template.
3.1 We’re creating a basic quote template that pulls information from an opportunity record. The merge syntax, which is surrounded by “double curly brace notation” and includes the merge field name, is used to identify the data you need to merge into that document.
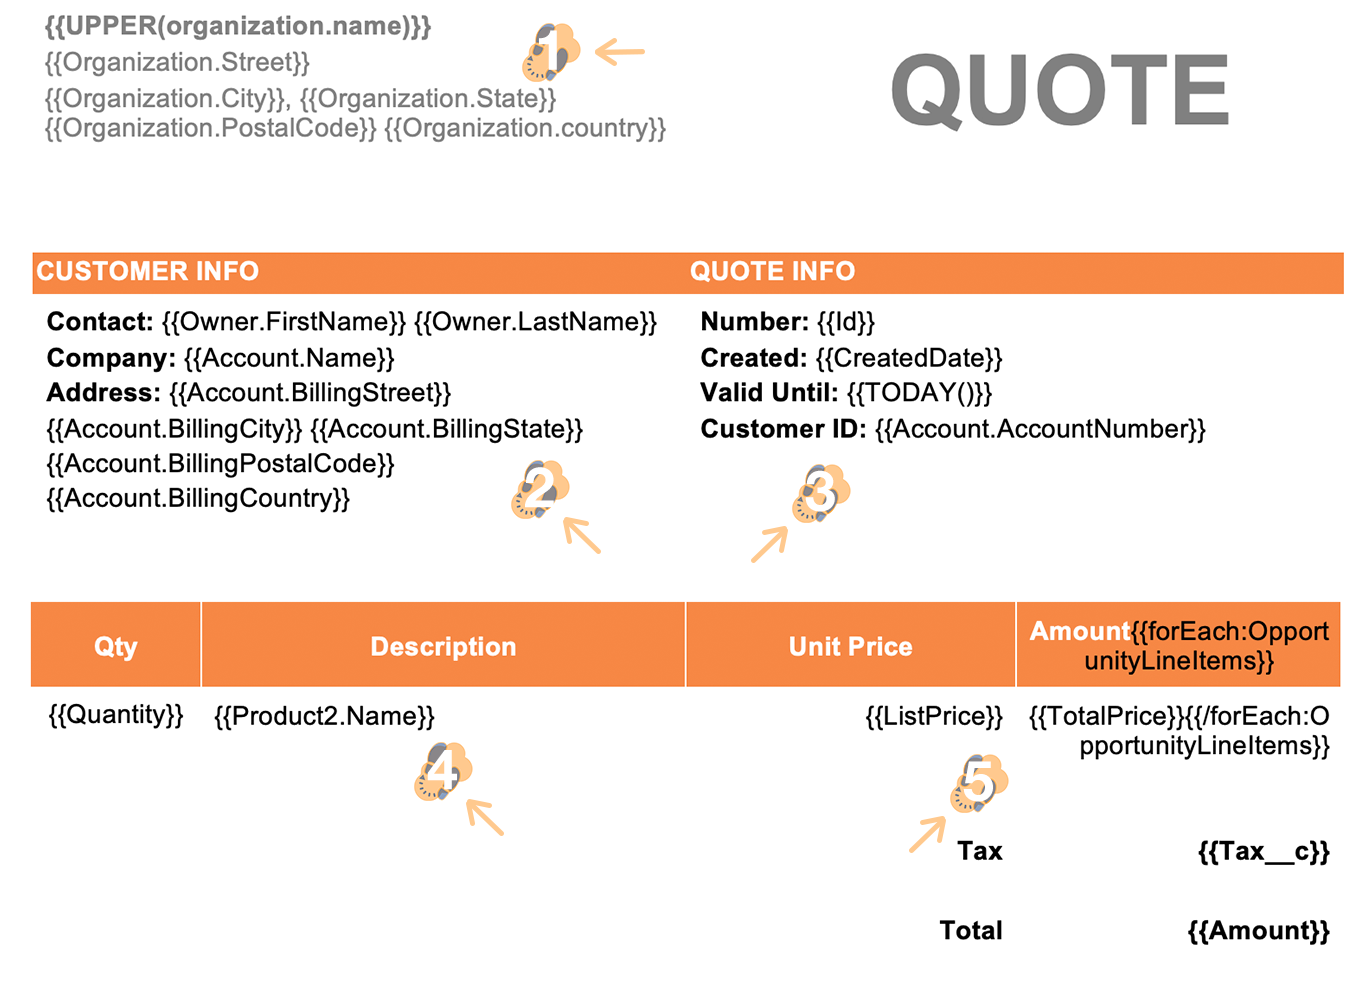
Note: You may have noticed additional merge syntax used such as (TODAY(), UPPER(), and ForEach). They offer additional functionality which can be further explained in our Merge Functions or Glossary articles.
3.2 As you begin to build the template you may notice “red squiggly lines” below each merge field syntax. We recommend you ignore each one as the document editing software will not recognize the merge field syntax.
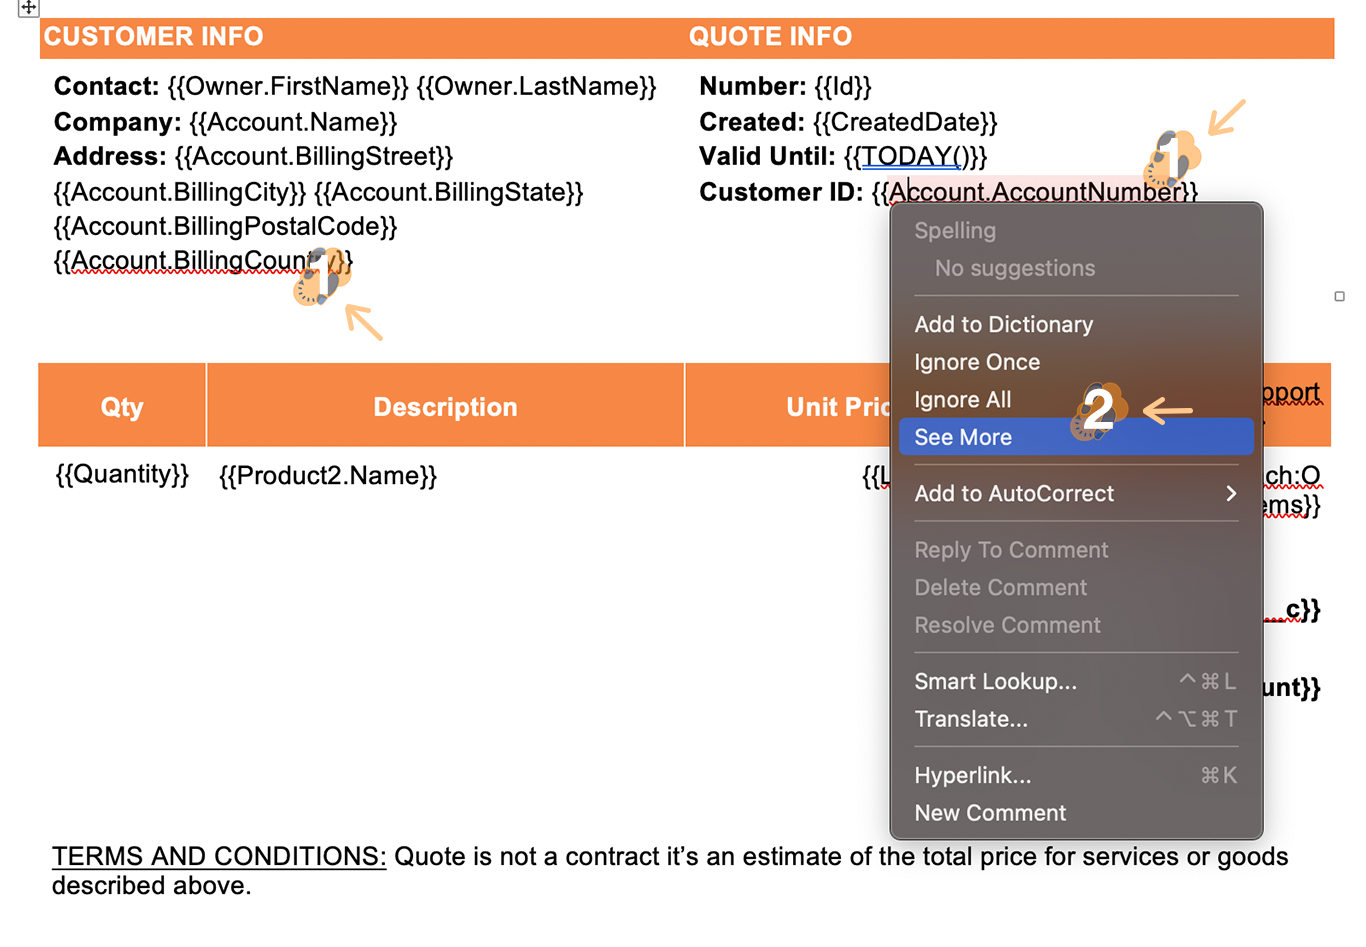
Note: Removing these errors will ensure no issues occur while testing your document and merging within a component.
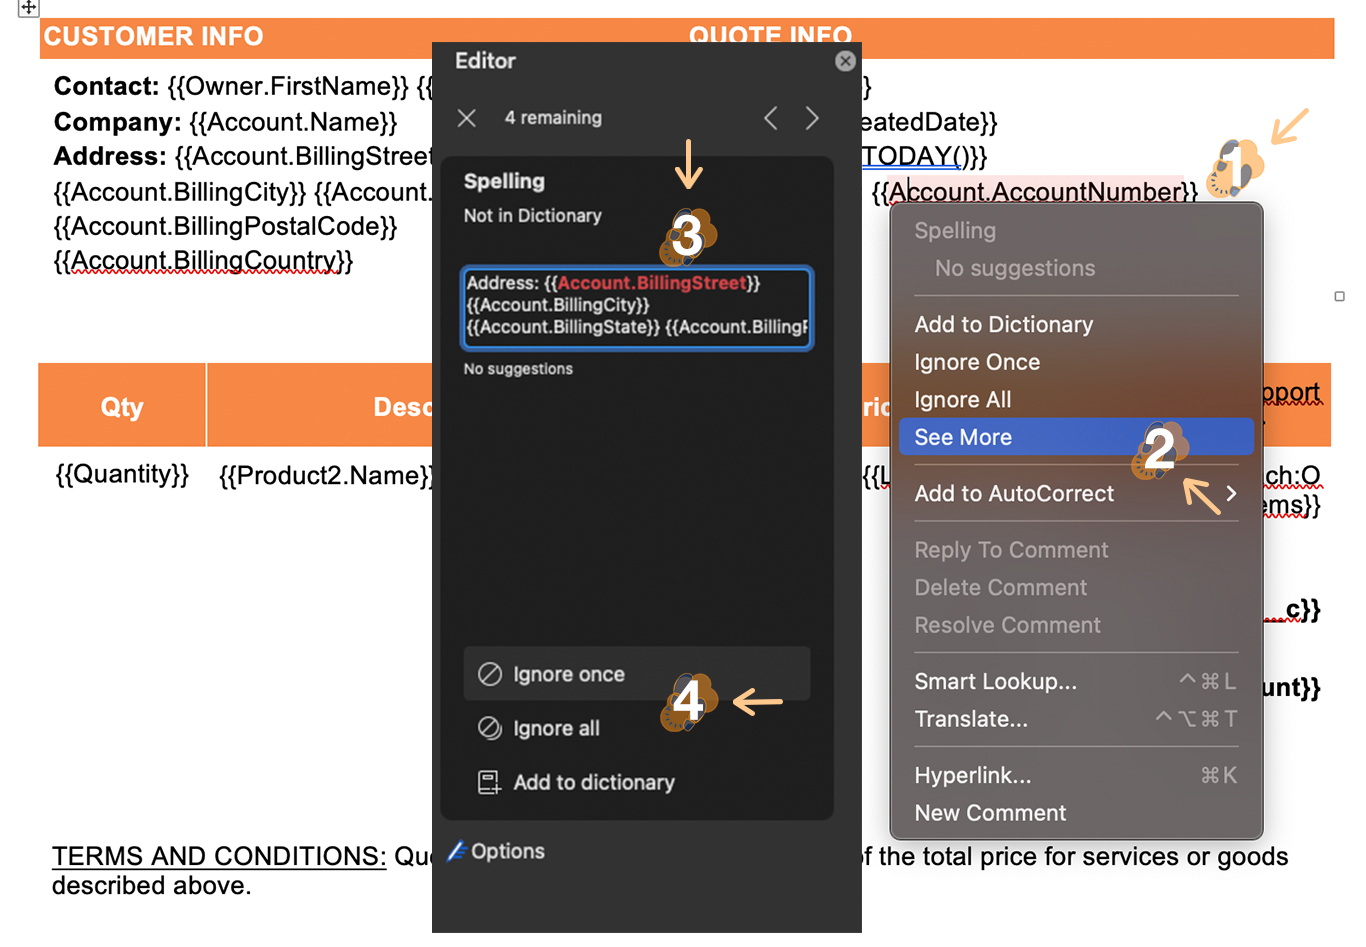
3.3 Simply highlight, right-click, and “Ignore All” for individual instances or “See More” to have the document remove all errors.
Note: Once you have added all the merge syntax you need, simply format the layout based on the type of document you plan to generate. In our example, we kept things simple and added a color background along with some tables to keep data organized and separated within each section.
Step 4: Test Your Template ↵
Testing the template before adding it to a routine can greatly help reduce the back-and-forth changes. Test your template and adjust it as you see fit
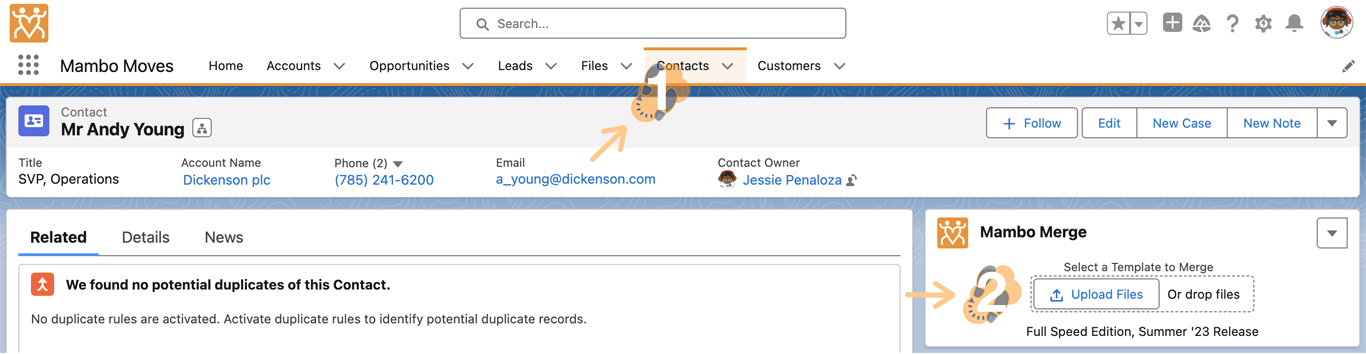
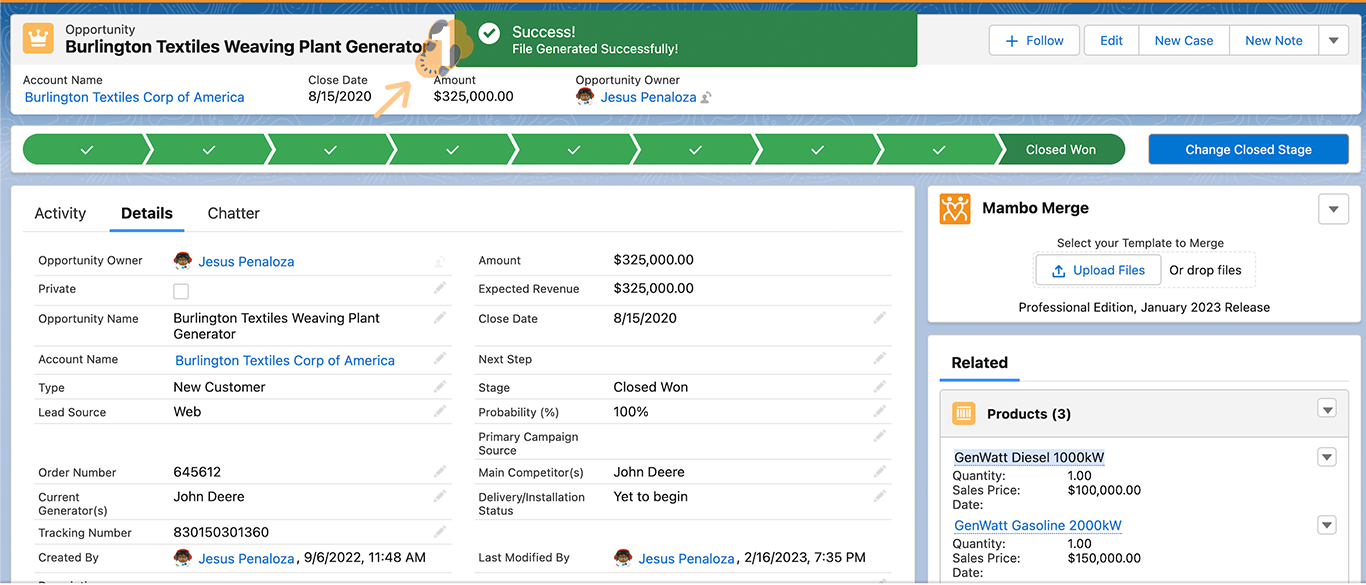
4.1 Head over to a component and simply “Drag and Drop” the file within the component it was built for to test.

4.2 The merged document will then automatically download to your computer and notify you if it was successful. Proceed to check the document to make sure the correct data was merged.
You can always repeat this process to refine and ensure the correct data is merged each and every time.
And… Just Like That!
Each document converted to a template can be organized and updated within your FILES tab. Finding a way to structure all your documents after they are created will help maintain them 3,6,9,12 months down the line.