2.1.0 | 11/15/2023
Step 1: Prerequisites | Step 2: What Is Template Builder | Step 3: How To Use Template Builder | Step 4: Creating A Template
Create Templates And Transform Them Into Meaningful Documents
Structuring the way you want your documents to look and feel after merging the Salesforce data within your org should be simple and it is with Mambo Merge. Sit back, relax, and enjoy the journey as we take you through the tools to make that happen.
Step 1: Prerequisites ↵
Before diving in make sure to complete the following checklist.
1.1 Install a “Mambo Component” within the Object page you plan to merge documents.
Note: We recommend to complete the list above before you proceed.
Step 2: What Is Template Builder ↵
To create documents a user must build a Template that outlines a document’s layout and includes the Merge Fields required to identify what data to merge within a Salesforce org.
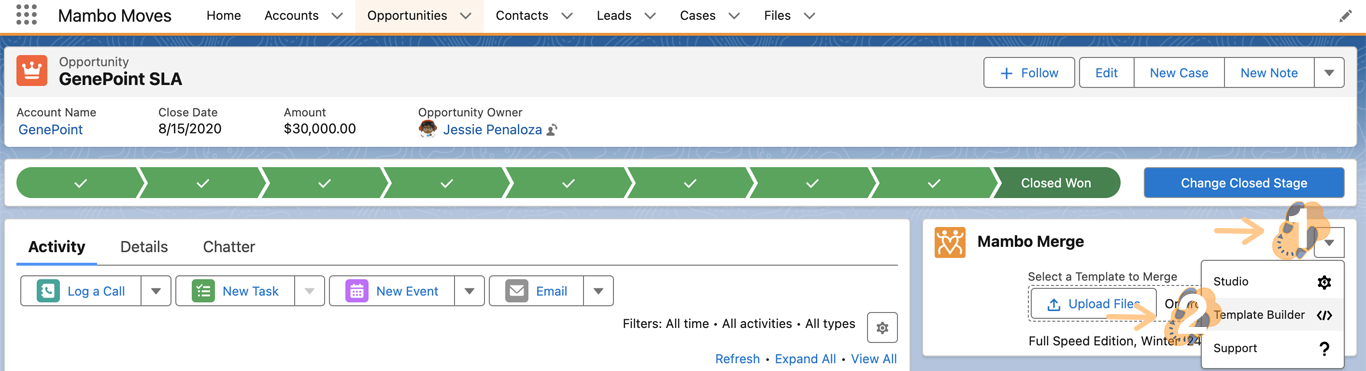
2.1 Head over to where you have your “Mambo Component” installed.
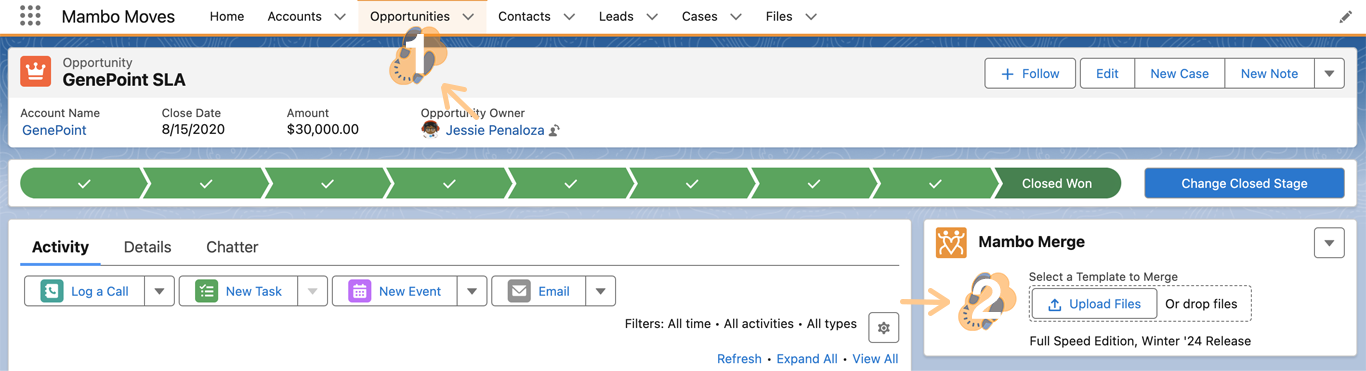
2.2 Click on “The Down Arrow” and select “Template Builder” from the dropdown.
2.3 Here our “Template Builder” screen will launch and be ready to use. At first glance, you will notice a lot of information that may not make sense, don’t worry will break it down.
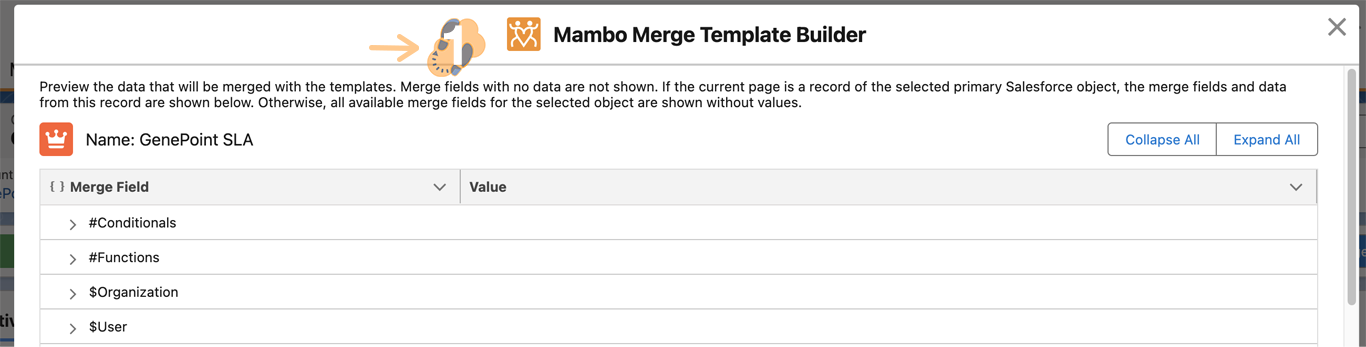
The “Template Builder” is intended to consolidate all data available within the “Current Object” and can be used within Templates right out of the box. You will use this, almost all the time, to develop or revise templates you plan to merge.
Note: Typos or syntax will generate errors which may take a lot of time and resources to troubleshoot. Also, the user(s) initiating the merge must have access to the merge field and data they wish to merge.
2.4 From left to right you have “Record Name,” “Merge Field,” and “Value.” On the right, you can expand and collapse to navigate each merge field.
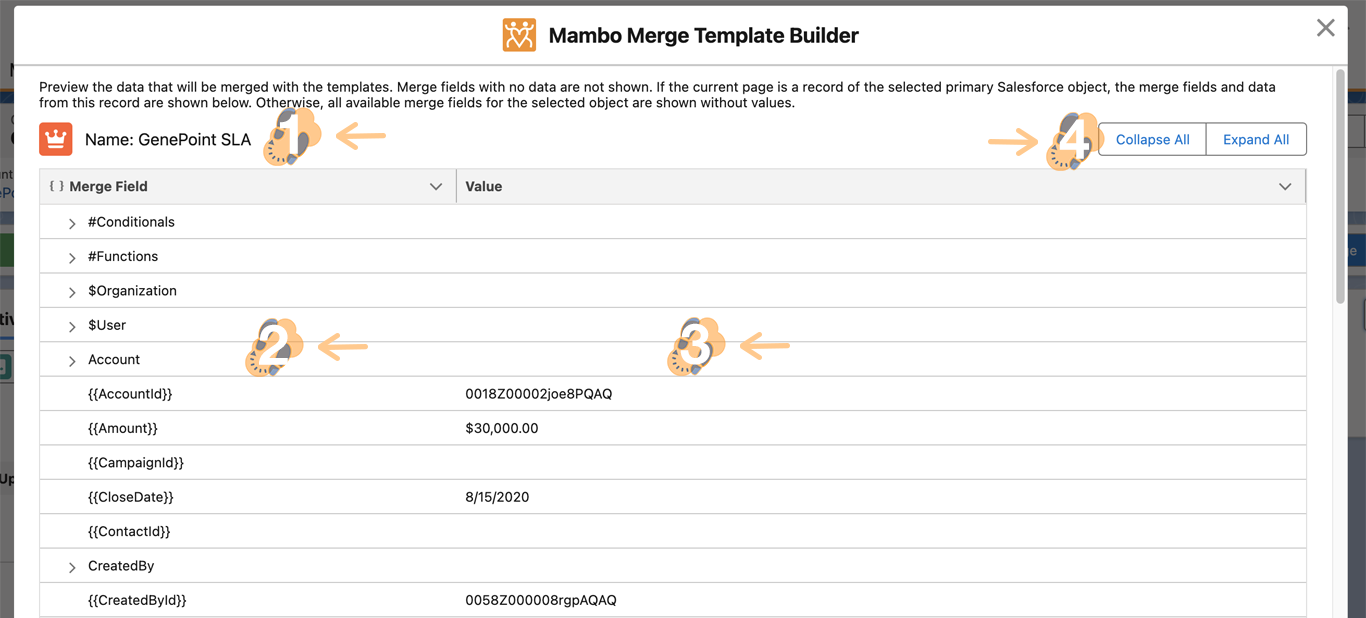
- Record Name: Displays the name of the current record along with all the merge fields and values available to use within a template.
- Merge Field: Displays the syntax to use within templates to tell Mambo Merge what values to invoke for each merge.
- Value: Displays the data stored within a merge field. Used to identify the merge fields to use within a template.
- Collapse/Expand: Each merge field may have layers to traverse before reaching the appropriate syntax to use within a template. This helps you quickly jump between layered merged fields.
2.5 From top to bottom, we have "#Conditionals" This syntax is used within a template to evaluate merge field values to display additional information only if the condition is met.
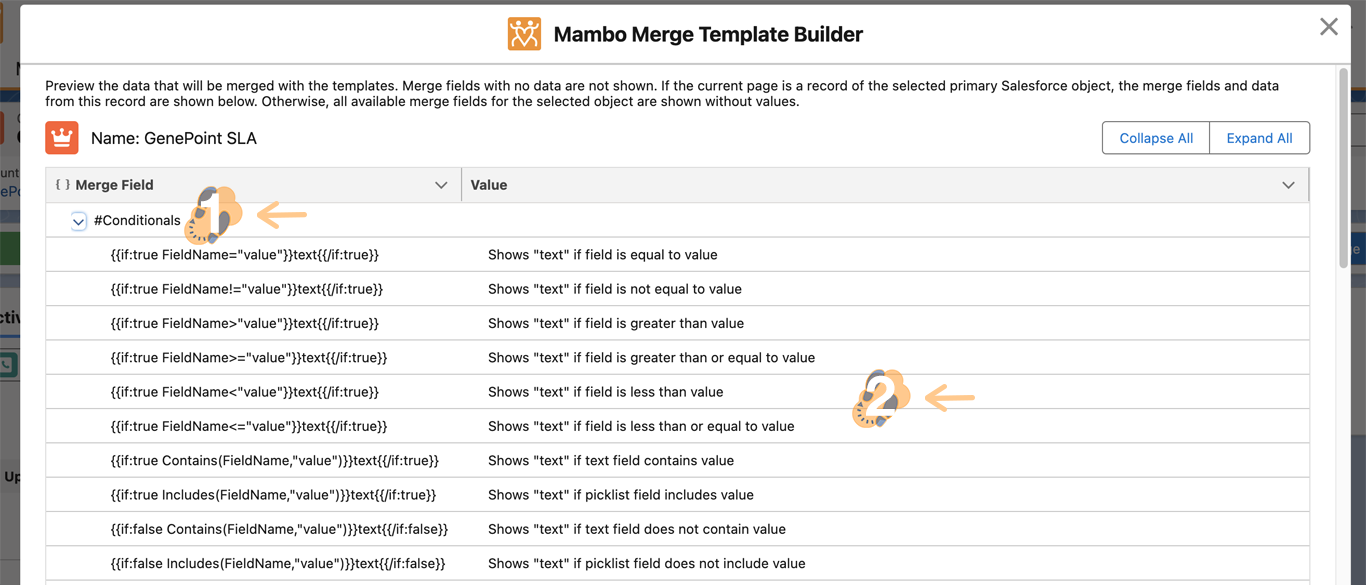
Each one consists of a starting and closing syntax along with the actual “Value” stored.
Note: A great example would be including a (thank you blurb) for new customers versus returning customers. Adding a personal touch to each opportunity opened or closed.
2.6 Next up is a series of “Merge Functions” which help automate essential tasks within your templates. These include but are not limited to adding images, setting time stamps, or formatting text.
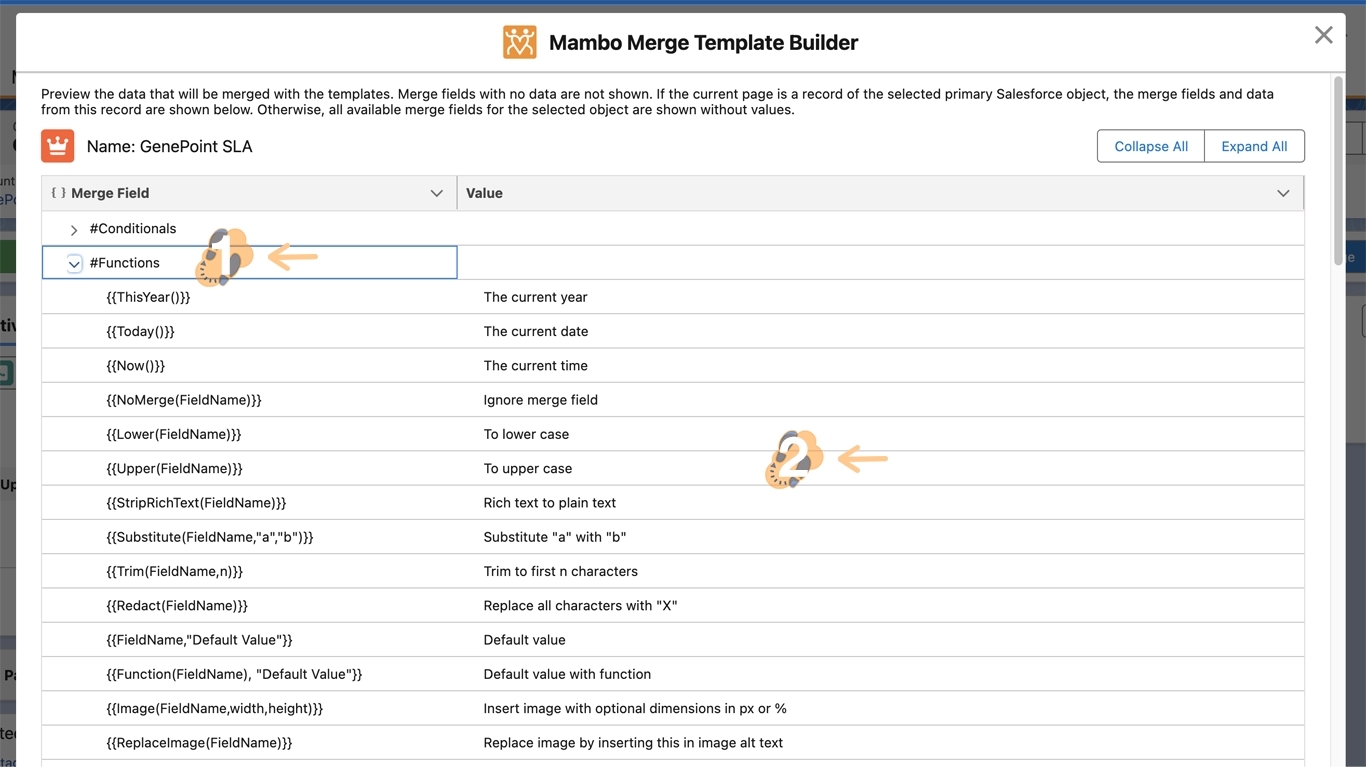
Note: We continue to add more merge functions with each new release.
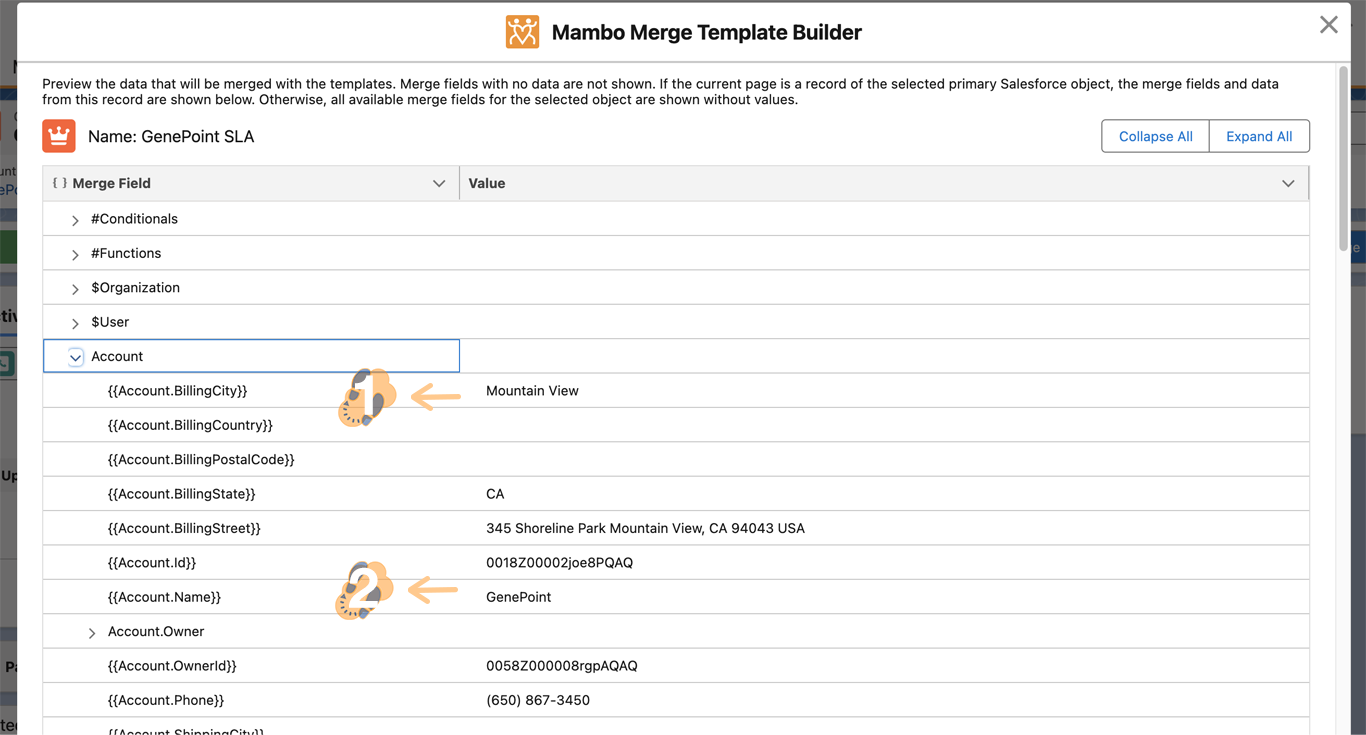
2.7 A series of hand-picked merge fields are automatically available to merge based on the object you have a component installed. Within the opportunities records some of the “Account” fields along with the “Contact Roles” and “Opportunity Line Items” are included.
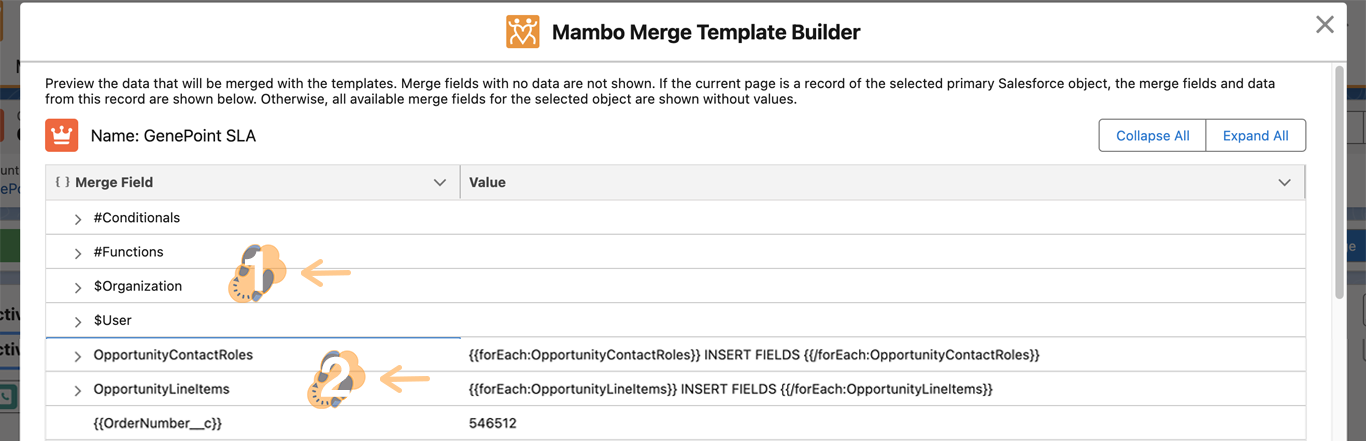
- $Organization: A series of fields to identify the org
- $User: Fields that identify the user invoking a merge
- Referenced Object: A series of hand-picked merge fields are automatically available to merge based on the object you have a component installed
- Reference Related Lists: A series of hand-picked related lists are automatically available to merge based on the object you have a component installed. These lists have a special type of syntax to use within documents and look within each line item. Similar to Conditionals they have a start and closing merge syntax.
Note: If you cannot find a Merge Field or Related List that appears on your object but is not identified by Mambo Merge. You will need to build Relationships within a Routine to tell Mambo Merge where the data you seek is stored. This is included in our Full Speed (paid) edition.
Step 3: How To Use Template Builder ↵
Now that you have a better understanding of what our builder is all about we can proceed to break down some of the ways to use it and get the information you seek.
3.1 Here are things to consider when you start to use the builder.
- Make sure each Merge Field you plan to use within a template has data on it. Otherwise, the builder may not identify it within the screen.
- You are only previewing the current record and object within the builder. If you cannot find the merge fields you are looking for switch to another record and try once more.
- Merge Functions and Conditionals are not required to be used but help automate additional tasks within each template. Use them wisely.
- Each Merge Field needs to be added within a template as it appears on the builder. Any syntax or typos may generate errors which can take additional time to troubleshoot. Always double-check the syntax of each merge field.
- You may need to use Relationships to access additional merge fields not found by default within the builder. This is a discussion for another article and can be found on our support page.
Step 4: Creating A Template ↵
Now we take what we’ve learned and apply it directly. Let us proceed to show you how to use the builder to put together a template.
4.1 Based on the type of document you want to create you will need to use your preferred editor. In our case will keep things simple and use Google Docs to start.

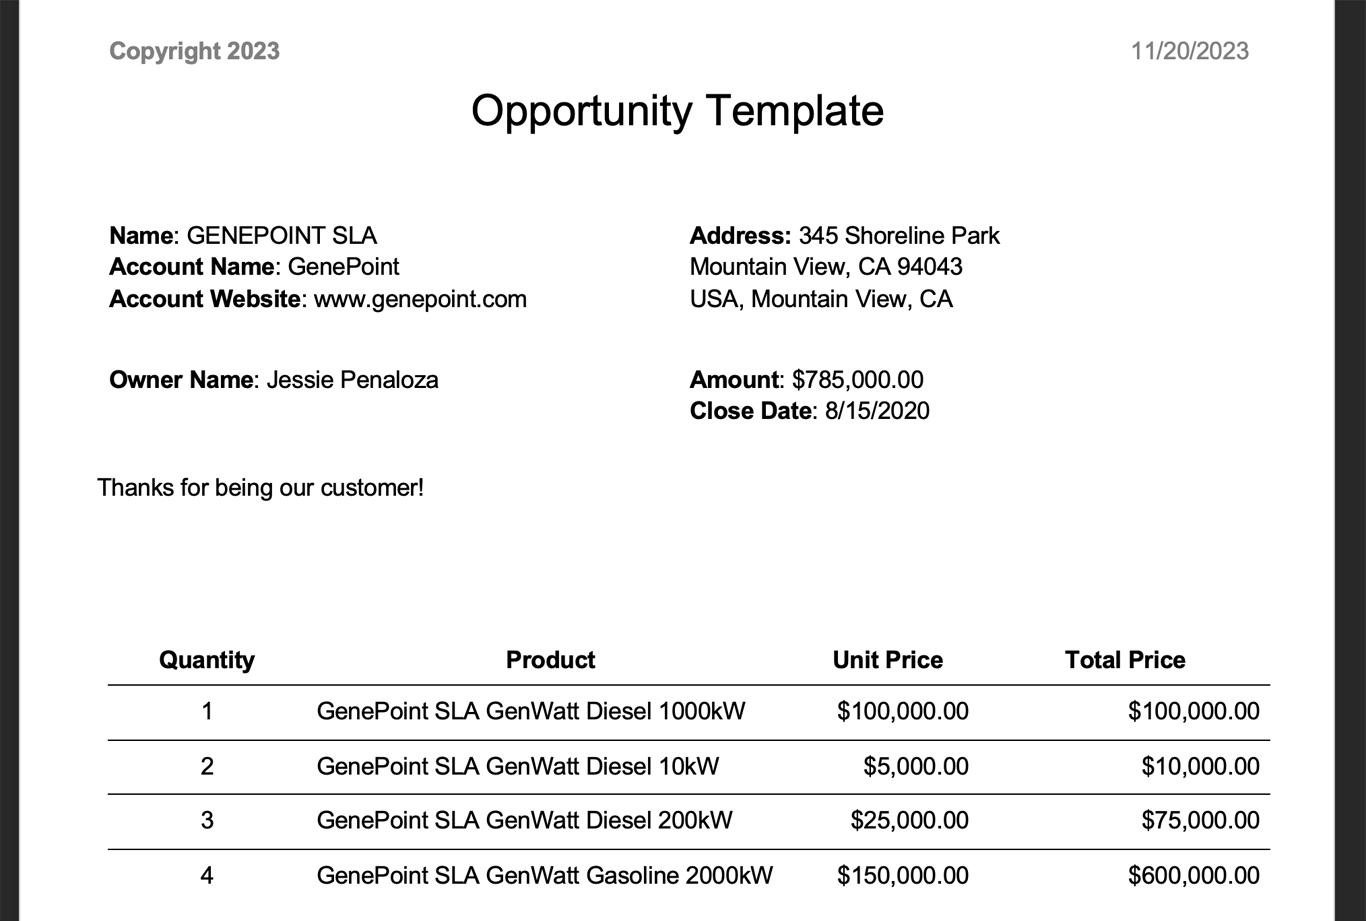
4.2 Simply traverse the builder and locate the merge fields you want to insert and organize your template’s look and feel. In this example, we are retrieving basic information within an opportunity record.
4.3 Will include some merge functions to adjust the “Name” and “Closed Date” of the opportunity. Next, will make sure to display the line items of the opportunity in a table format. Using the “forEach” loop we can traverse each line item and have Mambo Merge generate a new row with each new set of values.
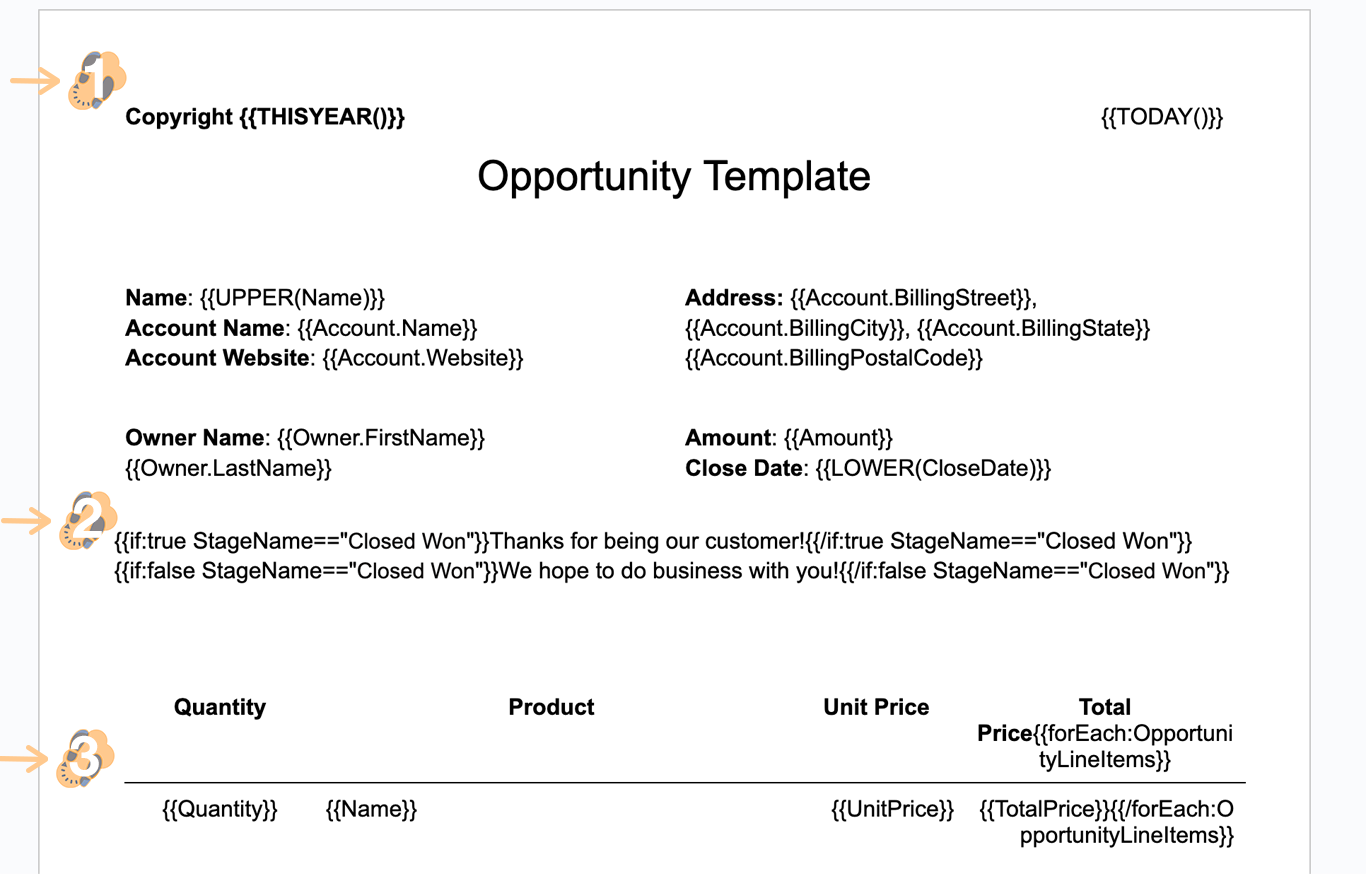
4.5 Finish things off by adding some time stamps on the header.
4.6 Once the template is ready proceed to “Upload” or “Drag” into the Mambo Component. This will initiate Mambo Merge to take the template you just created and combine it with the values found within each merge field inside your org to create a merged document.
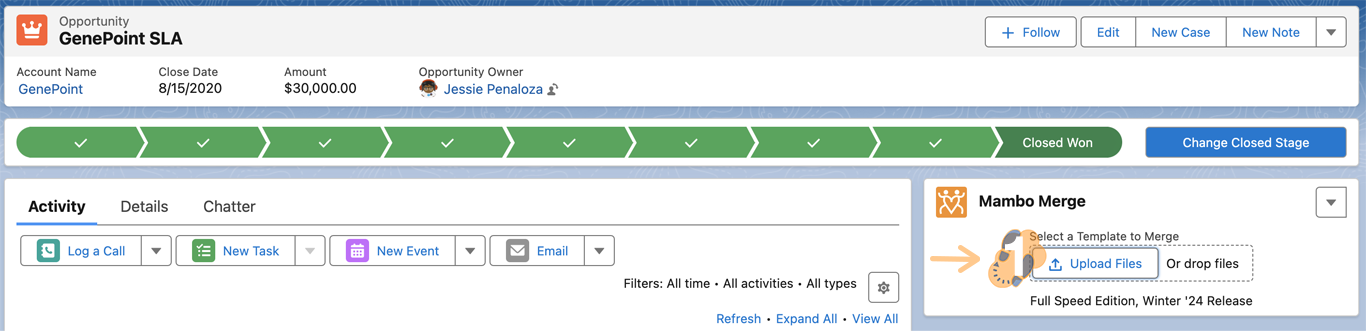
4.7 Open your merged document to make sure all merge fields are replaced with values stored in your org. Also, make sure the look and feel you created is intact.
Note: Double-check your merged documents to make sure the information you seek is merged.
Keep Up The Good Work!
Now you can begin converting all those existing documents into meaningful templates.