2.2.2 | 1/17/2024
Step 1: Prerequisites | Step 2: Define Your Use Case and Conditions | Step 3: Build A Flow | Step 4: Test Routine
Use Flows To Create List View Buttons
Use these step-by-step instructions to create a Mambo Merge button within Salesforce, using Flows. This is a great option for either a “Records Where” & “From Report” Routines. By following these steps, users will be able to easily navigate through the setup process and create a custom button that allows them to merge multiple records with a Mambo Merge Component, not on the record page.
Step 1: Prerequisites ↵
Before diving in make sure to complete the following checklist.
1.1 Install a “Mambo Component” within the Object page you plan to merge documents.
1.2 Know how to use “Template Builder” to create a template.
1.3 Know how to build a “Routine” and “Merge Button.”
1.4 Have our “Full Speed” edition installed.
1.5 Be familiar with creating “Flows” within Salesforce.
1.5 Be familiar with* “Setup”* and “Object Manager” within Salesforce.
Note: We recommend to complete the list above before you proceed.
Step 2: Use Case and Conditions ↵
You need to identify what use case you are trying to generate documents for and what conditions must be met within each record to merge data.
2.1 Mambo Merge components require you to be within individual records to initiate the trigger of the component so instead will create a button within the List View navigation bar. Making it easier for users to deploy their components and merge the data they seek with the templates they’ve built.

For this example, we will be using the “Leads” List View Object with a preset “Bulk Merge” Routine that will assess Leads based on territory and once initiated consolidate them all into one larger document.
Note: Remember the Object and Routine can be interchanged to fit your use case however the steps taken to build the List View button are standard Salesforce knowledgebase, for the most part.
Step 3: Build A Flow ↵
With our use case and conditions defined, we can begin to build out the Flow that will link our Mambo Component and Routine within our List View button.
3.1 From your org navigate to “Home” and search for “Flows.”
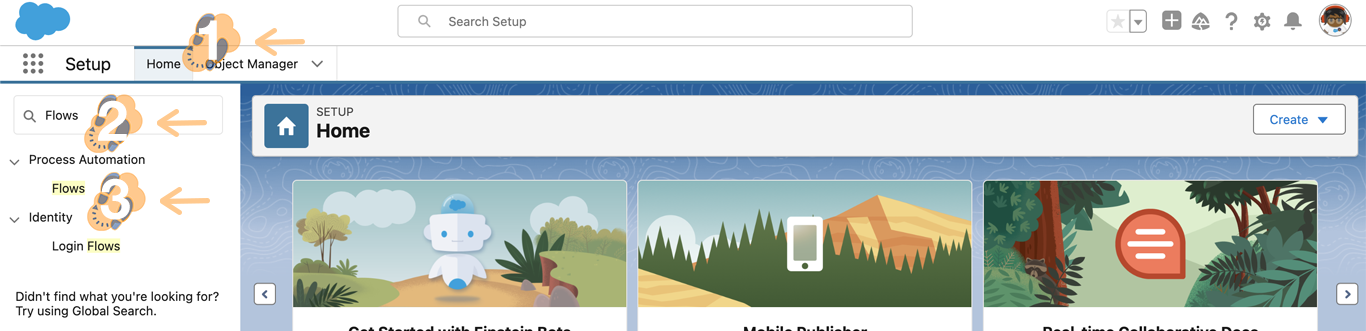
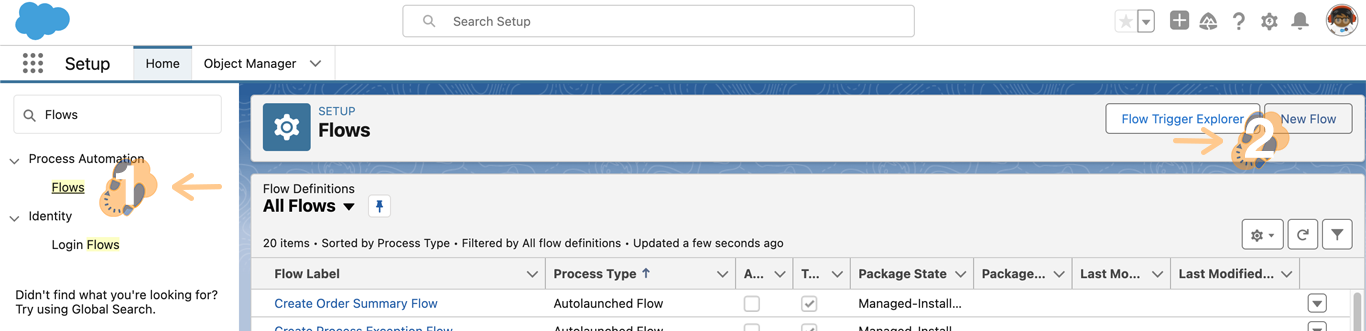
3.2 Click on the “Flows” search result and begin a new flow using the “New Flow” button.
3.3 Use the wizard, choose “Screen Flow” and click on “Create.”

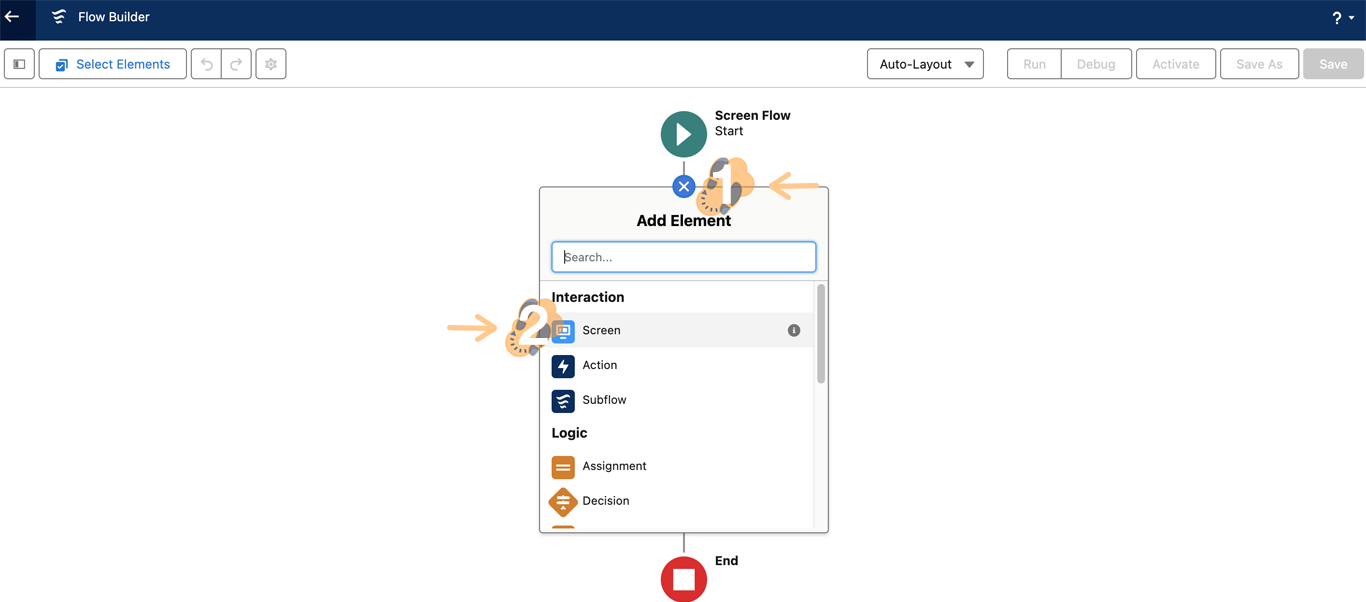
3.4 Click on the "+" option and choose the “Screen Element” from the drop down.
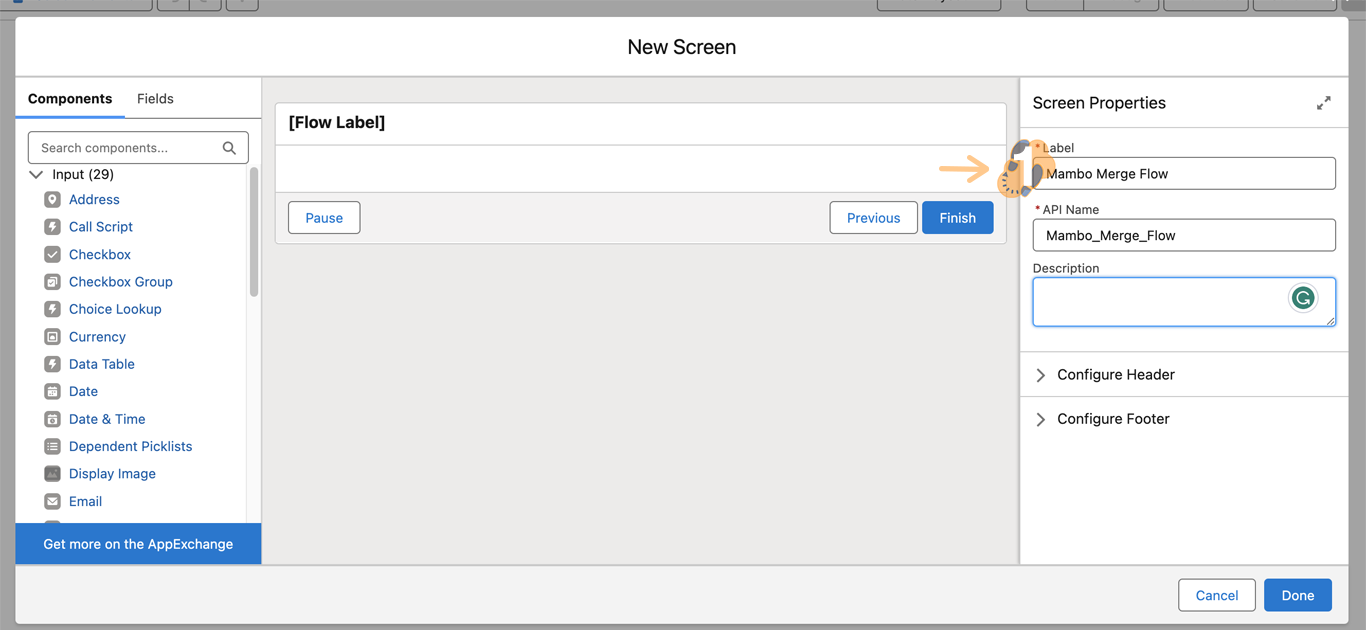
3.5 Continue by labeling your “Screen Element.” For our example, we used “Mambo Merge Flow.”
3.6 Using the “Components” tab on the left, search “Mambo” to locate the Mambo Merge component.
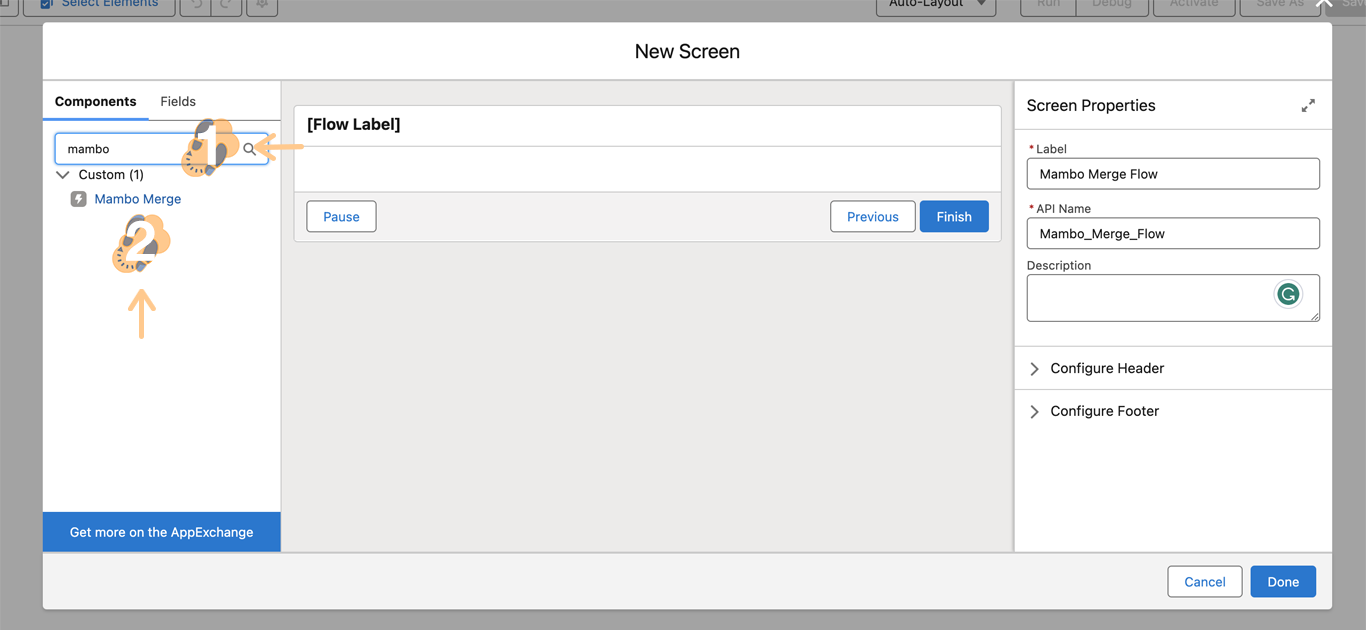
3.7 Simply take the component and “Drag It” to a location within the screen.

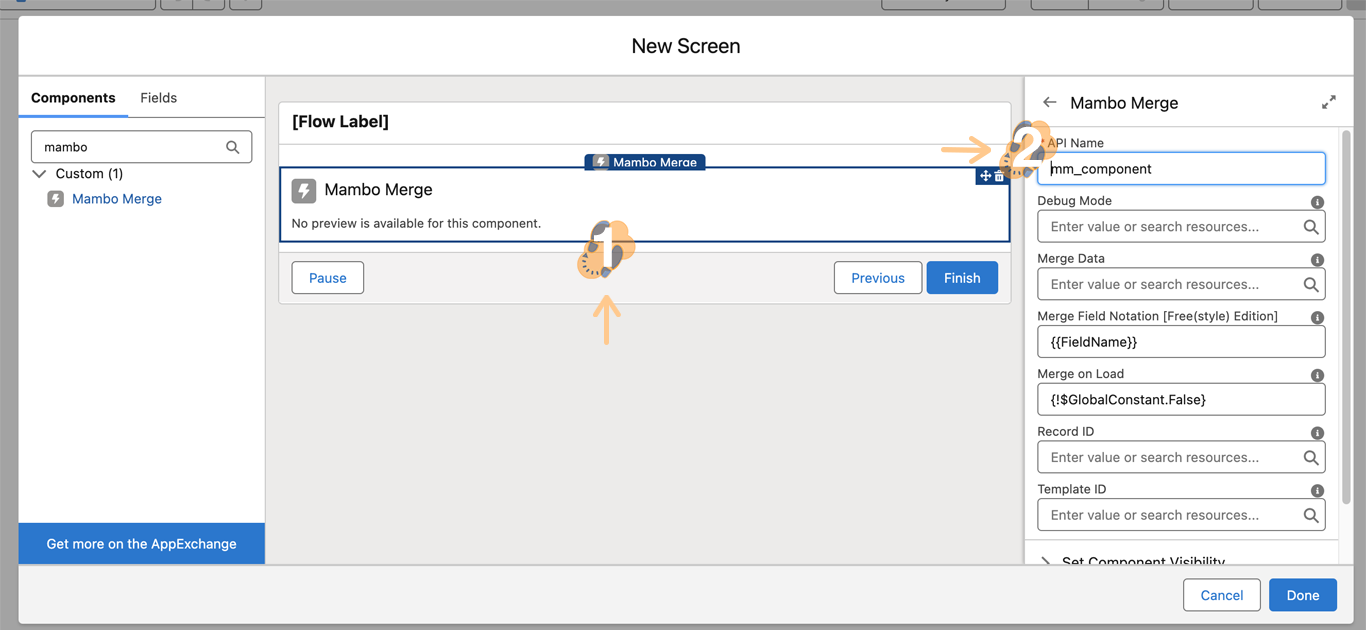
3.8 Now proceed to configure the component by providing it an “API Name.” For our example, we use “mm_component.” The name can be changed if needed but to complete the Flow we need to provide it one.
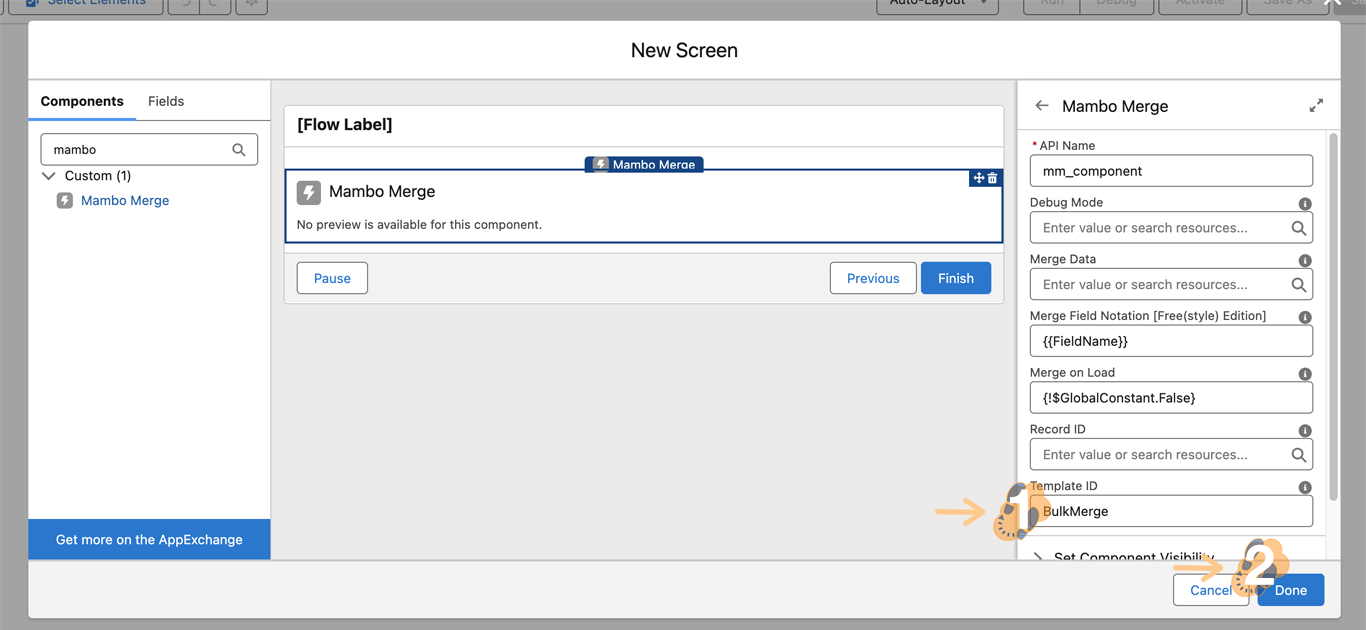
3.9 We need to assign the Routine to the component. So, will proceed by using “BulkMerge” within the *“Template ID” *field. This field is case-sensitive so make sure to double check syntax. Proceed by clicking the “Save” button.
3.10 Continue by pressing the “Save” button to begin saving this Flow.
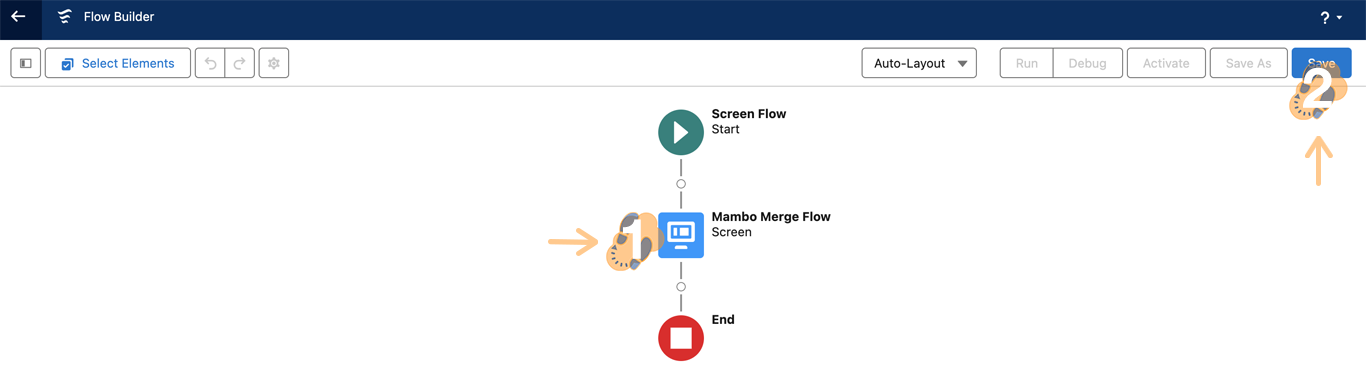
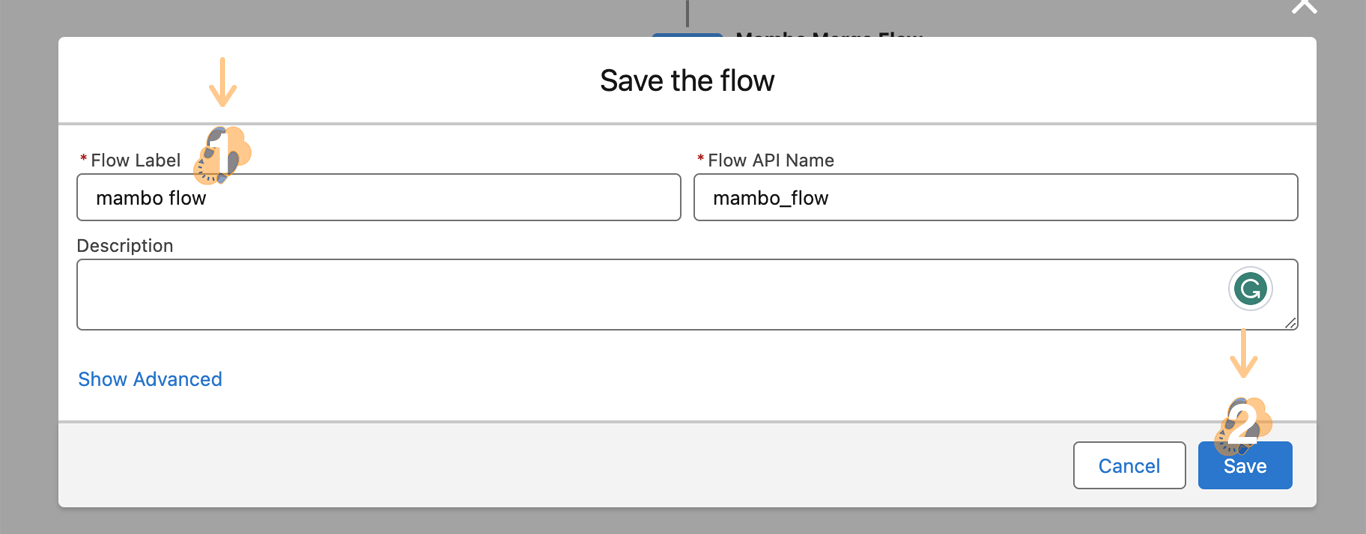
3.11 Label your Flow and press “Save” to proceed. For our example, we used “mambo flow.”
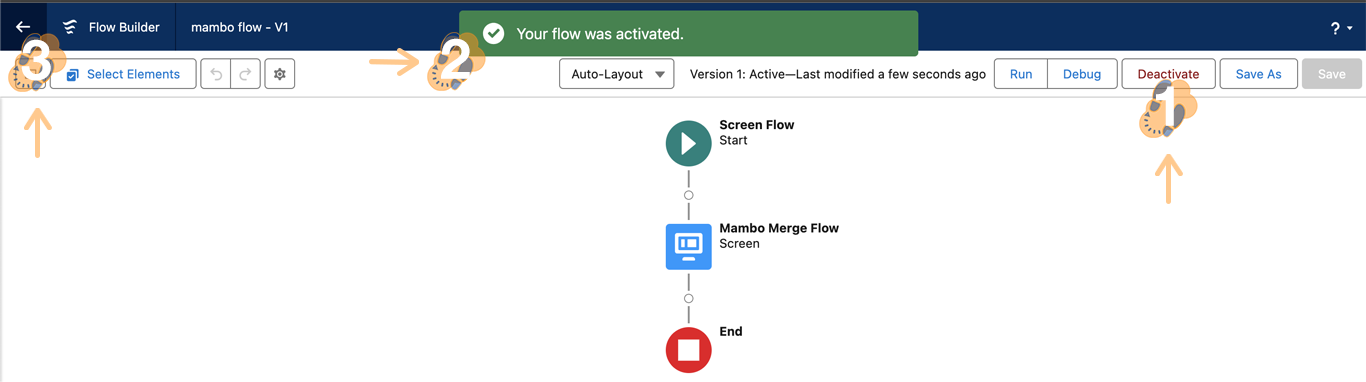
3.12 Conclude by pressing the “Activate” button. A prompt may appear to confirm activation. Once confirmed, use the “Left Arrow” to exit the Flow.
Step 4: Create Button And Verify ↵
Now that we have the Flow built, we can create our button and assign the Flow to launch our Mambo Component and Routine.
4.1 Let’s head back to the “Object Manager” to search for our Object. In our example, we are looking for the “Lead” Object. Once confirmed, click on the search result.

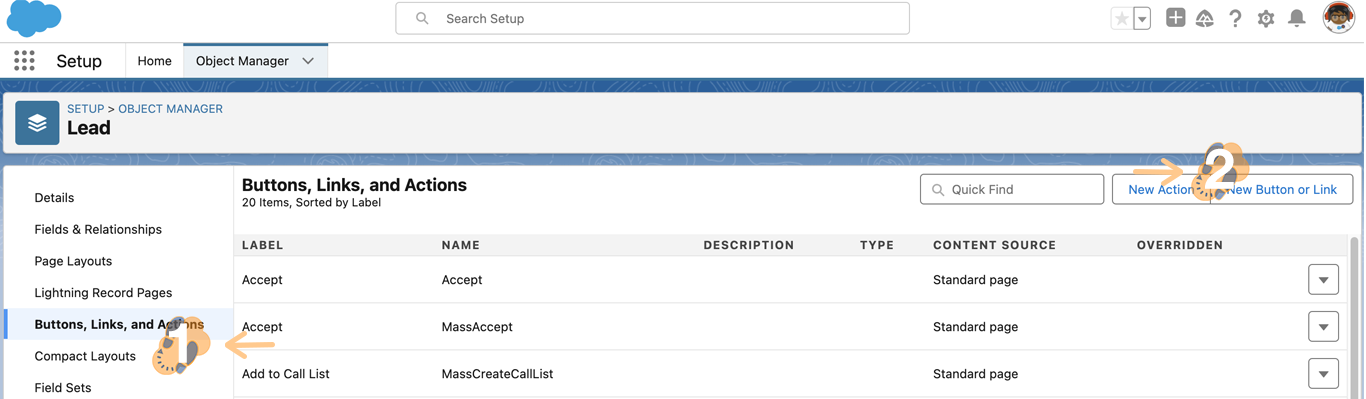
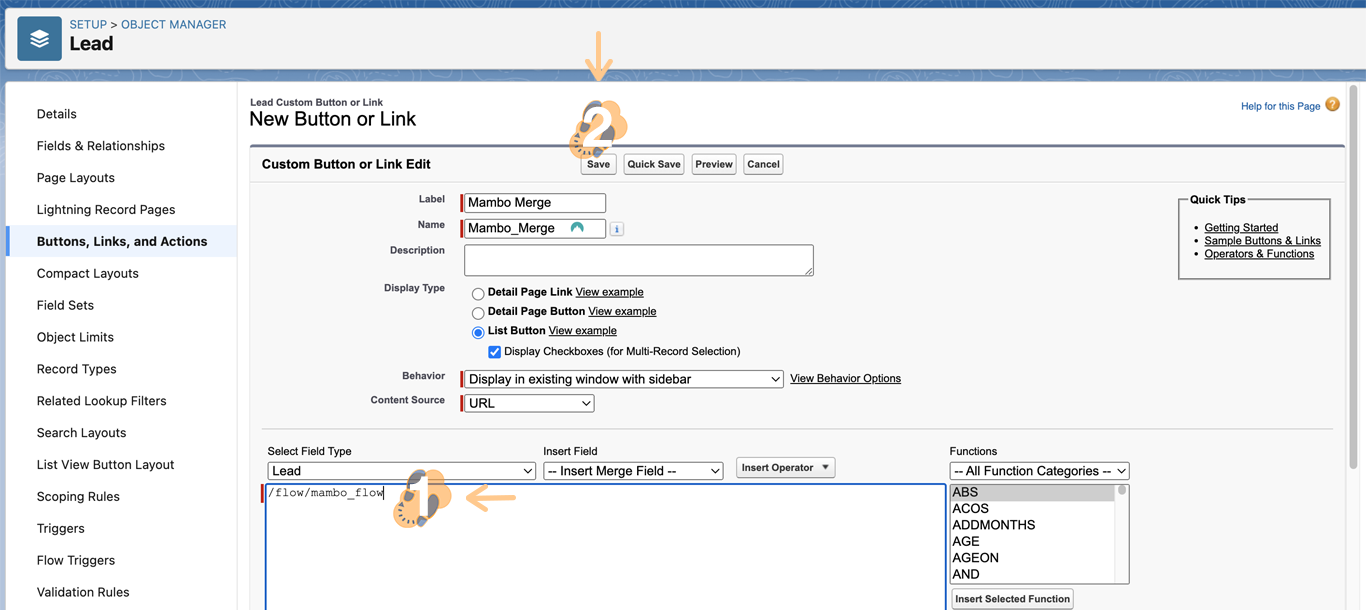
4.2 Using the navigation on the left click on “Buttons, Links and Actions” followed by the “New Button or Link” on the right.
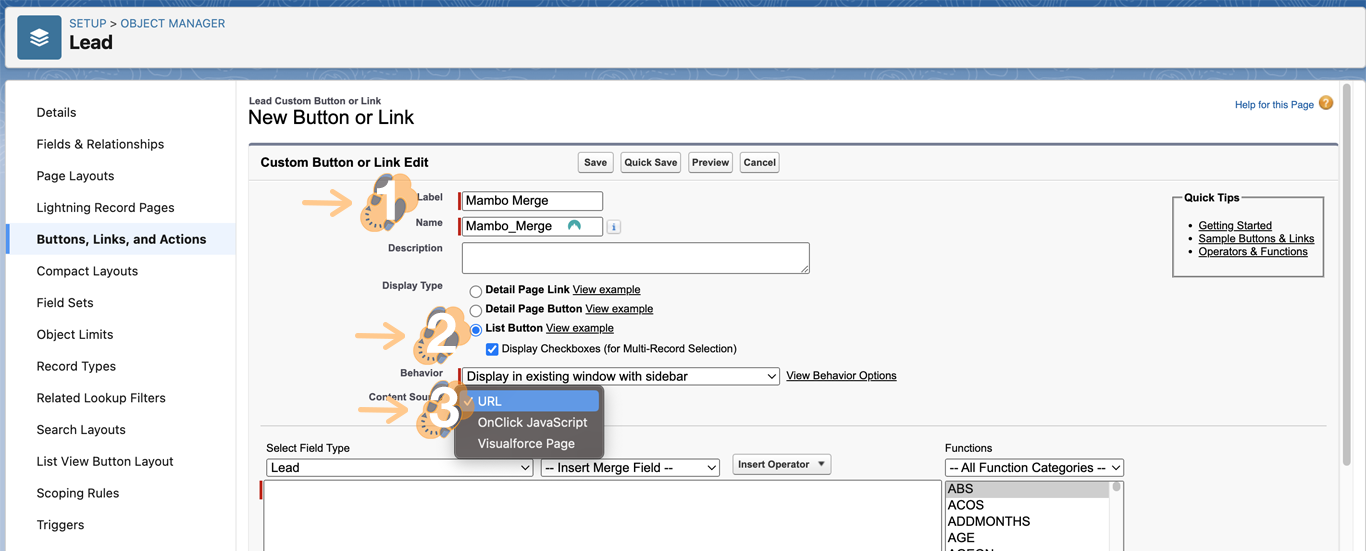
4.3 We configure the button settings by giving it a name or Label “Mambo Merge” followed by a Display Type of “List Button” and Content Source of “URL.”
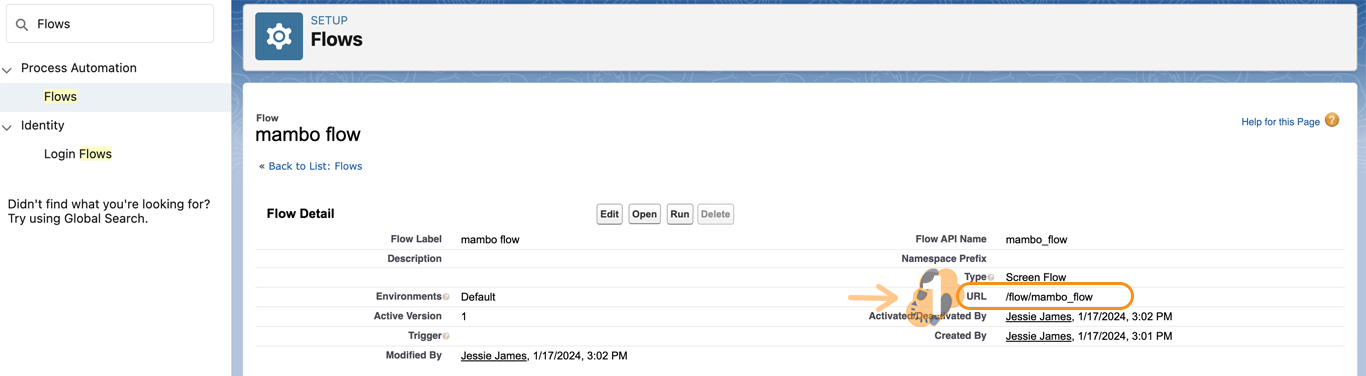
4.4 On a separate browser tab will need to head back to the Flow to obtain its “Flow URL.” Simply head back to “Home”, search “Flows”, locate your Flow, click on its down arrow, and select “View Details and Versions.”
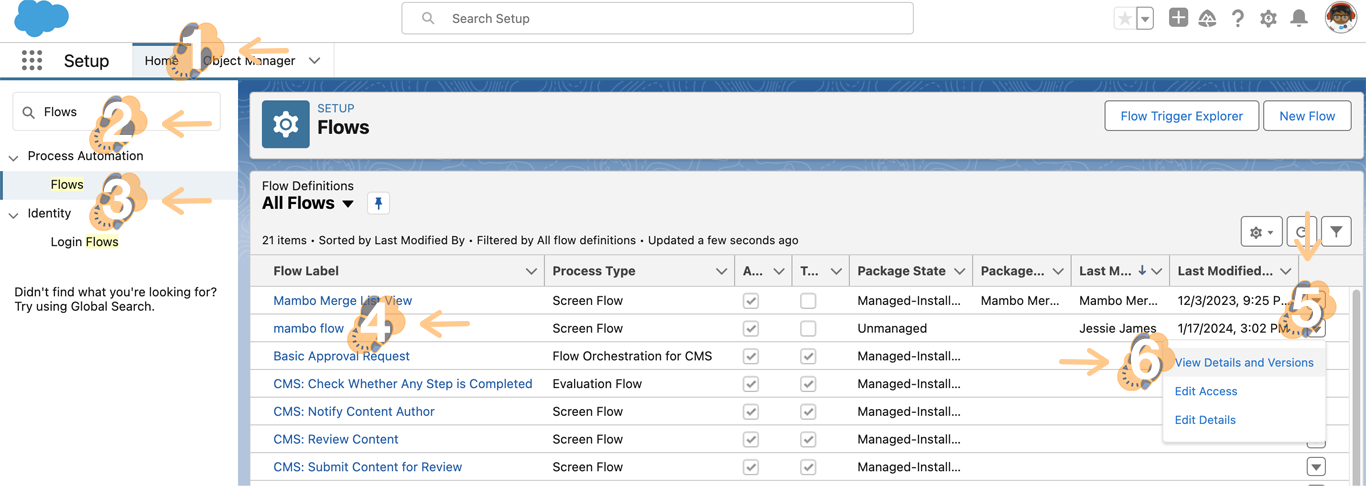
Note: Sometimes you’ll need to sort out the Flows to make it easier to locate them.
4.5 Locate the “URL” and copy it. In our example, it is called, "/flow/mambo_flow."
4.6 Now paste the “URL” within the “Large Text Box” and finalize the settings using the “Save” button.
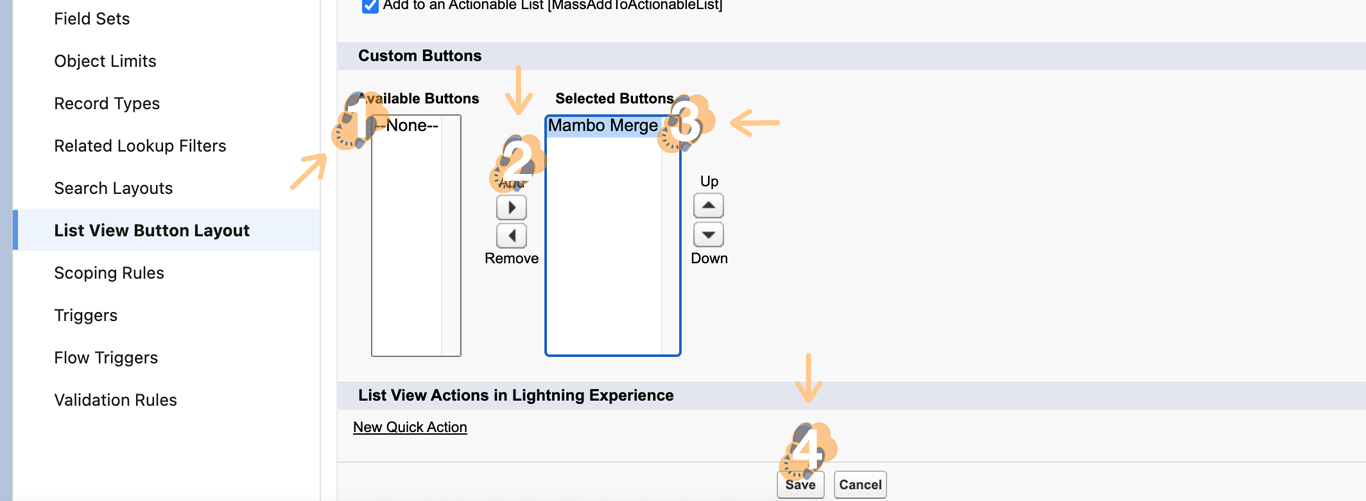
4.7 With the button now created we can add it to the “List View Button Layout” by choosing this option from the nav menu and using the “Down Arrow” to select “Edit.”
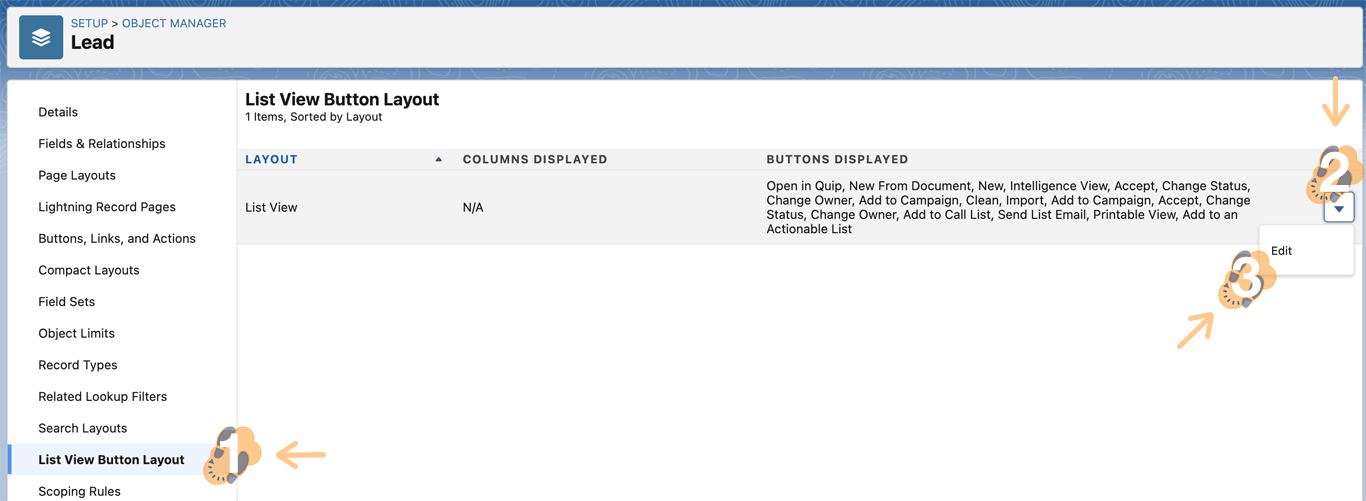
4.8 Simply add it from “Available Buttons” using the “Right Arrow.” Once it appears on “Selected Buttons” click on “Save” to finish.
4.9 Head back to the “Object’s List View.” In our example, we used the “Leads” locate your button named “Mambo Merge.”
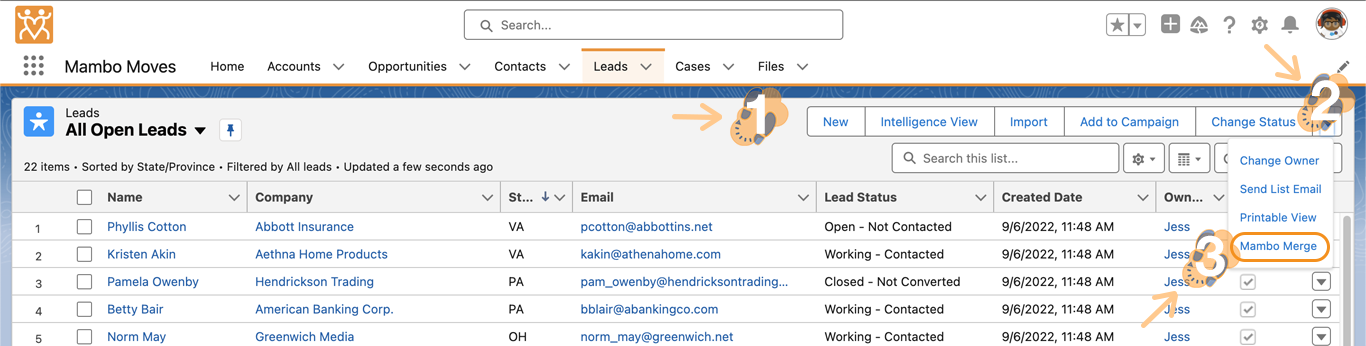
Note: Sometimes you’ll need to click on the down arrow if there are existing buttons consuming your List View navigation menu.
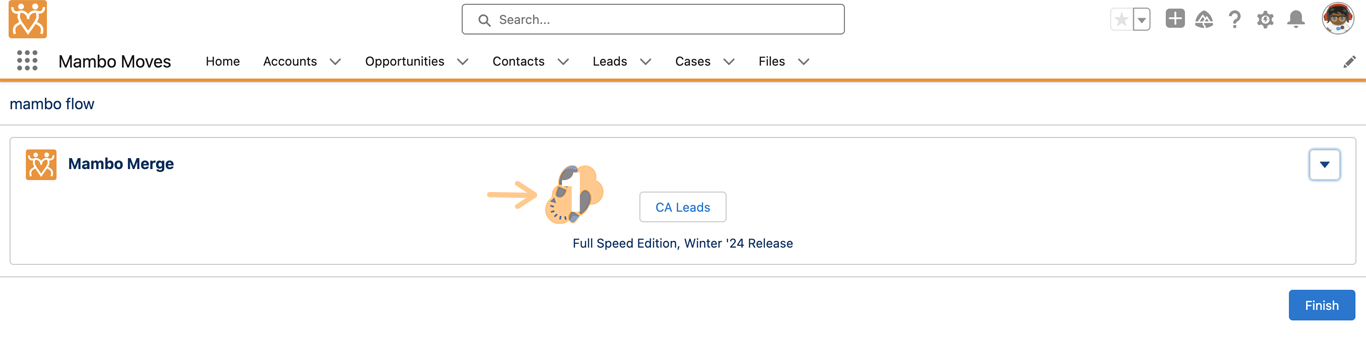
4.10 Pressing the “Mambo Merge” button will now launch an instance of the component with the pre-defined “Routine” ready to implement upon triggering its action button.
What type of List View Buttons Interest You?
Most of the steps in this article cover existing Salesforce knowledge that combined with Mambo Merge creates a complete solution for your everyday DocOps needs. Learn how Mambo Merge makes it easier to maximize your org needs.