2.0.1 | 9/01/2023
Step 1: Package Manager | Step2: Add Users | Step 3: Remove Users
Manage Your Users
After installing the App, you may have to modify the user licenses by adding, removing, or adjusting them to various colleagues. Let’s help you understand how to grant access to those who require it the most.
Step 1: Package Manager ↵
Let’s head over to Package Manager to get you started.
1.1 On the homepage click on the “Gear” icon, and select “Setup” from the dropdown list.

1.2 Search for “Installed Packages” within the “Home” tab and click on the corresponding search result.

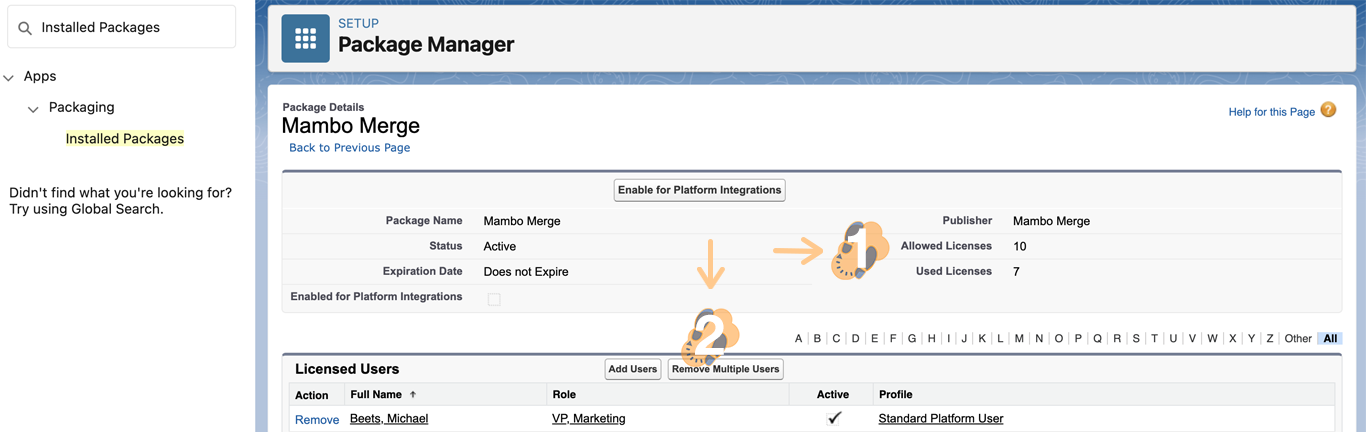
1.3 Within the Installed Packages page click on “Manage Licenses” next to Mambo Merge package name.
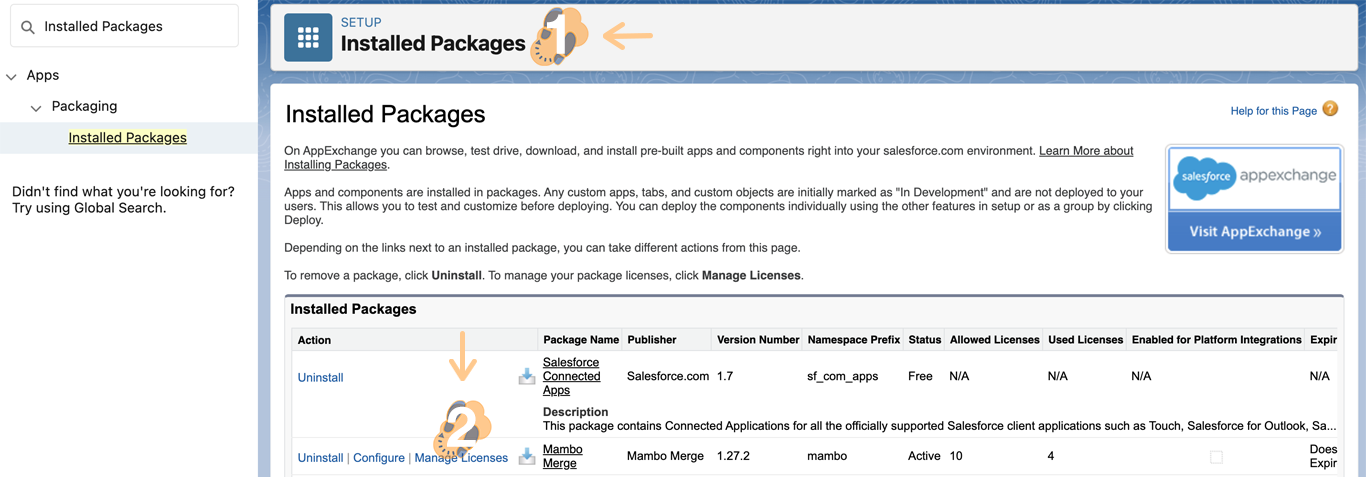
Note: A default install usually carries 10 licenses to distribute within your org. Within the Package Manager, you can begin assigning users to each license.
Step 2: Adding User Licenses ↵
Granting users a license allows them to manage each Mambo component within the org. However, this doesn’t mean that they will be able to merge data from any object or field they do not have permission.
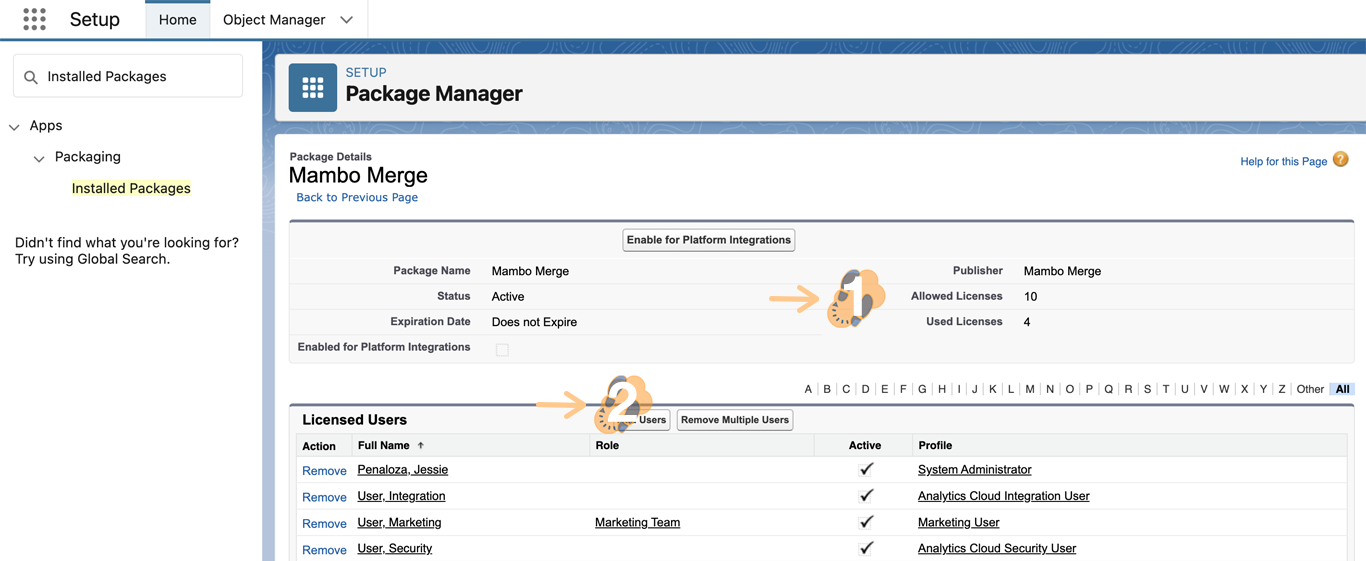
2.1 The number of “Used Licenses” will let you know how many licenses you can assign. Click on “Add Users” to assign available licenses to users within your org.
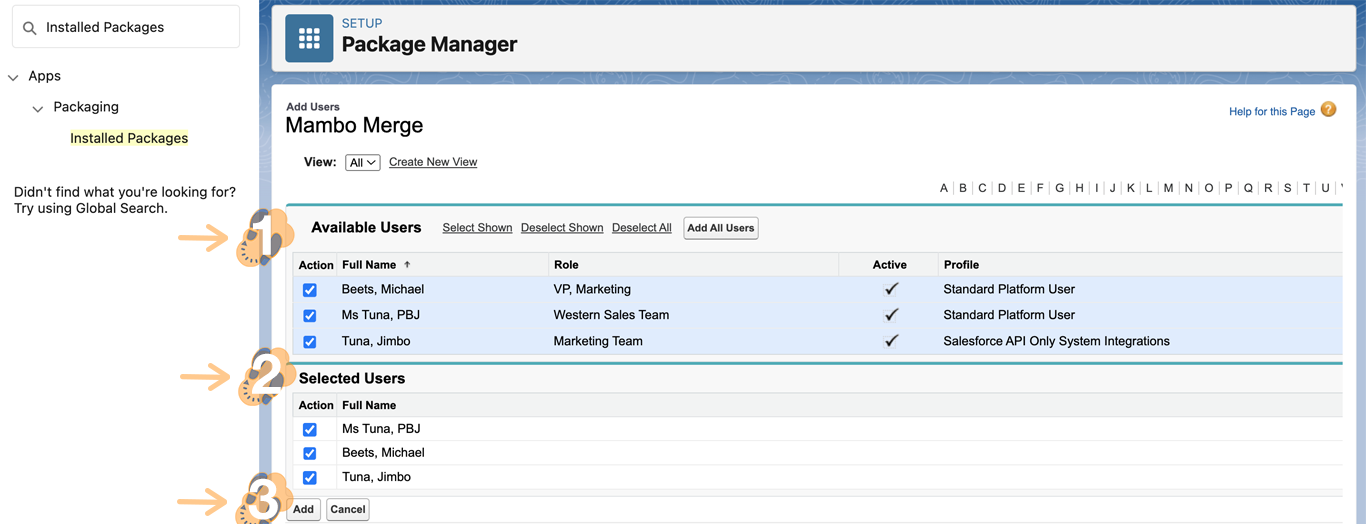
2.2 You’ll have the option to “Select”, “Deselect”, or “Add All Users”. After you choose a user, they will be displayed within Selected Users. Once all users are added click on Add to apply the change.
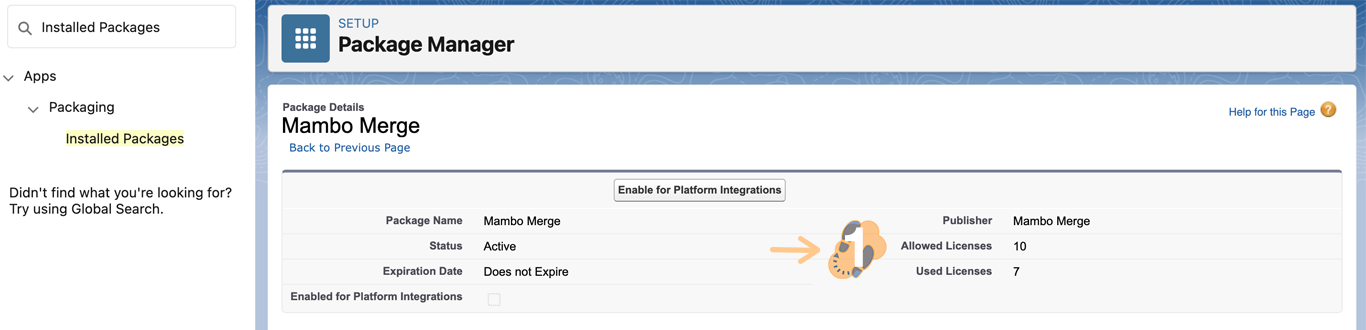
2.3 This will take you back to “Package Manager”. The number of licenses in use will reflect the changes made.
Note: You can always make adjustments by coming back to add additional users
Step 3: Removing User Licenses ↵
You’ve reached the limit of users and need to make adjustments to the existing user licenses. Here is what you can do to free up some licenses in case you don’t seek to purchase more.
3.1 Head back to “Package Manager” and click on the “Remove” button within each user assigned to remove that user and free up its license. You may be prompted with a confirmation message before applying the change.

3.2 To free up multiple licenses at once click on “Remove Multiple Users” to get started.
3.3 After you choose a user, they will be displayed within “Selected for Removal”. Once you’ve selected all users that need to be removed, click on the “Remove” button to apply the changes. Once saved you will be taken back to Package Manager.
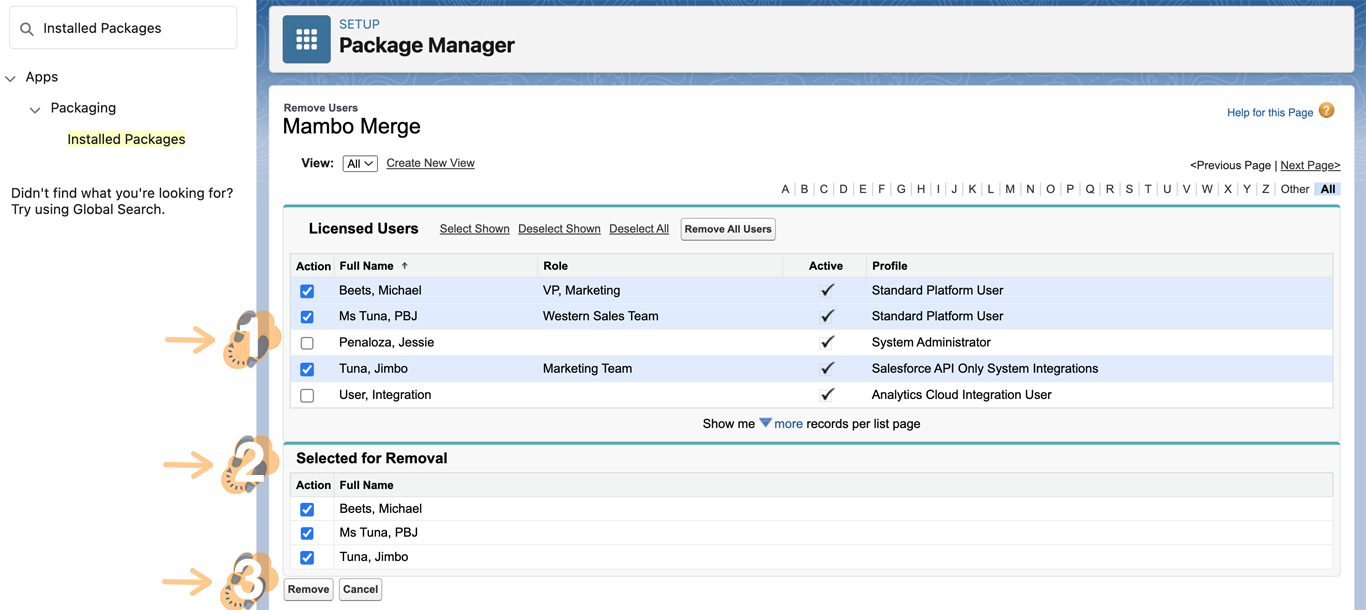
Note: You may be prompted with a confirmation message before applying the change.
3.4 Once again you will be taken back to “Package Manager” where the number of licenses in use will reflect the changes made.
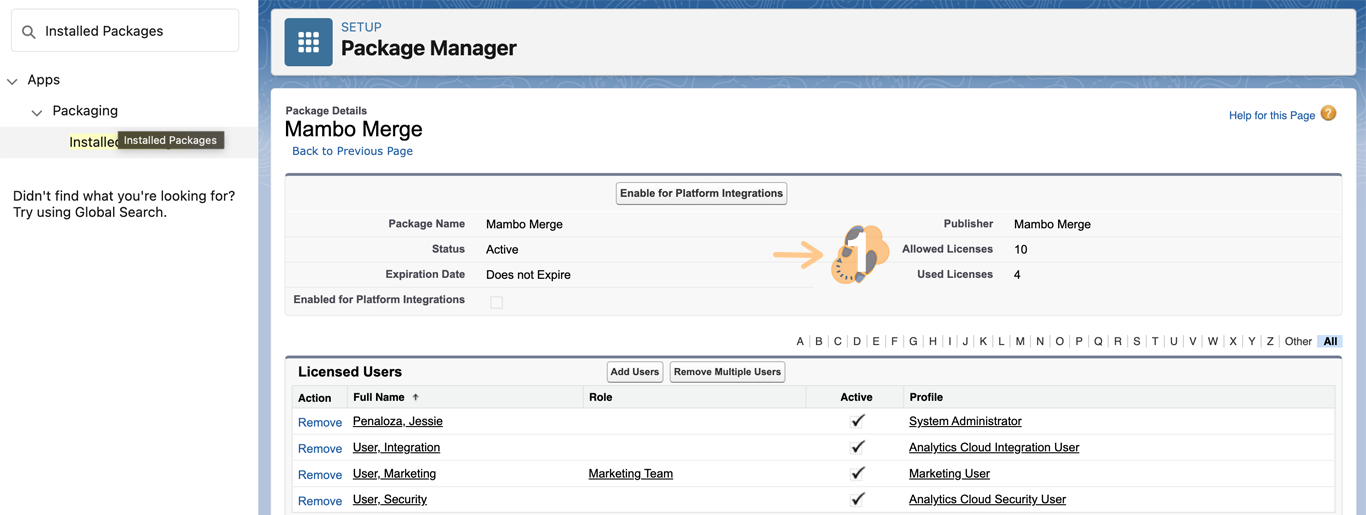
Note: You can always make adjustments by coming back to add additional users
Good Work!
Manage the users of Mambo Merge to ensure they can help you move in the right direction.