2.1.0 | 11/13/2023
Step 1: Prerequisites | Step 2: Create A Routine | Step 3: Test Routine
Create Multiple Documents At Once
With our latest installment, seamlessly generate multiple documents from each merge. Learn how to create individual documents for every record within your org.
Step 1: Prerequisites ↵
Before diving in make sure to complete the following checklist.
1.1 Install a “Mambo Component” within the Object page you plan to merge documents.
1.2 Know how to use “Template Builder” to create a template.
1.3 Know how to build a “Routine” and “Merge Button.”
1.4 Have our “Full Speed” edition installed.
Note: We recommend to complete the list above before you proceed.
Step 2: Create A Routine ↵
Once your templates are ready, add them to your FILES tab and reference them within the Templates screen of the Studio wizard.
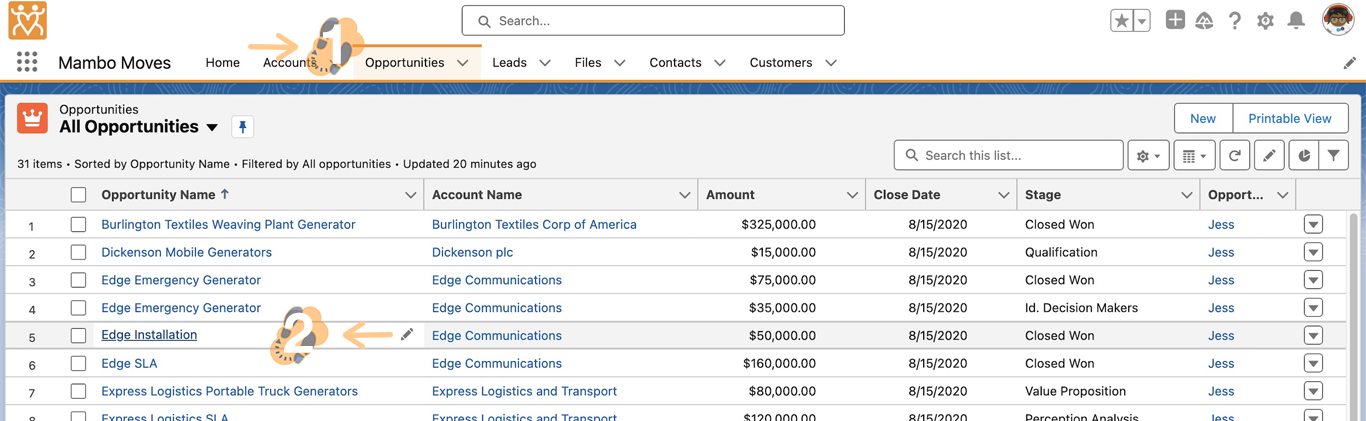
2.1 Locate a record within the “Object” you plan to build the routine around.
2.2 Enter the record and launch the “Studio” within the Mambo component.
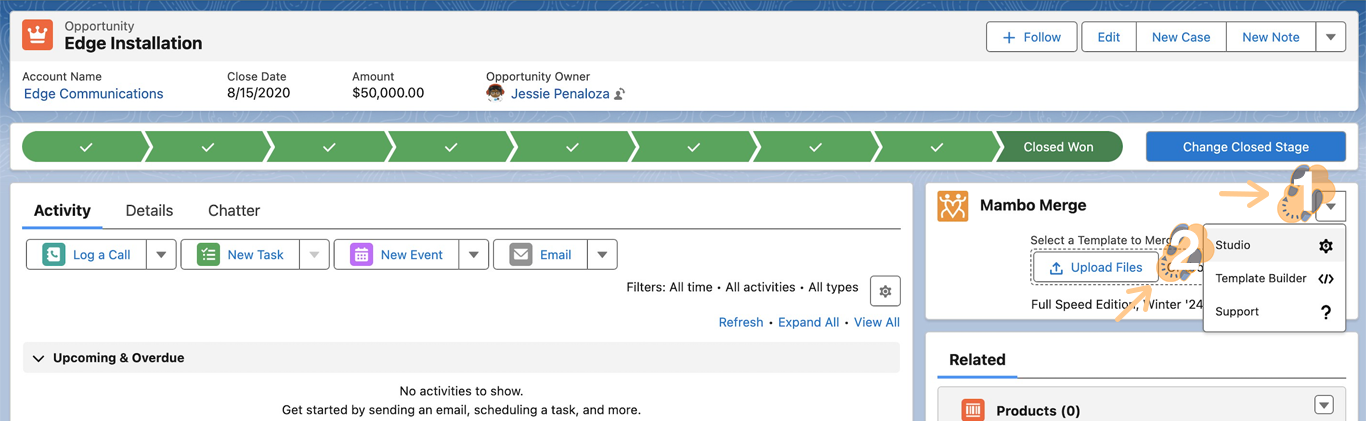
2.3 Click on an existing “Routine” and launch the wizard.
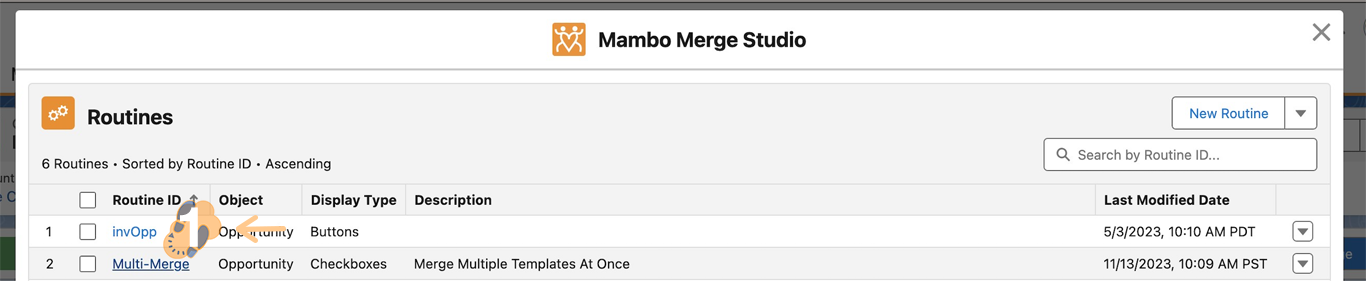
Note: You can always create one but for the sake of this article we are taking one we put together for this example.
2.4 Make sure the “Primary Salesforce Object” matches the Object you plan to build around and choose a “Single Record” records selection then click “Next” to continue. In our example, we are using the “Opportunities” Object.
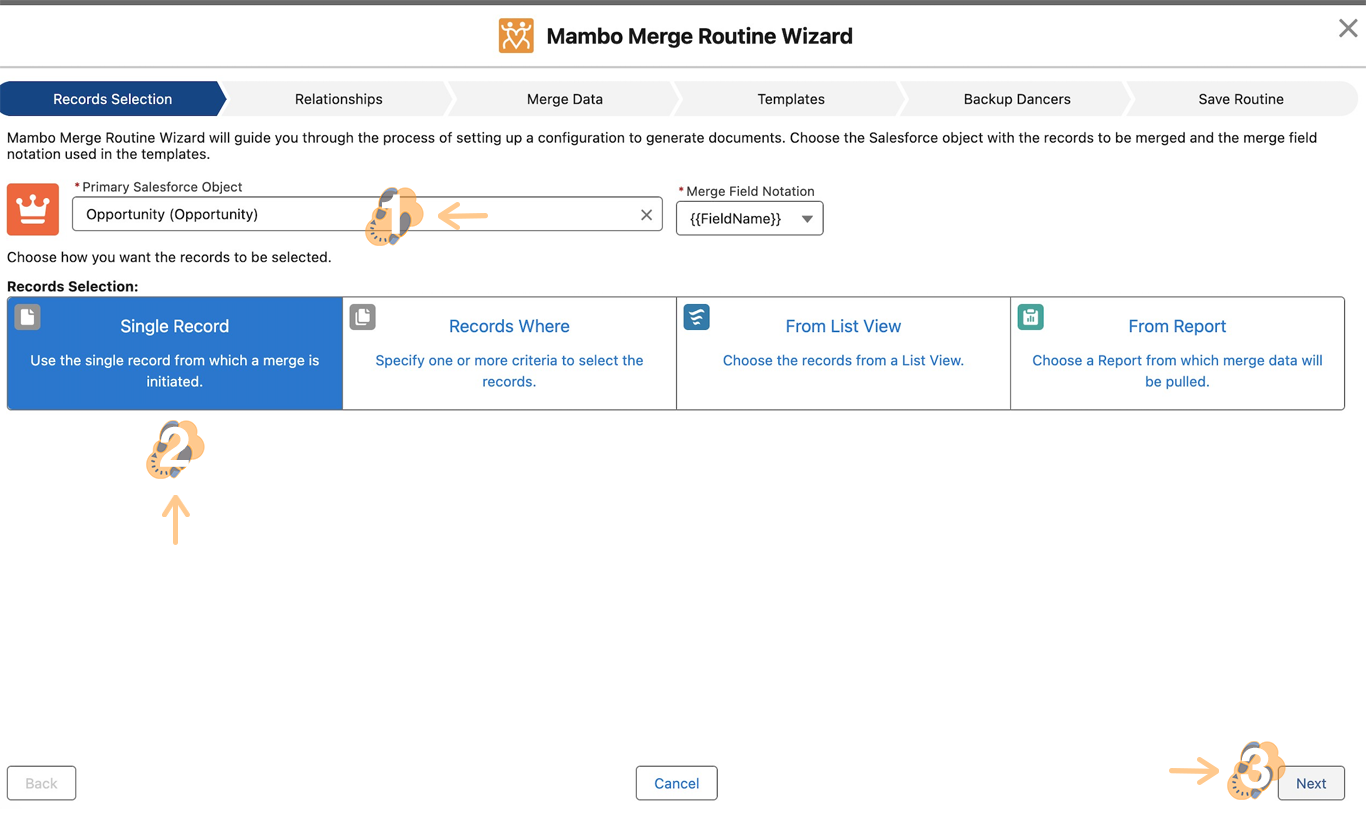
2.5 Skip both the “Relationships” and “Merge Data” screens. Click “Next” on each to continue.
Note: These screens are omitted since they are not required to demonstrate this feature.
2.6 “Add Template” and assign labels, destinations, and file names to each template you want to use. Double-check the details of each template and click “Next” to proceed.

Note: In our example, we prepared three templates and labeled them Contract, Quote, and Invoice. We used Attach to the Record as our destination and kept their merged name the same as their label.
2.7 Provide a name, display type (“Checkboxes” for multiple documents), and description (So anyone who needs to maintain it will be able to do so six to nine months down the line) for the routine. Preview the Mambo component and click “Save.”
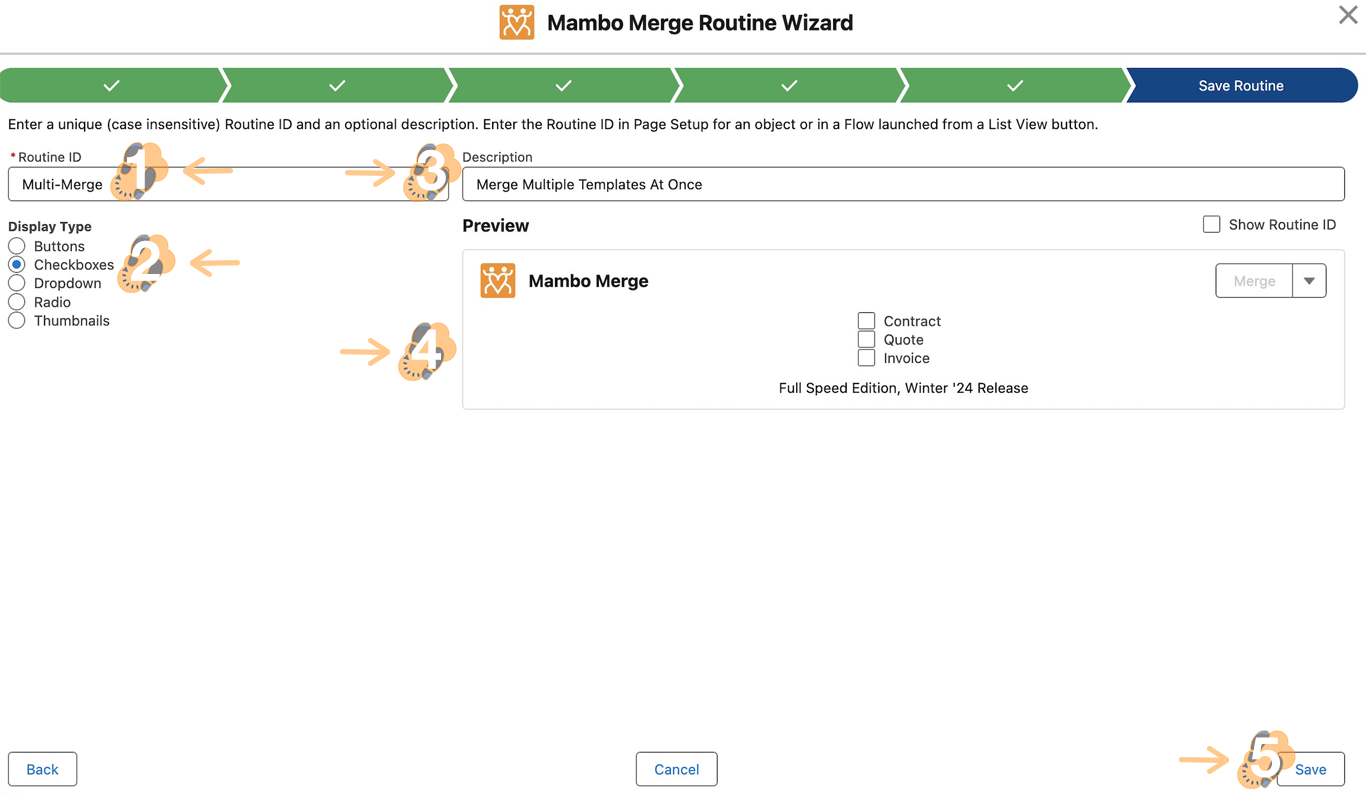
Note: Remember to save the Routine ID as you will need it to activate it later on.
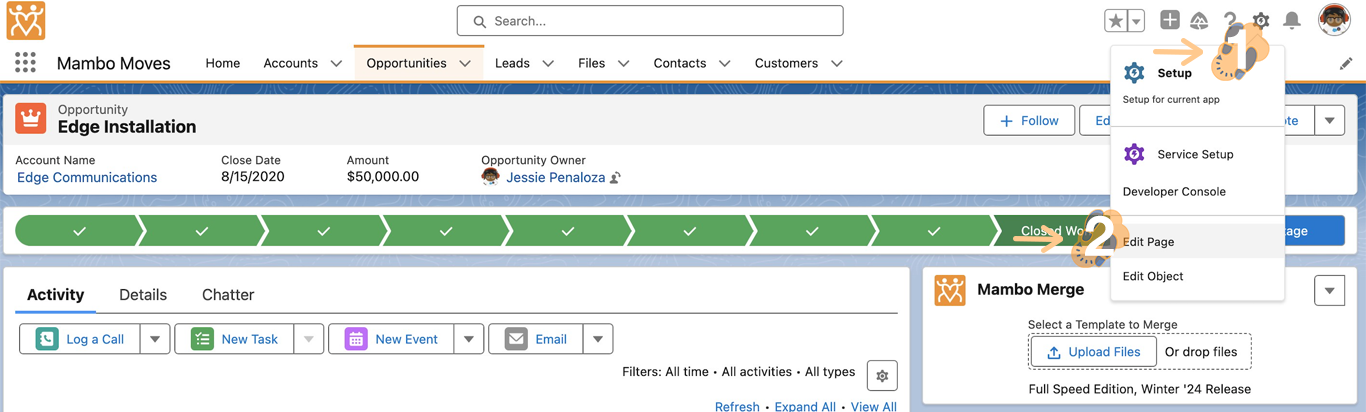
2.8 Return to the record page, click the “Gear Icon,” and select “Edit Page.”
2.9 In the page editor, click on the Mambo component and find “Template ID”.
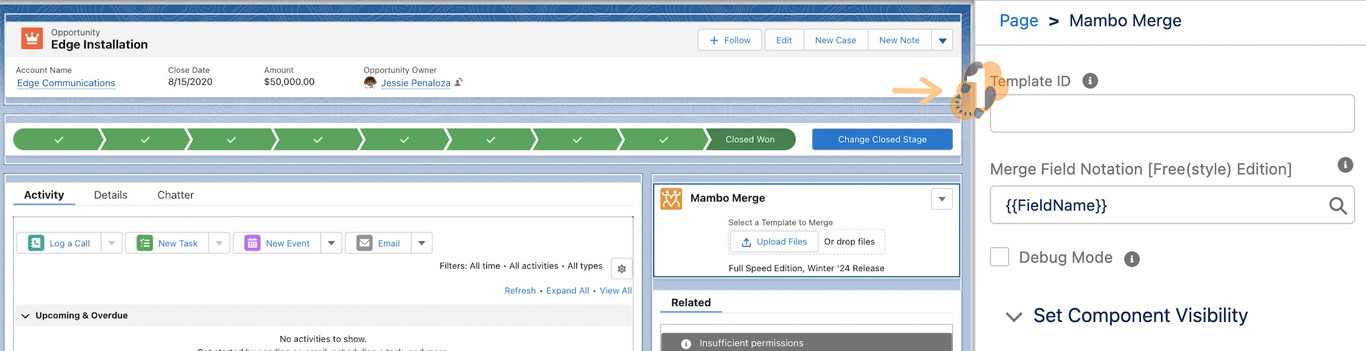
2.10 Copy the saved “Routine ID” and paste it into “Template ID.” Save and return to the record page. This field is case sensitive so make sure to type or copy it exactly as it’s saved.
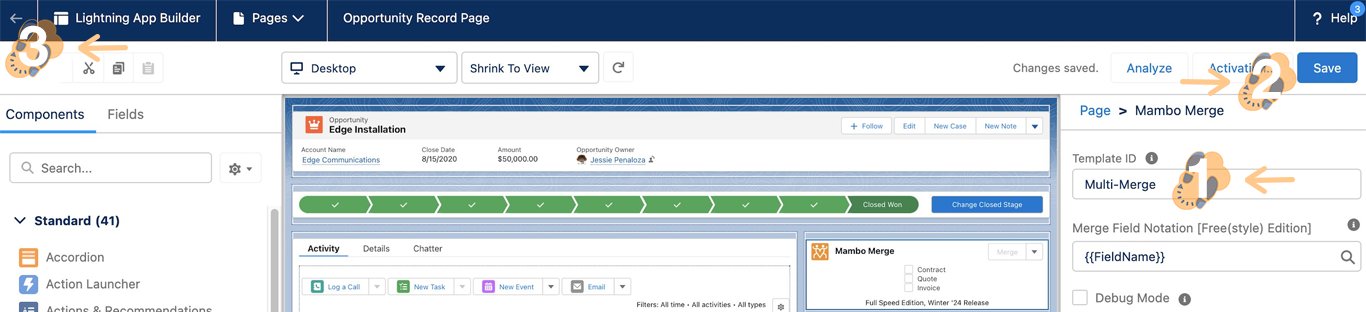
Note: In our example, we used Multi-Merge. The Mambo component previews automatically if the Template ID is correct.
Step 3: Test Routine ↵
Now that the Routine is activated, you can begin testing.
3.1 Return to the “Mambo Component” to see the activated Routine.
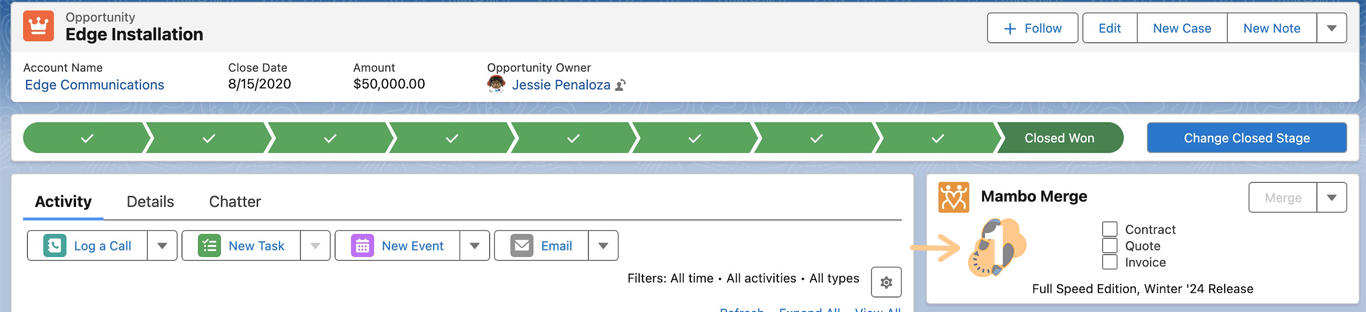
3.2 Check each template you want to merge and click “Merge.” In our example, we chose “Contract” and “Quote.”

3.2 Merged documents will be saved to the record. Check the “Notes & Attachments” section to confirm.
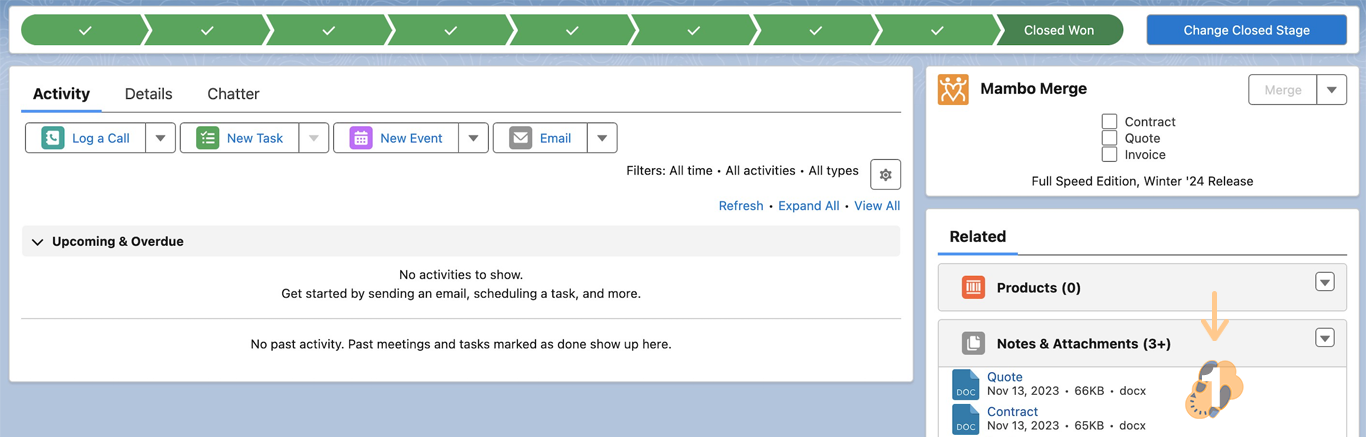
Note: By default merged documents download immediately but on our Routine, we assigned them to save to the record.
3.3 Repeat this process to test each document combination.
Note: Ensure the Mambo Component and Routine work as intended.
Merging Documents All At Once
Explore the enhanced functionality of Mambo Merge, designed to cover new use cases and automate tasks seamlessly.