2.0.3 | 9/30/2023
Step 1: Use Libraries | Step 2: Upload New Documents | Step 3: Replace Existing Documents | Step 4: Obtain File IDs
Maintain, Manage, and Update Your Templates
Reduce the need to completely build new configurations just to simply update layouts as changes present themselves. Learn to safely and effectively update your templates to deploy changes without impacting existing workflows.
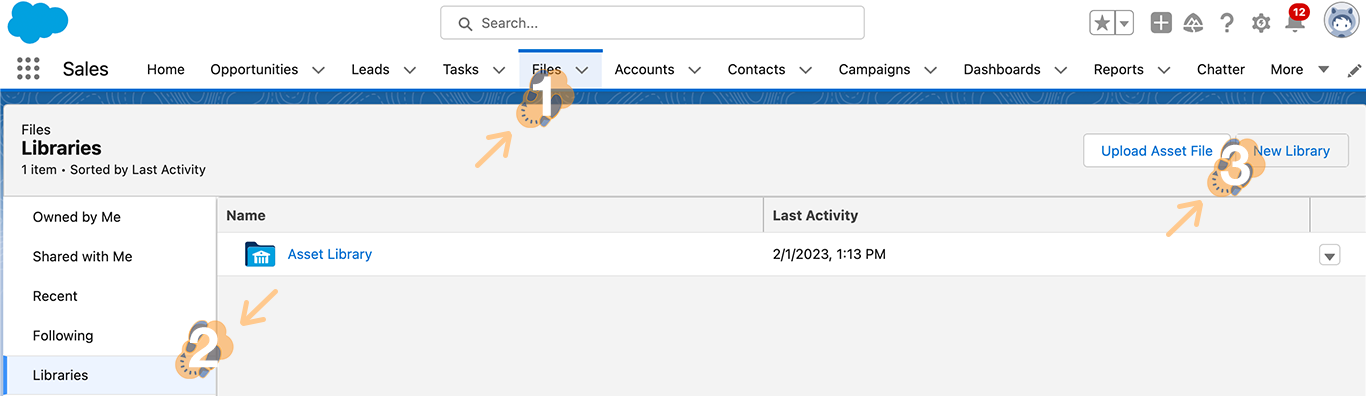
Step 1: Manage Your Documents By Creating Libraries ↵
Help centralize key documents by using Libraries within your FILES tab. Use these steps to get started.
1.1 Go to your org and select the “FILES” tab, click on “Libraries”, and press the “New Library” button.
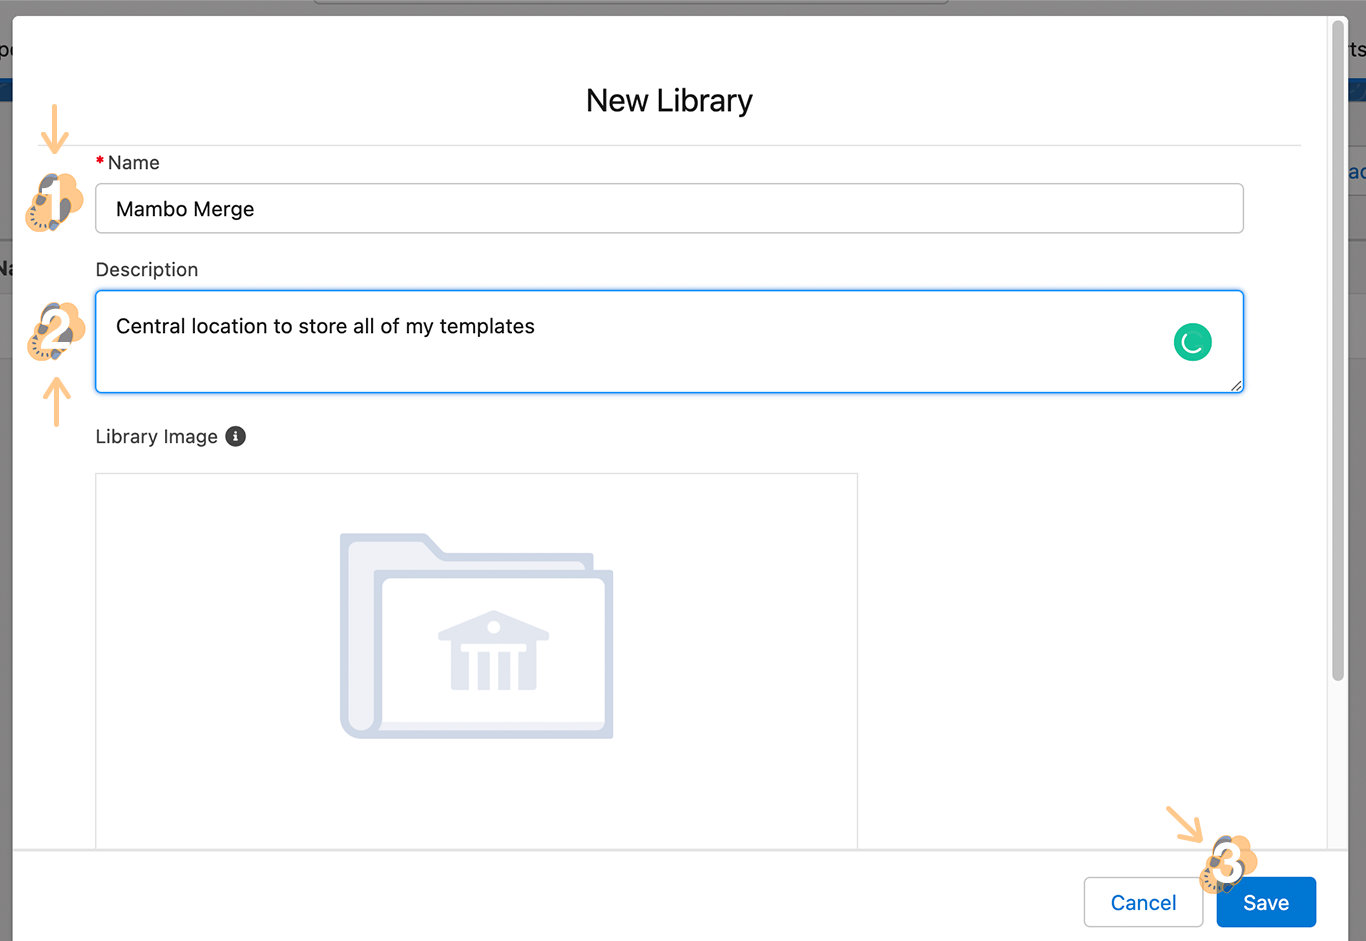
1.2 Assign it a “name” and “description”. Then click on “Save”.
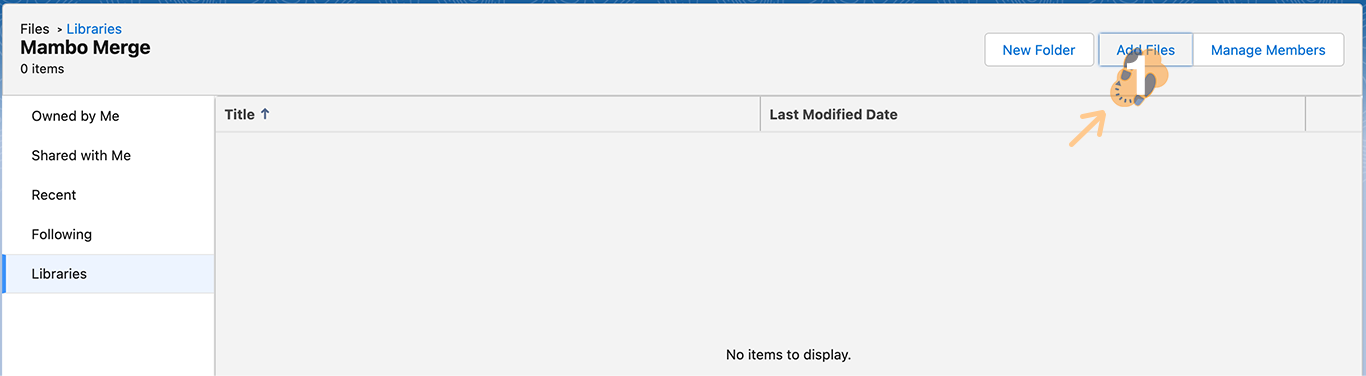
1.3 This newly created library can now be used to store documents. Simply click on “Add Files” to begin.
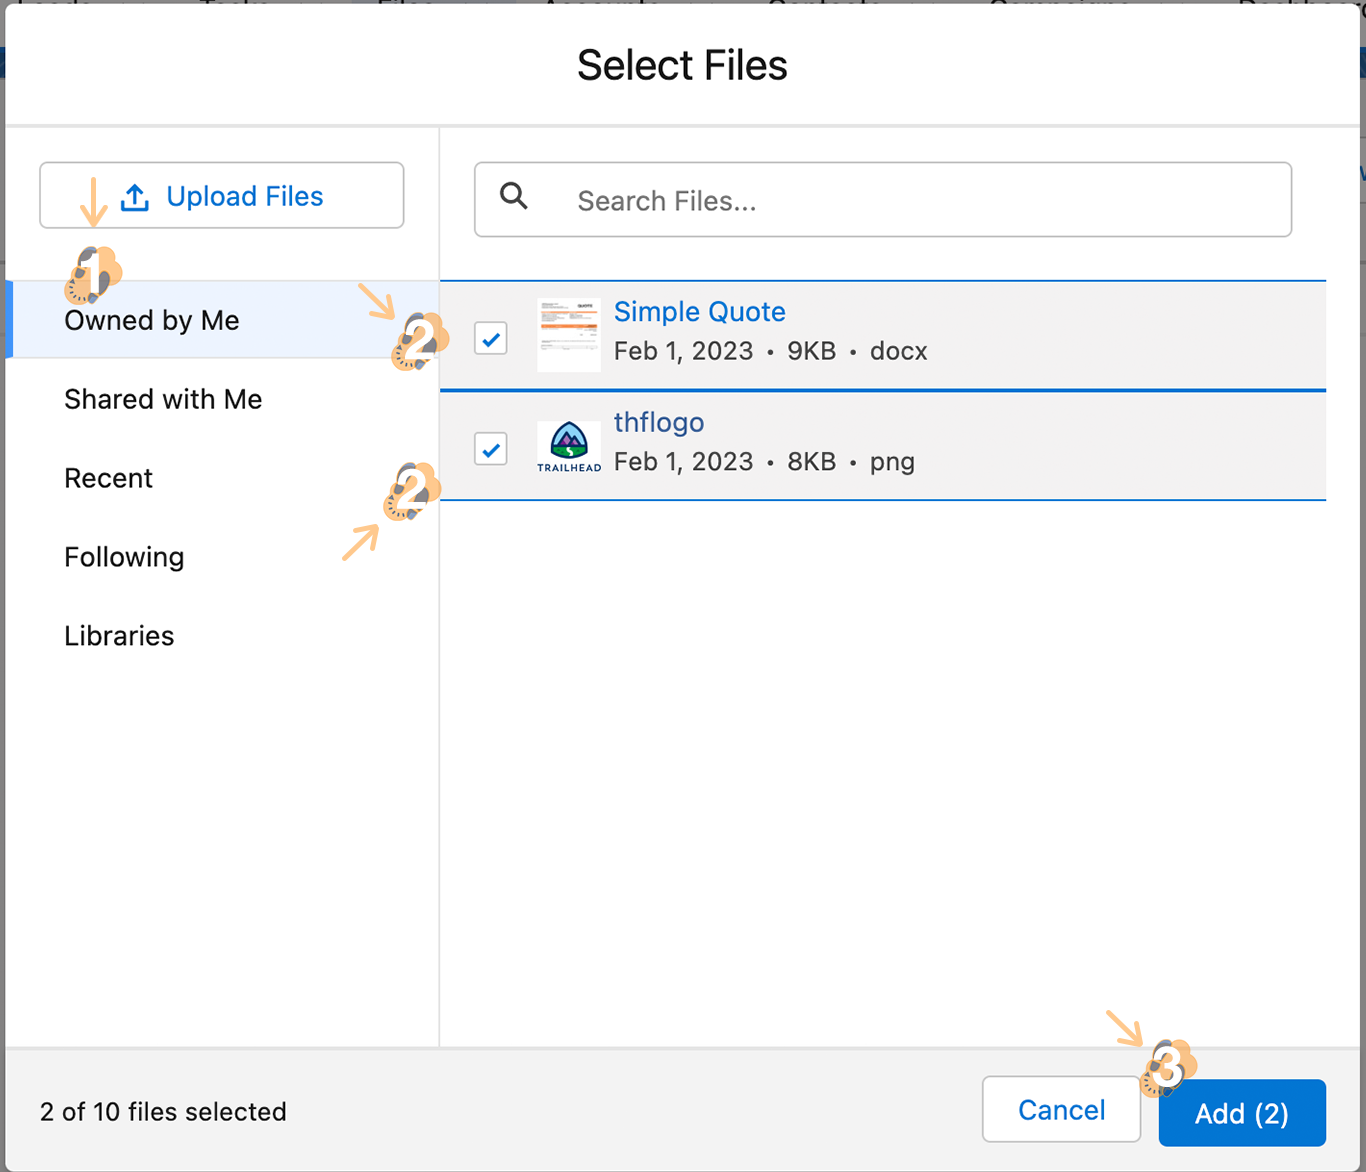
1.4 Select the files and proceed by pressing “Add”.
You can always go back to your libraries to add or remove files as needed to centralize them within one location.
Step 2: Upload New Documents ↵
Whether you decide to use a library or not uploading new documents to use within your configurations is as simple as 1,2,3.
2.1 Start by heading over to your “FILES” tab and click on the “Upload Files” button.
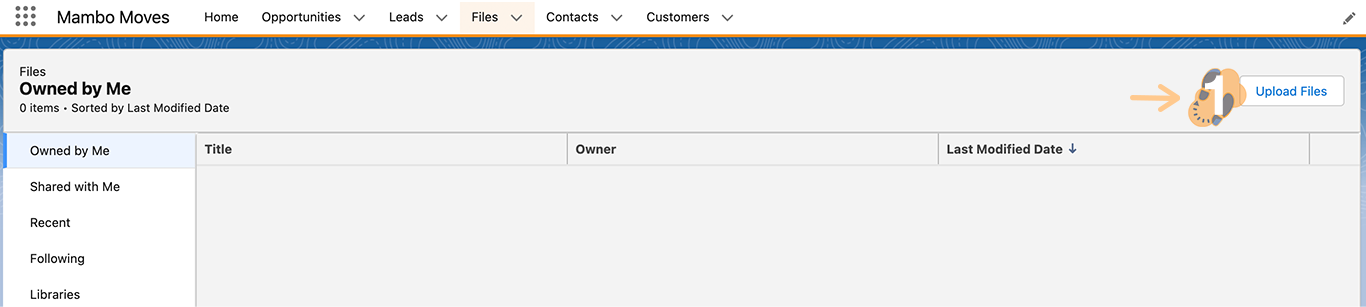
2.2 Select the “document(s)” you wish to upload.
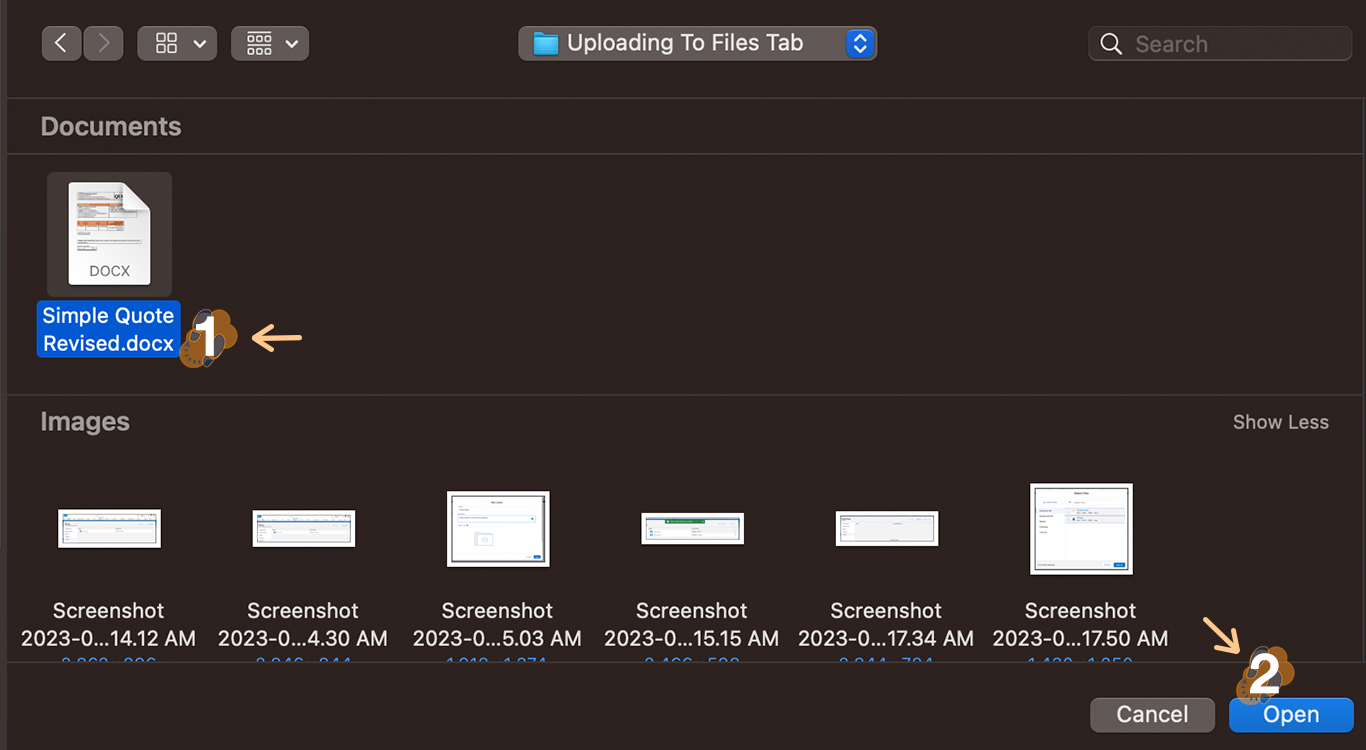
2.3 You may get an “Upload Files” confirmation, press “Done” to complete the upload.

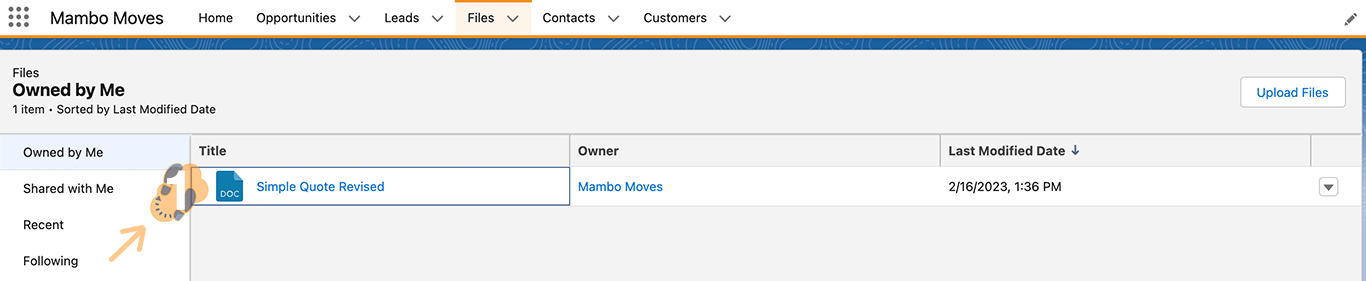
Now the documents(s) uploaded will be available within your FILES library.
Step 3: Replace Existing Documents ↵
To update an existing document to a newer version, using Salesforce’s built-in functionality can save time and effort. Rather than updating the configuration with a new file ID, simply replace the existing document with the new version to preserve its file ID.
Note: Uploading the same file name within an existing one in your FILES tab will not replace it but rather create a second document with a different file ID. If you want to replace an existing document you’ll need to use Upload New Version to completely replace it.
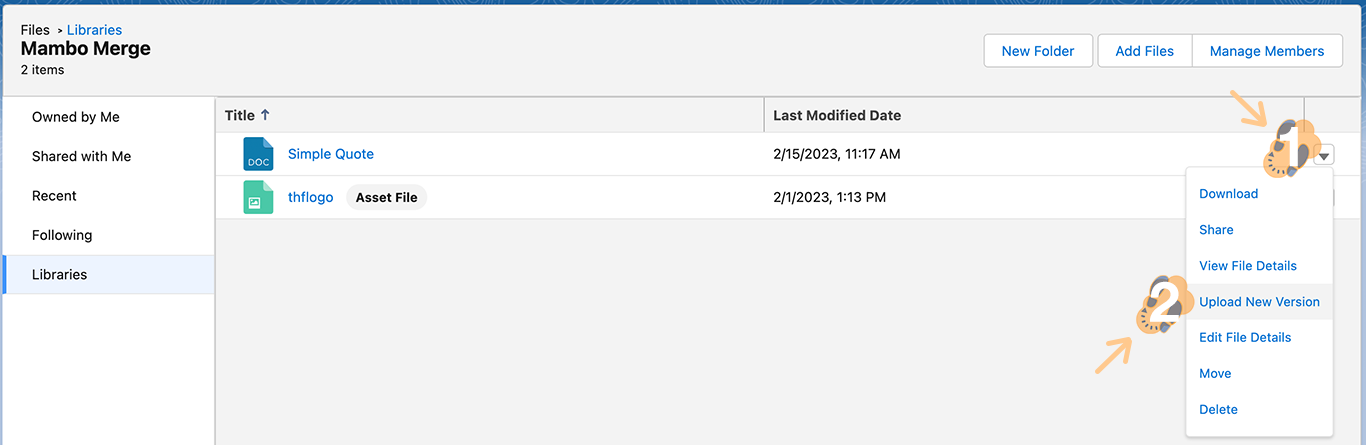
3.1 Start off by heading over to the “FILES” tab and locating the document you wish to update.
3.2 Click the “Down Arrow” and select “Update New Version”.
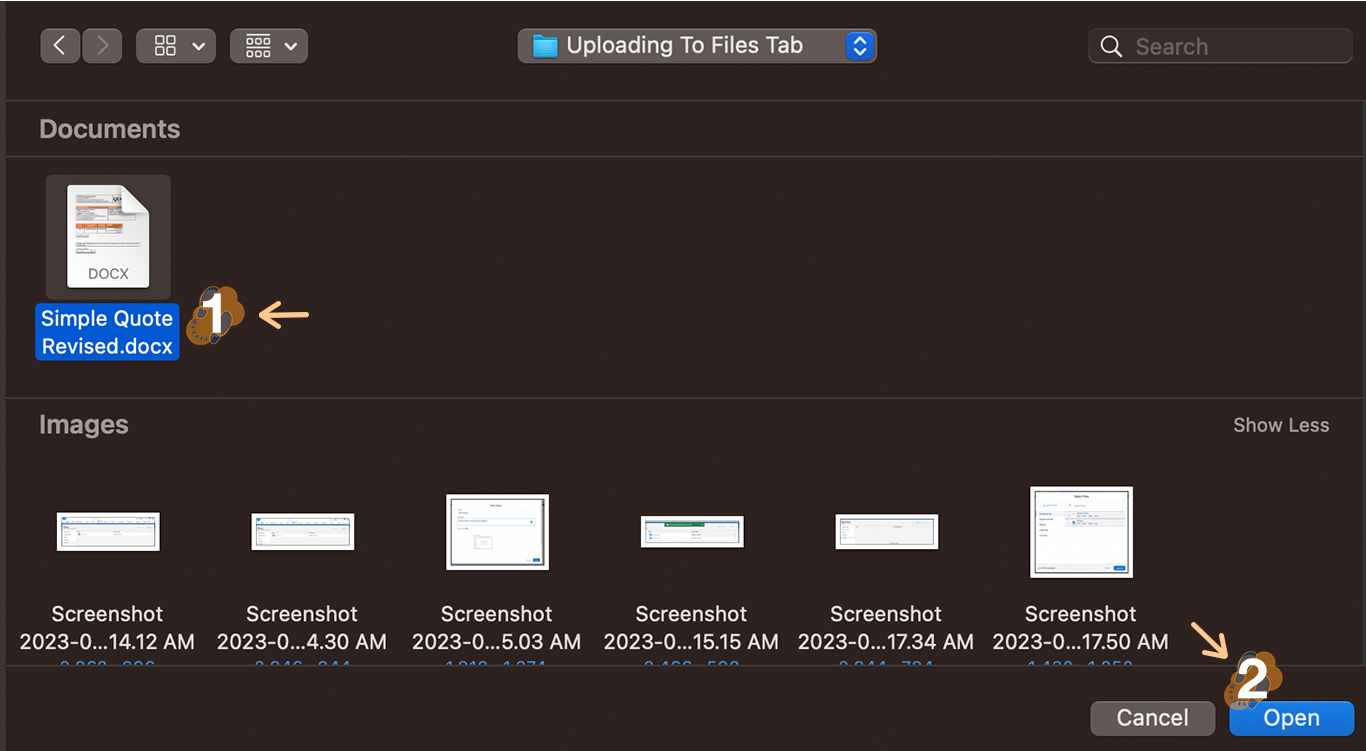
3.3 Select the file you wish to use to replace the existing one. Then click “Open”.
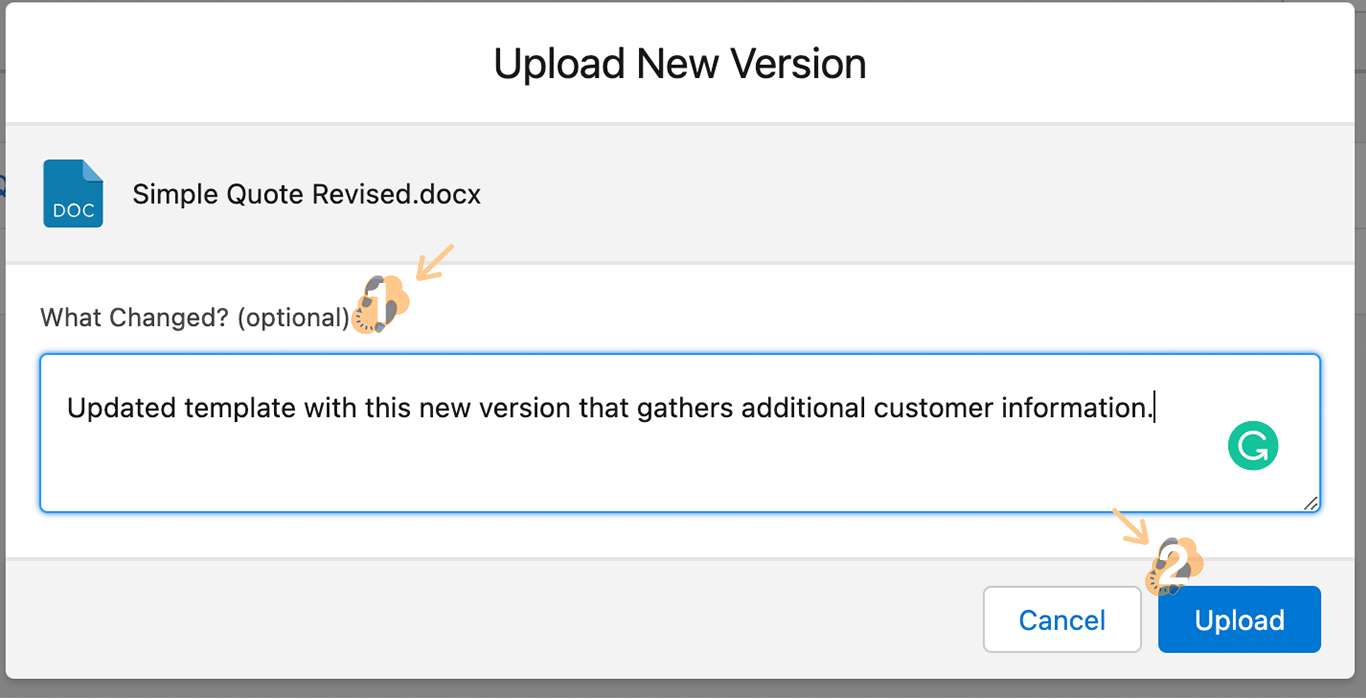
3.4 This next window will now give you a chance to add notes as a reminder for tracking the changes made when revising an existing document within the FILES tab. Continue by pressing “Upload” to replace the existing file with this newer version.
3.5 After the change is made, a confirmation message will display on top of the screen. This will allow you to test existing configurations with existing documents to see if their layouts are now updated and reflect the update.
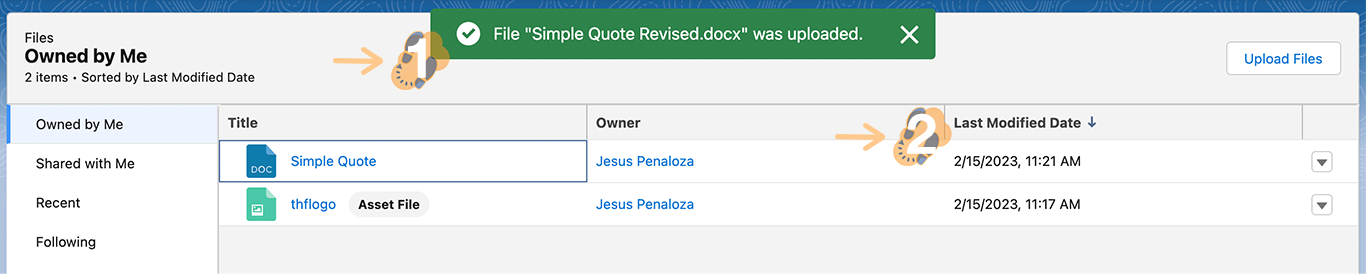
Note: The new file will not change the original file’s name and preserve its file ID.
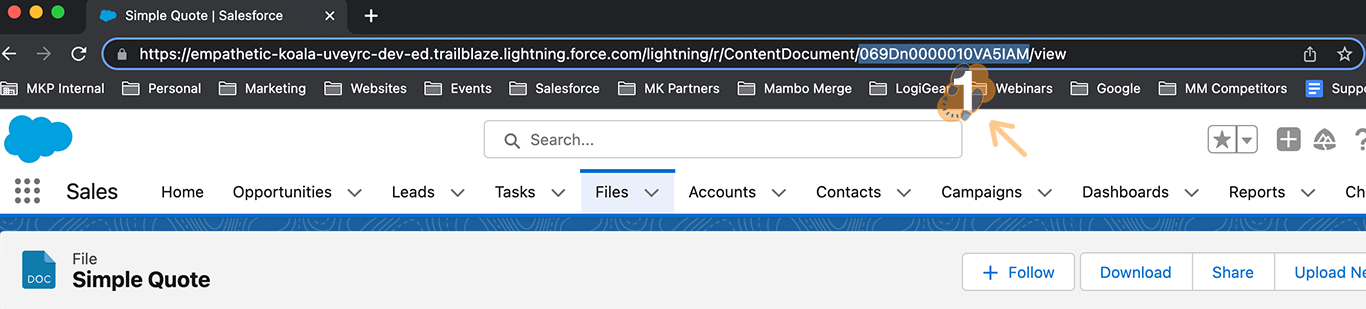
Step 4: Obtain A File’s ID ↵
There may come times when you need to create individual Merge buttons within a component that do not require you to build configurations. You will need to obtain a document’s key identified also known as the File ID or Template ID in order to link that document to the component. Use the steps below to obtain the 15-18 alphanumeric sequence.
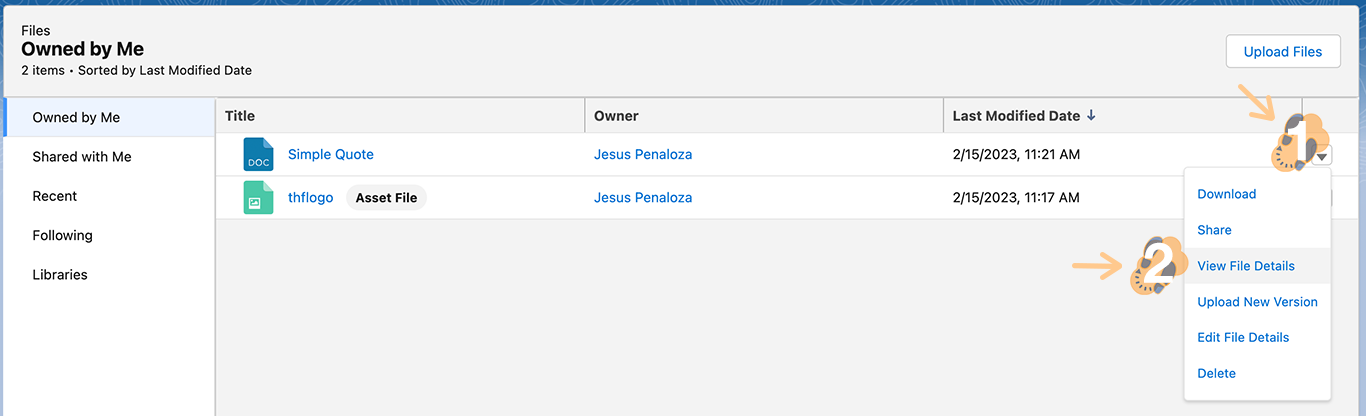
4.1 Start by heading back to the “FILES” tab, selecting the file, and clicking on its “Down Arrow” to choose “View File Details”.
4.2 This will open up the document details which includes a quick preview and some statistics. Within the top URL, you will see a “15-18 alphanumeric sequence” which is the document key identifier also known as its “File ID”.
Note: Copy and save this sequence to use and create a Merge button when using a single action configuration.
That’s It
Creating libraries, uploading new versions, and obtaining File IDs will help make sure you’ve organized documents in an efficient and productive manner.