2.0.1 | 9/1/2023
Step 1: Upload Images | Step 2: Identify File IDs | Step 3: Custom Text Field | Step 4: Insert File ID | Step 5: Template Builder | Step 6: Test Template
Enhance The Look and Feel of Your Documents
Adding images to your documents helps enhance the look and feel of your documents for your readers by using our IMAGE function. However, you’ll need to prepare your images in advance so that Mambo Merge can locate and retrieve them properly. Here are the steps to get this started.
Step 1: Upload Images ↵
You’ll need to upload images to your FILES direction or library in order to obtain their File IDs. These IDs will be used to call out each image when the function is used and a template is merged.
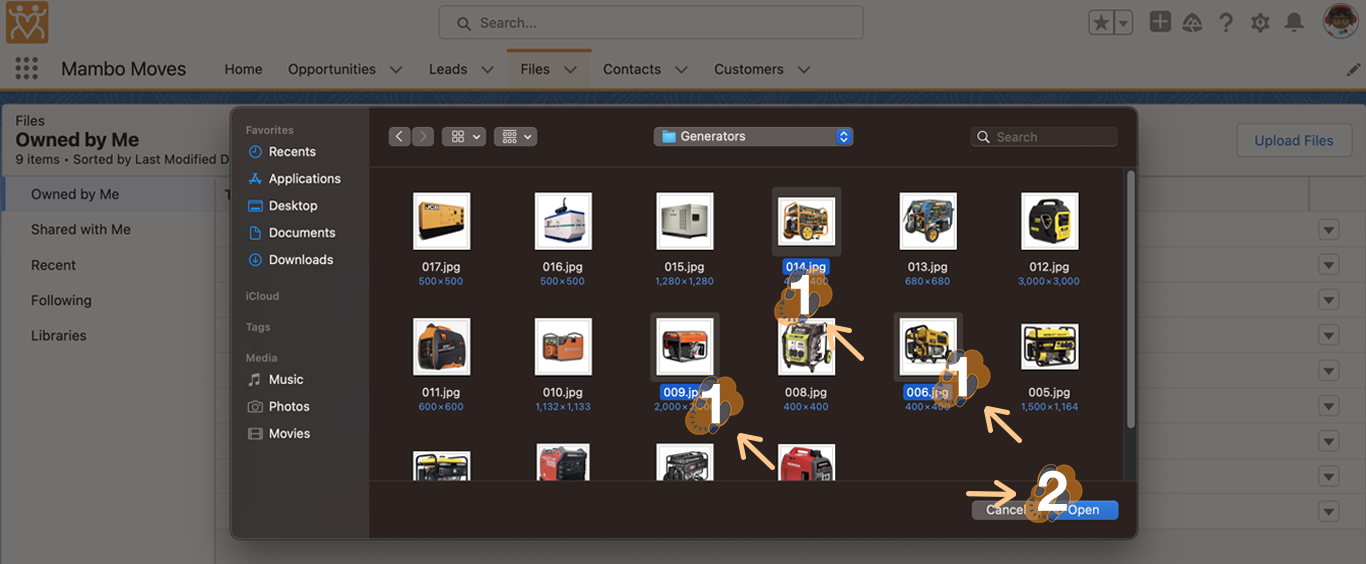
1.1 Proceed to your “FILES” tab and choose “Upload Files”.

1.2 Select all the images to upload and click “Open”. Make sure to “re-size images” before uploading them to ensure they fit within the desired template.
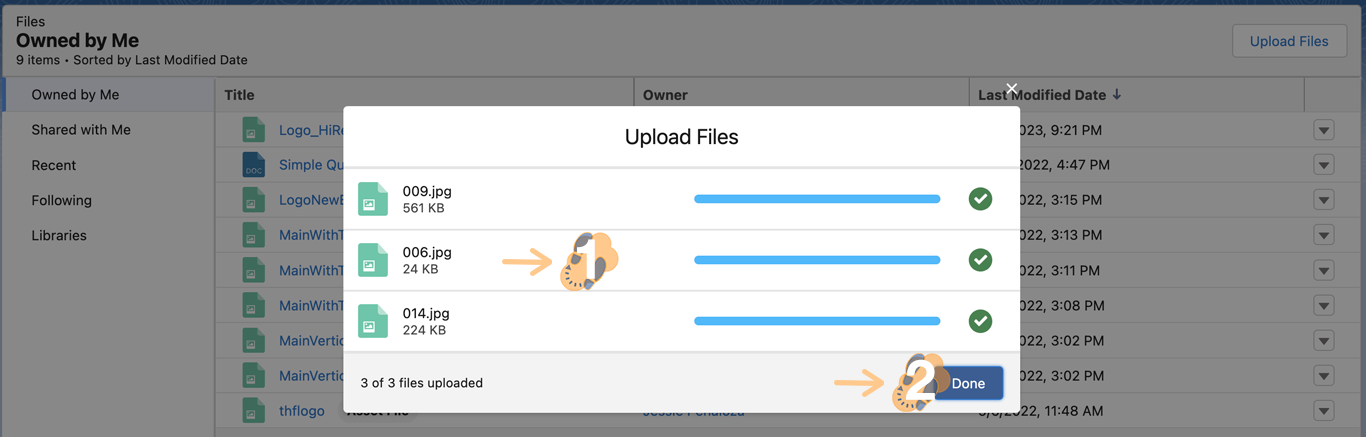
1.3 Once all files have been uploaded continue by pressing “Done”.
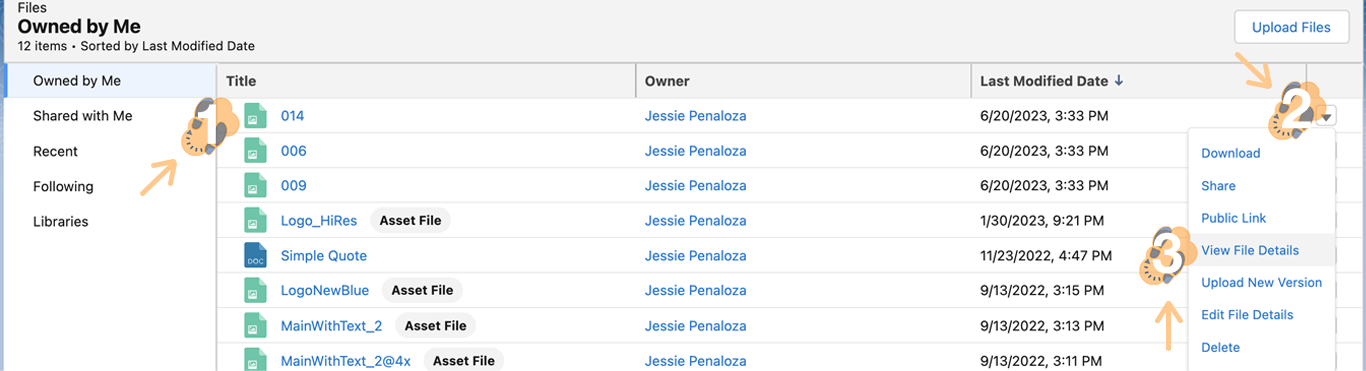
1.4 Each image upload will now appear within your “FILES” tab.

Note: We recommend using Libraries to keep all your images organized in one central location for accessing, revising, and maintaining in the future.
Step 2: Identify Each File ID ↵
Each file uploaded will have its own unique ID we can use within a template to merge into a document.
2.1 Select one of the images and click on the “Down-Arrow” next to it. Select *“View File Details” *to obtain its File ID.
2.2 Head over to the ULR on the top and next to the “ContentDocument/” section you will find “15-18 alphanumeric characters”. Copy and save this as it will be the unique identifier used by the IMAGE function merge within a template.

Note: Each file has its own unique file ID. Uploading a copy of the same file will create a new file ID. In order to preserve the File ID for an existing file you must replace it using the Upload New Version option.
Step 3: Create A Custom Text Field ↵
Next will create a custom text field to house the file ID assigned by Salesforce for each image uploaded. You’ll need to map each File ID to its corresponding record when the time comes.
3.1 Access the object page containing the component that will utilize the IMAGE function and click its “Gear” icon. From the dropdown list, select “Edit Object”.
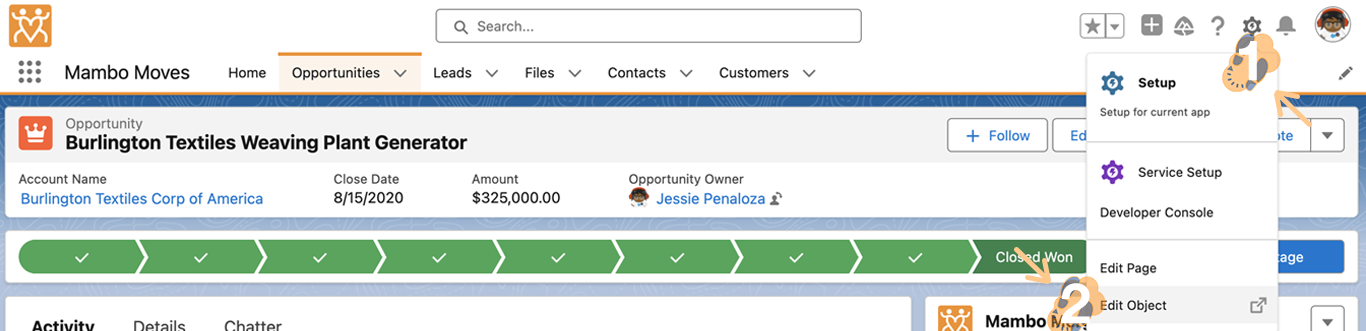
Note: For this example, we will be creating a new field within the Opportunities object page.
3.2 Within the Object Manager, click on “Fields & Relationships” and then “New” to begin creating a text field.
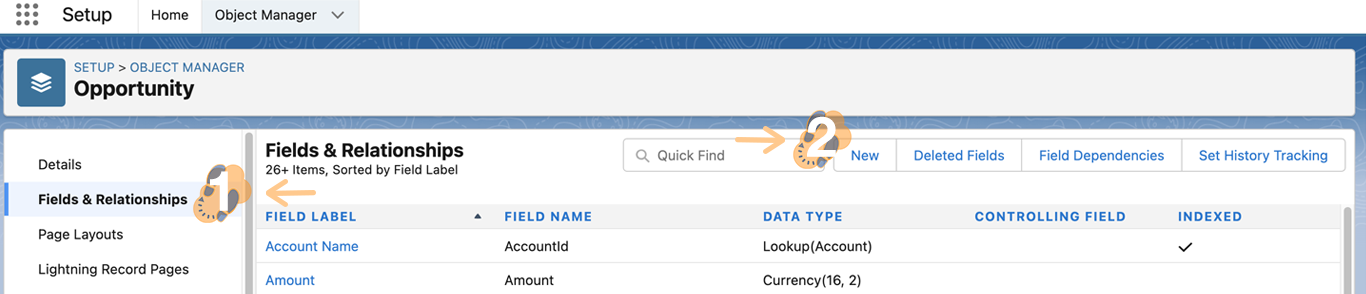
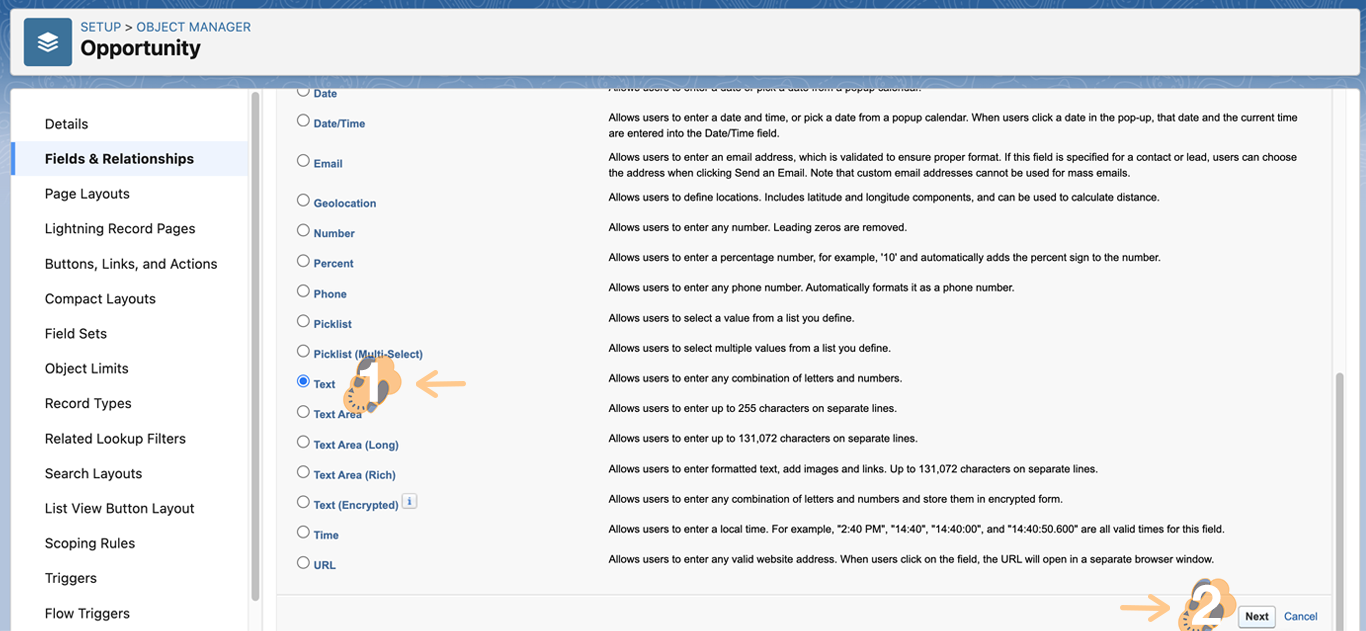
3.3 Select “Text” for the field type and click “Next”.
3.4 Provide a “Field Label” and “Length” then proceed to click “Next”.
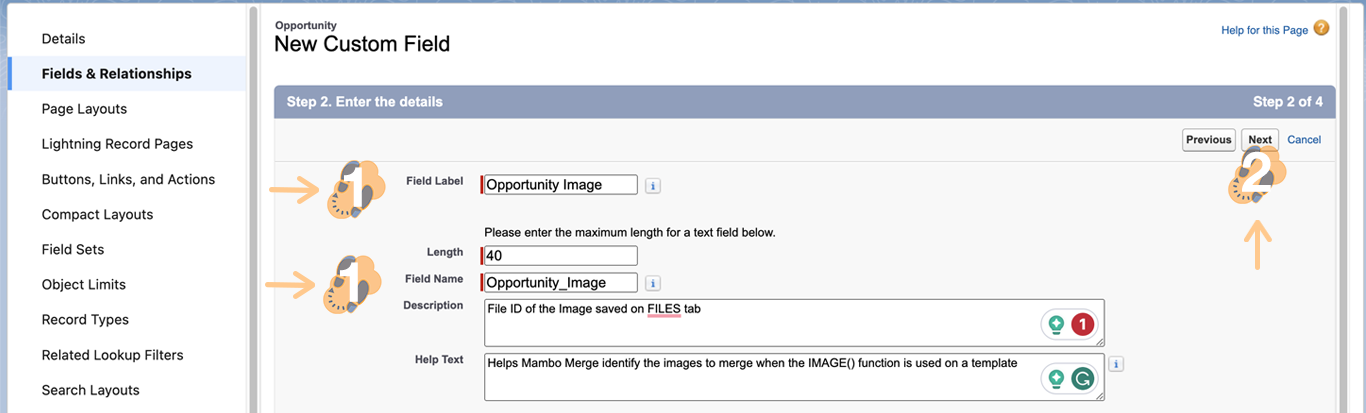
Note: The Field Name is automatically generated based on the Field Label entered. Description and Help Text are optional to summarize the purpose of the field. We called our field Opportunity Image and gave it a text field length of 40.
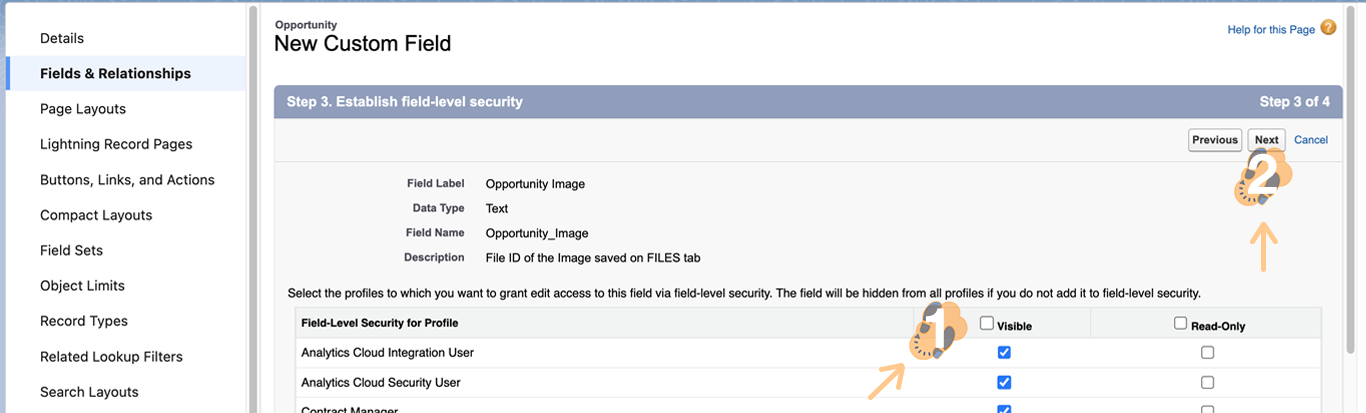
3.5 Establish “Field-Level Security” by identifying which users can access this new field. Click “Next” to proceed.
3.6 Define which “Page Layouts” will be allowed to use this field and complete by clicking on “Save”.
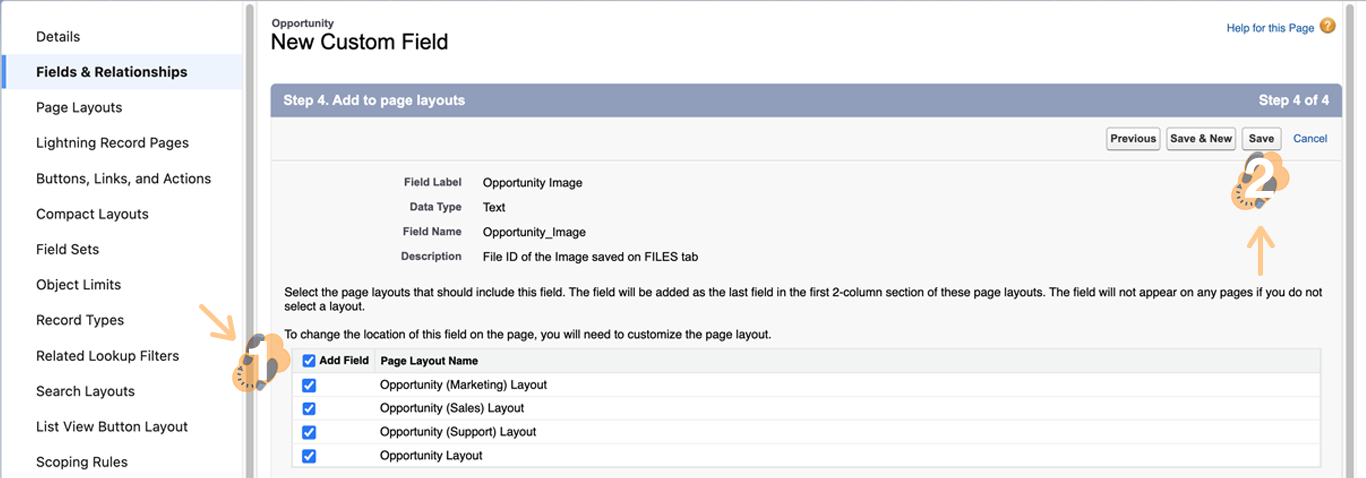
3.7 Once saved the “Opportunity Image” text field will now be available for use.
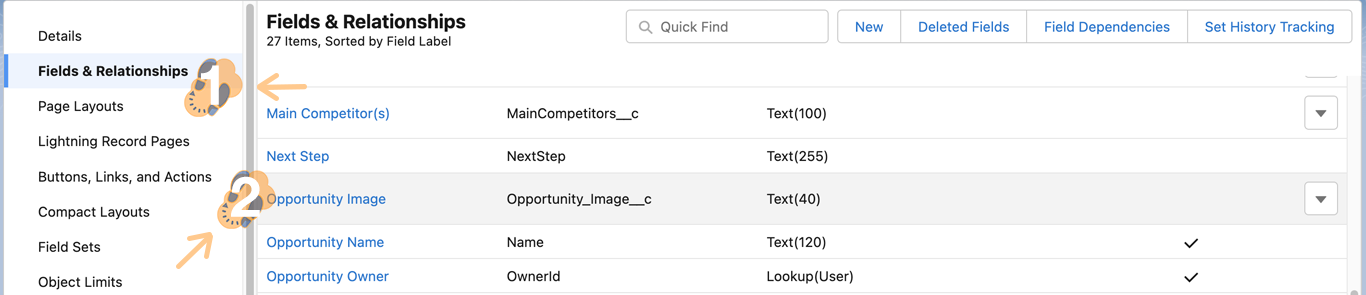
This custom can now be used within each record to store a different File ID.
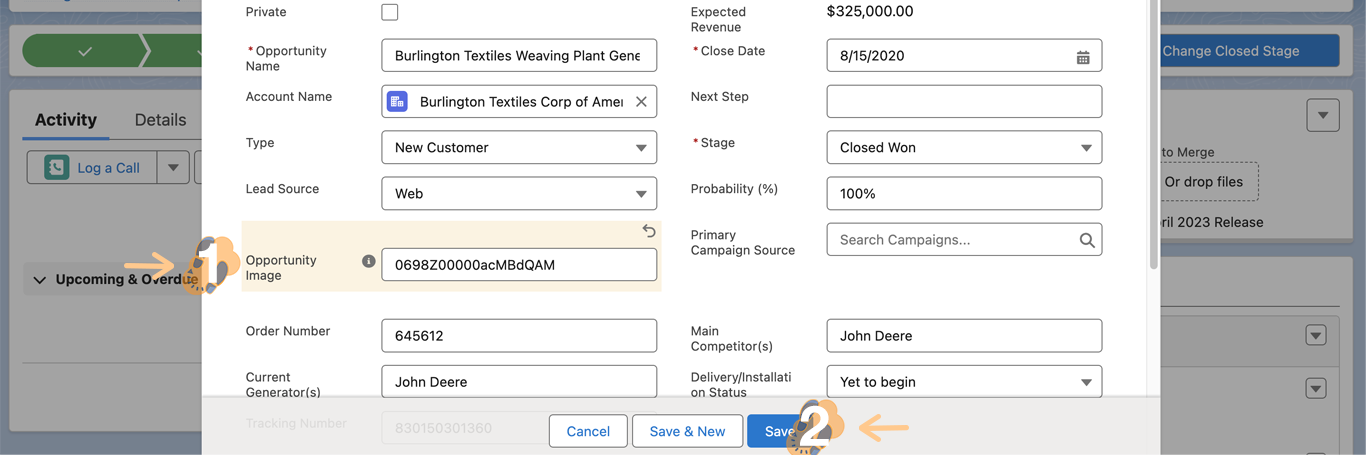
Step 4: Insert File ID To Custom Field ↵
Now you can add the File ID to the new custom field within each record page. For this example will edit one record to test. For some projects, you will use a tool to help simplify this process.
4.1 Proceed to a record and select “Edit” to update this new field with the file ID.
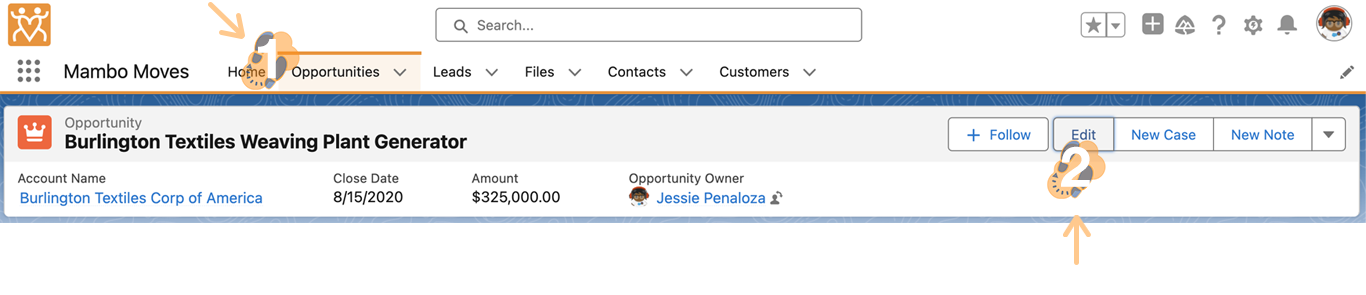
Note: For this example, we are now going to go back to our Opportunities tab and choose an opportunity to Edit.
4.2 Make sure to paste only the file ID saved previously without any additional characters. Using the “Paste as plain text” (Ctrl+Shift+V)
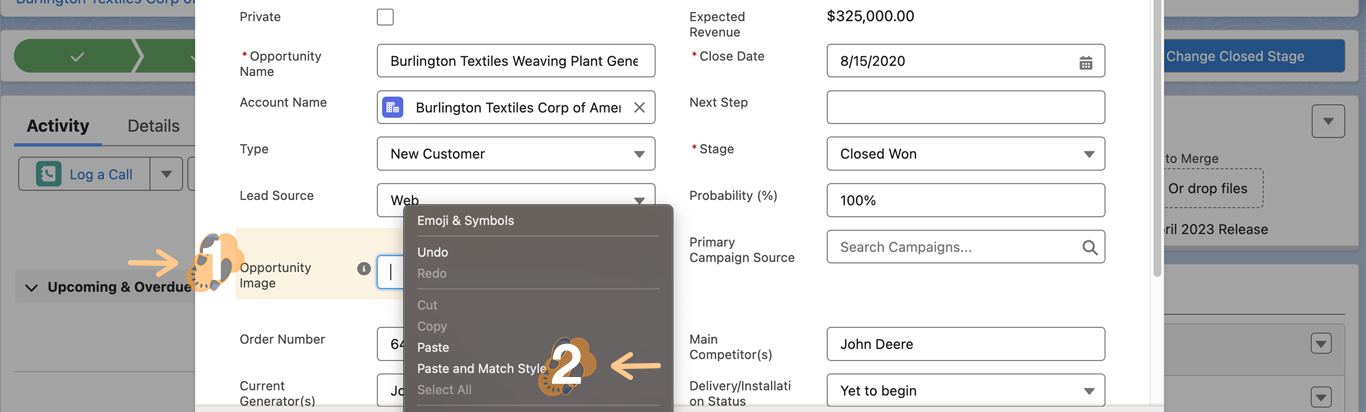
4.3 Once pasted double-check to ensure no additional characters were added and click on “Save” to update the record.
Note: Custom apps may be used to fill in each custom field with a different File ID that corresponds to each record.
Step 5: Use Template Builder ↵
Now we use the merge function and field syntax within our template to verify that the linked image will display correctly when our document is merged.
5.1 Click on the “Down-Arrow” and select “Template Builder”.

5.2 Within Template Builder use the “Merge Field” and “Value” columns to identify what fields to include within your template and to double-check each File ID is properly stored within its “Opportunity Image” field for each record.
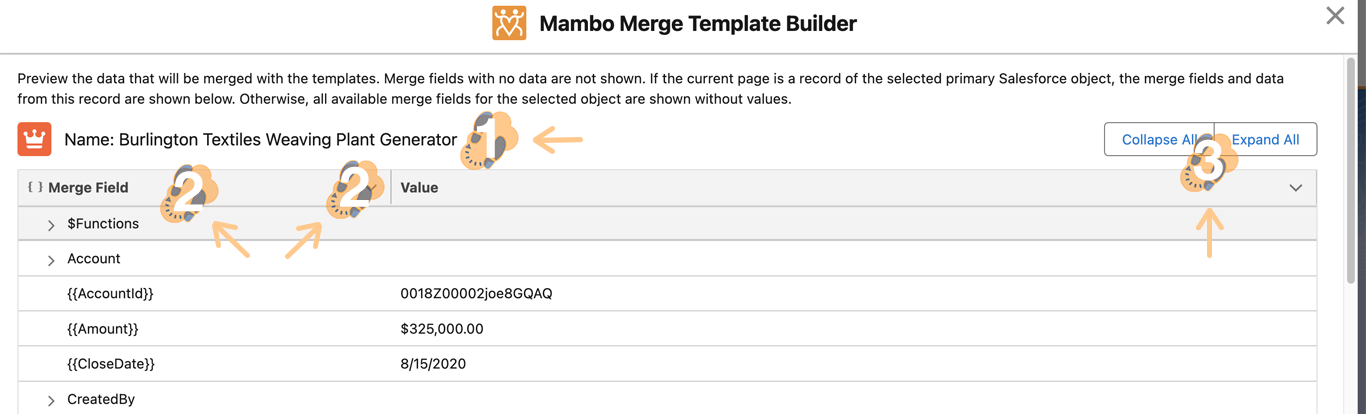
Note: For this example, our object is Opportunity and the field name is Opportunity Image. The merge field syntax needed to add within our merge function is {{Opportunity_Image__c}}.
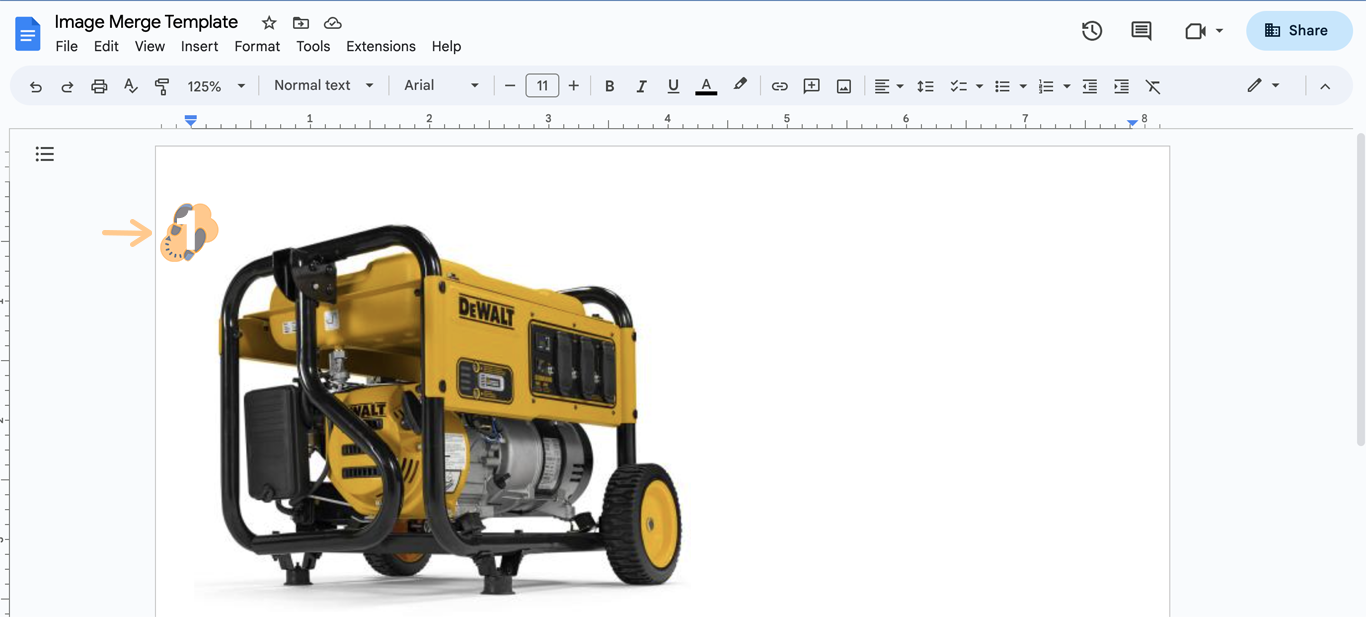
Step 6: Build and Test Template ↵
We can now insert the merge field syntax within a template to test and make sure the correct image displays within each merged document.
6.1 We start by opening up a new Word doc and inserting the following merge syntax "{{IMAGE(Opportunity_Image__c)}}".

Note: Must be using the PRO edition to use this function.
6.2 Download a copy and save it to your computer to drag the template to the component in order to test and generate the file with the image called.

6.3 A “File Generated Successfully” notification will appear on the top once the file is complete.

6.4 Upon opening the file, the image called by the file ID stored within the custom text field will now be shown within the document.
Note: If the image does not appear go back and make sure the copied File ID does not include any additional characters.
Merging Images One File At a Time
The process is pretty straightforward however some projects will require the use of additional tools to help upload documents, extract file IDs, create custom fields, and insert the IDs within each field all at once. Don’t worry we’ve got you covered, contact our team for assistance.